Showing posts with label Information. Show all posts

1/19/26

Soft, squishy homemade playdough - (I made 20 pounds of homemade playdough this day!)


I've been making homemade playdough ever since I was a child - literally.  My mother never (ever) bought play-doh from the store, but made it so that was what I knew growing up.  When I had children we did buy Play-Doh and Play-Doh sets from the store (and still do) but made tons of homemade as well - to supplement, to make more to share, and to just 'enjoy' when the store bought versions were too hard to use in some of the play-sets. The squishy homemade versions are so soft, and more affordable!  

This post comes about because I have some 'old' flour to use up from our emergency storage, and playdough is one of the items I chose to use it up on.   
 
I also wanted to use up some celtic salt I don't like as well as 2 of the flavor extracts I'm not a fan of!  I don't want to use any of these in cooking or baking so they were perfect to make into tons of playdough.


SUPER SOFT, SQUISHY HOMEMADE PLAYDOUGH
 
2 c flour
3/4 c salt
4 t cream of tartar
2 c water
2 T oil of choice (I used cheap, vegetable oil)
food color and extracts of choice (or use some powdered Kool-Aid from a packet)


Dump all your ingredients into a saucepan on the stove.  Cook over medium, stirring constantly.  It will start to thicken and get sticky.  Keep stirring.  It will start to turn into a ball and hold together.  Remove from heat.  Remove from the pan and plop it out onto wax or parchment paper to cool a little bit - it will still be sticky.  As soon as you can work with it without burning your hands, start to knead it.  As you knead it, it comes together.  When it's smooth and pliable, and cooled, it's ready to use.  Store it in a plastic bag to keep it soft.


 You can wait and not add the food color until later if you want more than one color per batch
  
It's sticky but comes together when you knead it.


Plop it out of the pan and start to knead it into a ball when it's cool enough to work with 


 I used good quality gel and powdered color to get the vibrant shades


I made 20 pounds of Playdough this day!  


Print Friendly and PDF

4/1/24

Fail - reconstituting freeze dried McDonalds Filet O'Fish and Fries (UPDATED)

Looks can be deceiving!  The reconstituted and re-warmed fries above look pretty normal and good for McD's but... they were completely inedible and went into the trash.

Actually, everything ultimately went into the trash.  Regular readers know I never ever ever waste food and always come up with new ways to use leftovers, failures, etc. but these, my friends, were inedible. 

It was still so fun to trial and error these though!!!

Today I started out with freeze dried Filet O'Fish and Fries from McDonalds.  Already purchased completely freeze dried.   Now, when I bought these a couple years ago, they hadn't been done before, and even this company was the first to do them - and therefore, had no experience and no reheating directions.  They took pre-orders before embarking on this little trial of their own.  I was game for trial and error so I bought some.

Today was the day to try to make them. 
I knew it would be tricky - already doing the cheeseburgers a couple days ago.  I thought I had learned some good tricks from the cheeseburgers and knew what to do, but these fish sandwiches were... a whole different kettle of fish.  Ha ha.  See what I did there?


Upon opening the dried sandwiches... they always look much better than they are.  Picture a piece of light weight wood - like balsam - and this sandwich made from it.  Or cardboard.  It's that.
 
I decided to use the instant pot to steam them this time rather than setting up the double broiler method I used on the cheeseburgers.  Good in theory but I think the double broiler method was much better as the pressure cooker still wanted to cook them.  I only did 5 minutes on these and they looked fine, but were hard and very much like shoe leather.
   Meanwhile I was doing one of the buns this way:  I wrapped in wet paper towels, steamed in the microwave for a minute and then put into a ziploc air tight bag for about 30 minutes.  I thought this would work but... not really.  It didn't change much from the state it was in when I took it from the microwave.  The sides were all soft and reconstituted, but the middles were not.  Spritzing hot water directly onto the centers softened them up though.  Steaming/spritzing worked better than the Ziploc.


The fries were done a couple ways.  Here I poured some freeze dried, directly from the package, into the steam basket of the pressure cooker.   It ended up being a fail anyway. 
These fries were poured over and soaked in boiling water.  It honestly was just like reconstituting dehydrated hash browns from the Costco or Sam's boxes of dehydrated potatoes.  Once rehydrated, they were just... like frozen, thawed fry shapes you buy at your grocery store.  Ready to be deep fried - not at all edible in this form. 
 
One of the seemingly best ways of rehydrating the buns was when I quickly dipped them directly into boiling water for 1 second and removed.  Still not great though.  the edges are mushy while the very center is still a little hard, and it isn't enough to soften the cheese, which is still sharp and solid.
 
Dipping the buns also made the little bits of pickle and onion from the tartar sauce come off in the water).  Not that there WAS any tartar sauce... that was gone during the freeze dry process.
 
Here is why they were inedible.  Note the hard, brown, shoe leather like texture.  Tough - like chewy jerky.
 
This is how they were when they were in the solid dry form... and they did not reconstitute well with any of the methods used.  It seems the freeze dry process with the solid cooked fish to start ruins the fish from ever reconstituting well no matter the style.  I am thinking maybe if you put it into simmer water for 20 minutes but then the breading falls off anyway and you are left with a tough little piece of dried fish that has a little moisture (maybe?) so it would be inedible that way anyhow.
 
Photos of the finished trial and errors......
 
The two trial and error fries, side by side.  The fries COULD be reconstituted and eaten but you had to soak them in boiling water and let them set about 30 minutes.  Then drain and pat dry or let set till dry.  Then heat oil and completely re-deep fry them. 

Basically you start from scratch as if you just cut your own potatoes up or used frozen fries from the store.  You have to re-salt them and there is little to no flavor of 'McDonalds' in them at all. 

It was really fun to mess around with these but in the end, yuck.   I think I still have another bag or two of these in food storage so perhaps another day I'll try again.  In the meantime, the McD's cheeseburgers can be rehydrated and eaten but I don't have much hope for their fish.

UPDATE:  MAY 2024
Last night I tried a second bag of fish sandwiches as I was going to be in the kitchen cleaning my oven anyway, so I thought I'd try the long steam process.

This time I placed the sandwiches on a piece of parchment paper, then placed it into the steamer basket of the double boiler and added just a tiny bit (less than an inch) of water in the bottom.  I placed the top on, brought it to a simmer-almost-boil, and then turned the heat down to a high simmer while I cleaned the oven.  

I tested it at 15 minutes and was very happy with the buns!  They were steaming slowly and gaining moisture and were becoming very 'normal' yet still needed a lot more time.  The fish were still 100% dried.  At 30 minutes I took the buns off the fish, put them on top of the fish patty and laid the fish on the parchment bottom so it would get more moisture than the buns (which were coming along well-ish).

Around 40 minutes I checked.

Although the buns were basically steamed they were not soft and fresh, they were more like...  a package of buns gets when you leave it in the freezer for a few months and then thaw them and try to use them. 

That weird texture they get when they are soft, yet hard.  And crumbly.  The buns were not enjoyable and I nibbled them but meh.


The fish.  Sigh.  Such high hopes because the outside looked great and I could press my finger on them and they were soft-ish.  Very 'moist' especially around the edges where it got most of the steam but the inside...  nope nope nope.

If you've ever eaten dried fish - dehydrated fish - or fish jerky... that is this.

I was a version of fish jerky and I just don't think fish filets freeze dry and reconstitute well.   The sauce was long gone (soaked into the bun and then disappeared almost completely during drying) so there was little or no flavor to my mostly fish jerky.

I actually ended up just dipping the fish filet into the water for a few second and letting it sit to reconstitute... which worked better than steaming!  It did soften it a little more... but it still had almost NO FLAVOR.

That's when I realized - usually McD's salt and pepper their filets and I could taste ZERO salt.  I looked closely and could not see any salt or pepper on them.  Not sure if the company ordered them that way or not but I added my own salt and pepper and that DID bring out a little bit of taste - before that you really couldn't even taste fish, there was little taste of anything.

SO after steaming the buns and dipping the fish into the hot water and letting them sit, then salt and pepper the filet... my end result was to nibble the rare piece of fish that wasn't fish jerky from the drying process but for the most part, you can't make fish jerky back into real fish... and the freeze drying process did indeed make fish jerky.  A yellow/tan/brown over dried fish.  The rare part where it wasn't, was ok but it was about 1 centimeter of each sandwich.  The buns were awful and useless.  I had such hope!  But they remain a weird texture and break apart, even they seem soft and steamed.

FINAL RESULT: I still say 'fail'.  Although I have better hope for the burgers - beef seems a MUCH better product to freeze dry.  I haven't done a trial on them yet though.



Print Friendly and PDF

3/27/24

Fettuccini Alfredo from the Auguson Farms Italian Bucket (long term storage)


As I stood in the kitchen, I saw this package I had left on the counter from the day before when I had taken out the 2 pouches from the Italian Bucket storage from Auguson Farms.  

Perfect, because Mr. Husband isn't a fan of fettuccini alfredo like I am (he likes red sauces, I prefer white) and this package uses ONLY WATER.  No work. 

Not the healthiest if you had to eat them daily as in a real life emergency situation.... look at the list of ingredients!  SO LONG.  I would prefer it to simply be fresh milk, butter, Parmesan cheese, cream cheese, parsley, garlic, pepper.... 


This is from the Italian food long term storage bucket I bought in... the spring of 2017 I believe. 
The best by date is November, 2042.


It was completely as expected - you add 4 1/2 cups boiling water and simmer and stir for 15 minutes.


Reminded me of camping.  
The taste is... fine.  Very much a 'mix' which is never good compared to fresh but all in all was completely fine.

I liked that the spices and milk ingredients in this one were loose and did not all clump up like the tomato products in the lasagna pouch.  This was loose and exactly like the pouches in 2017, etc.  It other words, time hadn't changed it at all.   I fully suspect it will be exactly the same in 2030 or 2040.  Well packaged and assuming no holes or critters would get into the pouches, this is a storage item that seems to do well with a test of time compared to the 'tomato' powder items.

It was good enough to finish off - and I was full and satisfied but I also felt 'too' full in a 'not really healthy' dinner kind of way.  But I suppose a big dinner full of pasta does that to you anyway.  A bit gassy from it as well, but all in all, it's a good product from storage.


Literally a picture of my dinner, as I was eating it...  Ha ha.


Print Friendly and PDF

2/24/24

The old 1942 Victory Garden Plan released to help families put food on their tables during the war

In 1942 the Illinois State Council of Defense released a plan of recommendation to families to plant a 'victory garden' to support food for their families during the war and the shortages.  (You also may want to plant your own foods because of food safety... just sayin'.)

It was met with such success, the Illinois Victory Gardens program's "Food For Victory" was recommended to the United States Department of Agriculture by the Men's Garden Clubs of America as a model plan for the other 47 states to follow.  It was voted the most efficiently organized plan in the nation.

I have had a copy of this plan in my files for years, but with gardening on the brain of pretty much everyone, I thought I'd put it on my site.  I have some personal thoughts about it - as many of these items are not things I nor my family would eat and a couple, I've never cooked with before (endive and Swiss chard) and I've only made rutabaga once in my life. 

For me, I'd replace some of those items I mentioned with potatoes (not sure why they didn't have potatoes on the plan) and more bush beans! 


Stanford University:  https://engineering.stanford.edu/magazine/article/scientists-have-developed-vaccine-protect-tomato-plants

University of California:  https://www.universityofcalifornia.edu/news/grow-and-eat-your-own-vaccines


Print Friendly and PDF

1/28/24

It was a 'make flour' kind of day today


After stocking up on a lot of flour for holiday baking this year, I still had quite a bit to use up since I didn't do as much baking as I thought I would.  I've been using that since Christmas, but today I finally was getting low enough I could get some hard white wheat out and grind some fresh flour.

I had about 10 lbs. of wheat berries here in the kitchen pantry.  After grinding the fresh flour, I went ahead and mixed it with the white flour I had left in the flour buckets.  

I was grinding hard white today.  I also have soft white wheat in storage and some hard red as well, although I don't use that as much.


Freshly ground flour........


Print Friendly and PDF

1/6/24

Auguson Farms Buttermilk Pancake Mix made into Soda (Biscuit) Bread


I had a mason jar with powdered whole eggs in it in the kitchen pantry we've been using for about 1 1/2 weeks, but this morning, completely out of eggs, it was time to dive into our "long" term storage and find a #10 can of eggs.  
 
While looking for the eggs, I saw a few other items to bring to the kitchen... and I spied a box that I recognized as some of the FIRST products I ever bought for long term storage!  Knowing I made my first purchases in February of 2012, and it's now January of 2024, I decided it would be a great time to open them and start to use them - oldest first!

One of the items I bought in 2012 was a can of Buttermilk Pancake Mix from Auguson Farms.  I noted when looking at the can that it was bulging a little bit.  Now, if it were a can of meat or Spam, the bulging would be a concern.  In this mix however, I knew it was because this mix of dry ingredients has baking soda in it.  Being 12 years old, I was not at all surprised.  Or concerned.


I did flip the can over to see what the packed date was, and if it had an 'expiration' date of any type but as you can see, it's so old that the ink has mostly disappeared. 


I wanted to test the mix to see if it would still raise and taste good, so I decided to use one of the recipes from Auguson Farms - their 'buttermilk bread' recipe using the mix.  Super simple - just the mix, water and a little oil.


The stock photo on their site looks like a yeast bread, which is fine.  But being that this mix uses buttermilk and baking soda, I knew it would be more of a 'soda' bread - or a biscuity bread.  And it was.

This a good 'breakfast' bread since it tastes and crumbles similar to a biscuit.  Great with eggs, bacon, sausage gravy, etc.  Not good for slicing or toasting through.  Too crumbly!


Print Friendly and PDF

12/16/22

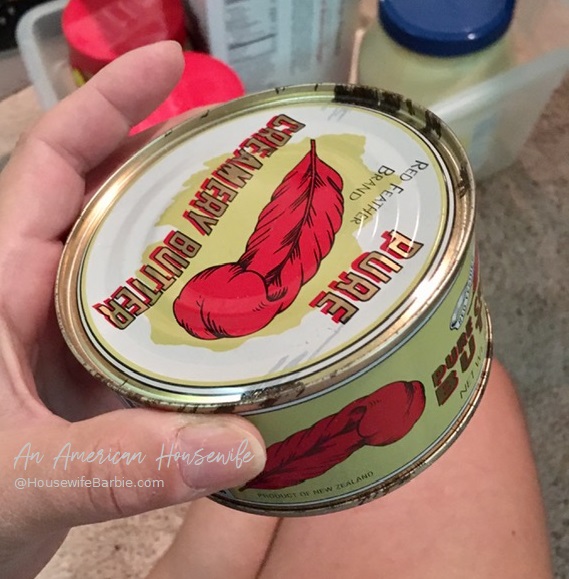
Emergency Storage: Opening up a 10 year old can of Red Feather Butter


Back when I first started to worry about having a bit of emergency food on hand in storage, I bought a couple cans of Red Feather canned butter.  It went into the 'long' term storage pantry. Since we don't use this butter for every day I didn't (and don't) rotate it out. 

There are a few items that are difficult to store long term because the cans they are in degrade.  This includes items such as butter, tomatoes and pineapple.  I was thinking about the butter and how it was at the 10 year limit I had heard others mention in discussing its lifespan.  I put it on my task list to go into the long term storage foods and find the cans of butter to check them.

What I found was YES the cans had started to degrade.  You can see the edges were discolored although I couldn't see, nor feel anything actually leaking.  They were completely dry, not greasy and had no discernible smell or scent. 

The outside of a can of 10 year old Red Feather Butter

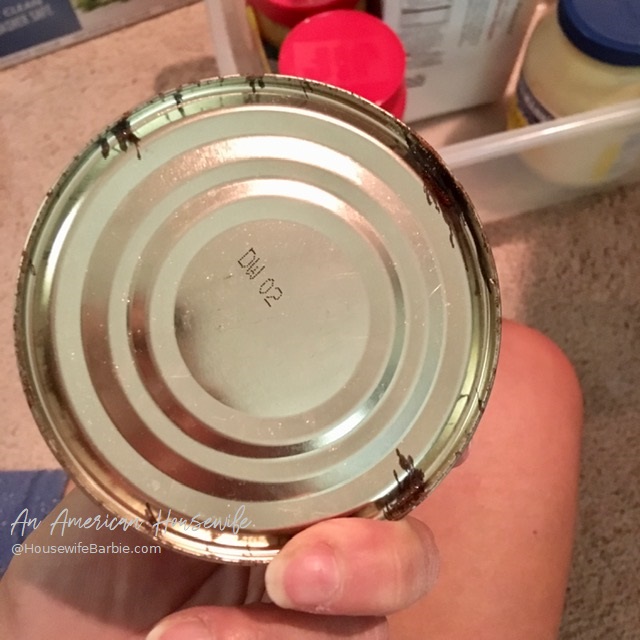
When you buy this brand canned butter, note there is never a 'best buy' date on the can.  Typically they are simply marked with something like DW02 which I've not been able to find out what it means and it's stamped on cans from all different years, so it's most likely where it was canned (?) but it's not a date. 

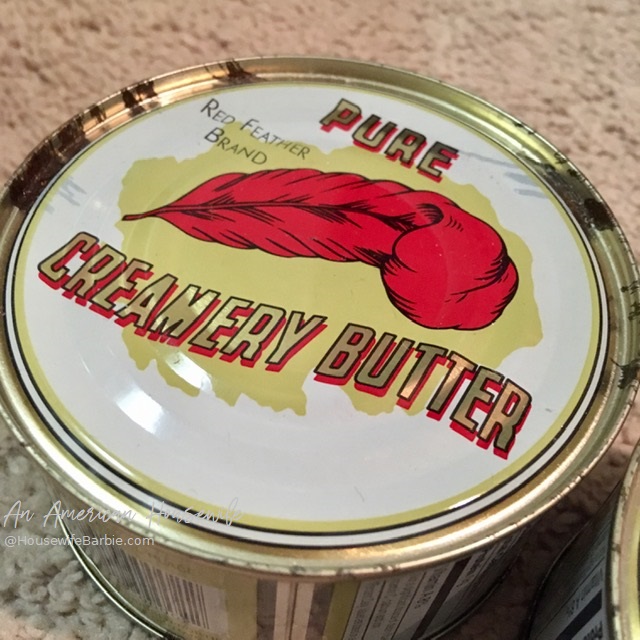
10 year old Red Feather Butter

In this picture (above) you can see the only spot I was really concerned about would be the larger, more bubbled (?) rusty spot on the right hand side. The other rusty spots didn't concern me. 

(NOTE the cans have been stored in a temperature controlled, dark environment away from excessive temperature changes, high heat, nor any sunlight this entire time.)


Looking at the outside of the can, I was pretty sure it was going to be bad inside... but I was going to open it up and have a look anyway.


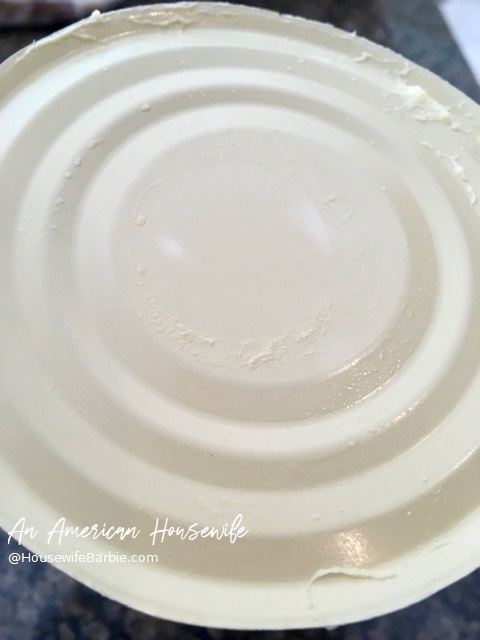
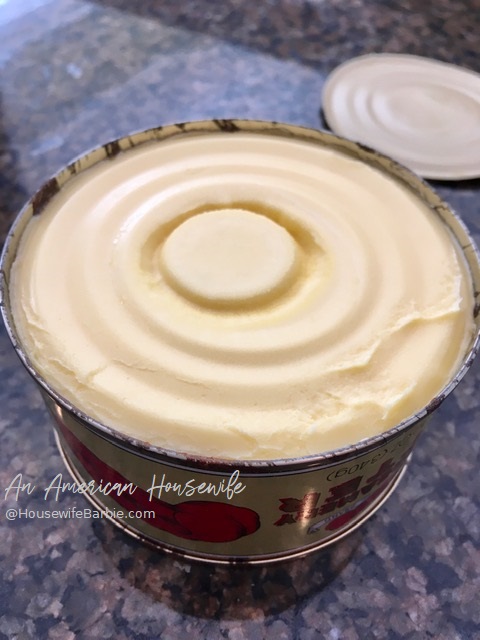
Surprise!  It wasn't bad!  Here is a photo under the lid when I first opened it.

The inside lid of a 10 year old can of Red Feather Butter
 

Here is a picture I snapped upon first opening the can
An opened can of 10 year old Red Feather canned butter - a taste test
I scooped out the butter onto a plate.  Where the butter (and my rubber scraper) rubbed against the can it smeared with a bit of the dark rusty spots but the butter itself was still pure.  (See below).  I used a paper towel and wiped off the discoloration and decided to do the taste test.


Having home-canned my own butter I already knew that when you heat the jars or cans of butter to render them safe for canning and get a good seal, the butter is 'cooked' and in turn, the flavor changes a little, and gets stronger.  Sometimes home canned butter will turn a darker yellow depending on the heat and length of cooking time. 

This butter was a golden yellow, and stronger smelling than grocery store butter, but not like it had started to go rancid. The outside of the can was questionable, the butter inside was still clean, creamy and smooth.

My Final Thoughts:   The state of the can made me leery of course, and in 'good times' and 'times of plenty' I'd probably have been tempted to toss the degraded cans out without opening.  Butter is very expensive right now though, and I opened them to taste test, so I did.  It is stronger smelling and tasting than brand new, refrigerated butter from the store; while noticeable on things like toast, bread and rolls, when used in cooked foods or to season vegetables, it was fine. 

I'm not sure how long it would take before the oils took on a truly rancid flavor; perhaps within this year or next they would to the point of being 'yuck'?  There is no mistaking the smell and taste of oils and fats that have gone rancid so you would know immediately if your butter had turned.

I feel as the 10 year mark was probably longer than I would suggest storing them before rotating out though.  Personally I think I'm putting a self-imposed limit of 5 years on our Red Feather Butter from here on out. 


Print Friendly and PDF

9/24/22

Sugarfree Sweetened Condensed Milk Recipe - trials using some powdered heavy cream and previously frozen almond milk from my emergency storage

This post has multi-levels of information! 

1)  A homemade sugarfree version of sweetened condensed milk
2)  A keto version of sweetened condensed milk
3)  Wanting to do a 'trial' recipe using previously frozen almond milk from my deep freezer
4)  Using some heavy cream powder from our emergency storage


In regular baking, there are many recipes that use sweetened condensed milk.  It's so easy to grab a can off the shelf and make the baked goods.... but not so easy when you are sugar free and/or keto or low carb. 

In 2015 I posted a recipe for a sugarfree keto version of sweetened condensed milk, followed up by a post in 2019 because it's so awesome to use in my favorite homemade keto ice creams. 

A few weeks ago I whipped up a batch of sugarfree sweetened condensed milk so I could have some on hand in the refrigerator for my favorite ice cream, cheesecake and bar recipes.  However, I had to play with my recipe to use things I had on hand since I was low on heavy cream and I wanted to try using previously frozen almond milk from my freezer storage. 


I believe in prepping for emergencies (if you follow me you already know that).  One of the things I've tested over the past 2 years is freezing things like whole milk, almond milk and heavy cream.   Milk freezes beautifully short term but I found heavy cream and almond milk separate.

My goal was to see if using previously frozen almond milk and powdered heavy cream powder could result in positive outcomes in cooked recipes (hoping the separation would come together or cook into the final product).  And it did.

Sweetened Condensed Milk - sugarfree

2 1/2 c heavy cream
1 c almond milk
1/2 c powdered sweetener mixture of 2-3 kinds; like monkfruit, erythritol and xylitol
1 T butter
1/4 t xanthan gum

In a saucepan, place the cream and milk and bring to a boil, reducing to medium low immediately.
Add the sweeteners, butter and xanthan gum.
Simmer, stirring, until it's thickened and reduces by half.
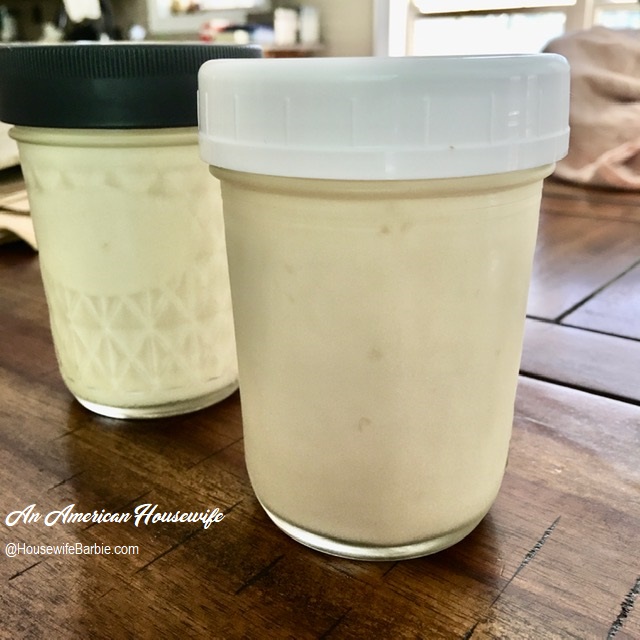
Let it cool down about 20 minutes and pour into sterile, glass jars
Store in the refrigerator


NOTES

This time I added the butter, sweetener and xanthan at the simmering stage instead of waiting til the end; no problems.

I only had a little bit of heavy cream so I substituted the Hoosier Hill Powdered.  I used the directions on the container (3/8 cup of powder to 1 cup water) but then added another tablespoon or so to make it nice and thick(er) for my use.

The big trial was my almond milk.  I wanted to know if I could stock up and save containers in the freezer.  It separates upon thawing and although you can shake and blend it and it comes together a little bit, it doesn't go back to the original state, which makes it gross to drink but seems to work beautifully in cooked items like this condensed milk, puddings, etc.  


You can see how the separated almond milk and the powder make a rather grainy liquid before cooking. No worries it was smooth as normal once it simmered!


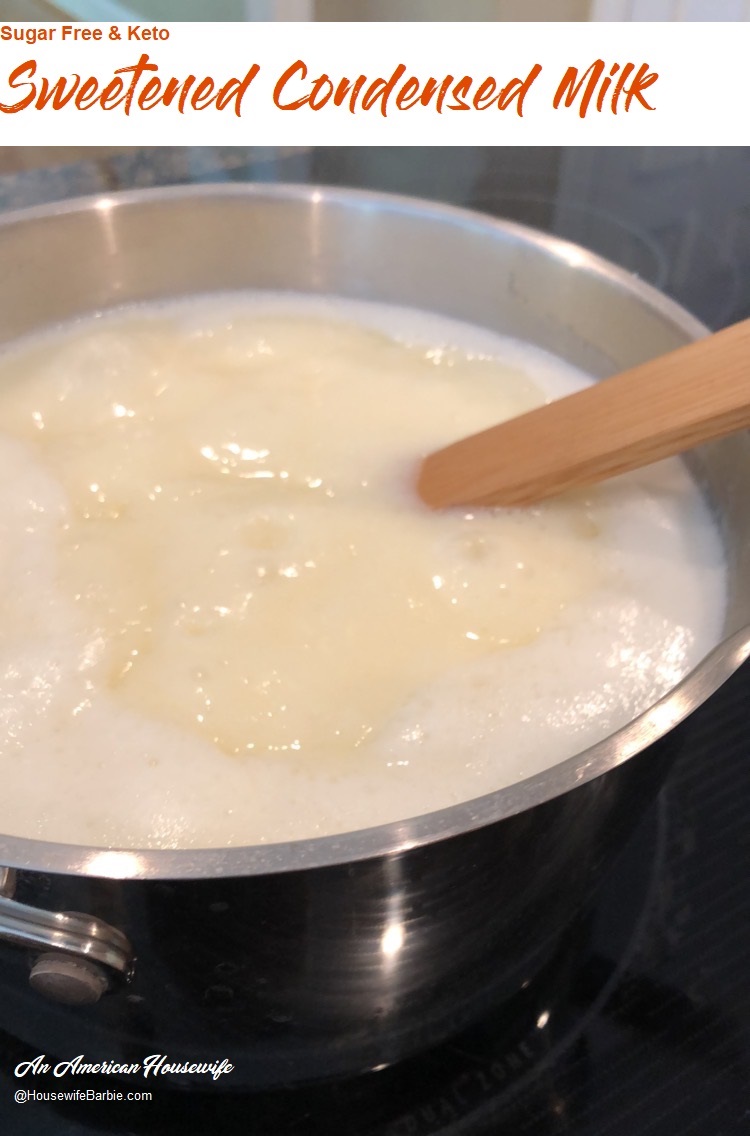
This was a video that I took a photo from showing it being stirred while cooking

Thickening up!!  Smooth and perfect.


_____________________________

The almond milk I buy and freeze are the plastic containers I buy at Sam's Club.  They are grainy and separated upon thawing and I was afraid they were useless but in cooked goods, they turn out perfectly.

I mentioned my emergency storage heavy cream in the post above.  I have Hoosier Hill Farm's brand and it performs wonderfully.  I can't speak to other brands. 


Print Friendly and PDF

8/3/22

Homemade Butter - got extra whipping cream? Make butter using just a mason jar


Homemade butter!  I make this once in a while but with the cost of whipping cream being what it is, I'm not really saving money to make it myself so I just buy it.  However, sometimes I have extra whipping cream leftover from other recipes and making homemade butter is one of the ways I use it up.  It will take about 10 minutes or so and use nothing more than your leftover whipping cream (heavy cream) and a glass jar with a lid.

 
Homemade Butter
(It's actually just home-shaken butter....)

Heavy Whipping Cream - any amount but it's best if you have at least 3/4 of a cup

Place the cream in a glass jar with a tight fitting lid.
Start to shake it.
Continue to shake it.
Keep shaking it.
It will turn thick, then will blend together to form whipped cream.
Keep shaking it.
Just when you are thinking you are bored and 'done' and there are other things you could be doing right now....
You'll hear it separate!  You'll hear the sloshing sound of liquid and a little thump of solid butter!
Open the container and you now have buttermilk and butter.
Remove the solid butter. Use the buttermilk for any other use (ranch dressing or bread!) or just drink it if you like buttermilk.
Add about 1/2 cup ice cold water to a bowl of butter and knead the butter a bit, working out the excess liquid - a cloudy, watery liquid.
If you want to add salt at this time go ahead and add a little dash to taste (amount depends on how much butter you made.)  Pour off the excess liquid and use your homemade butter!

That's it!  You made butter.

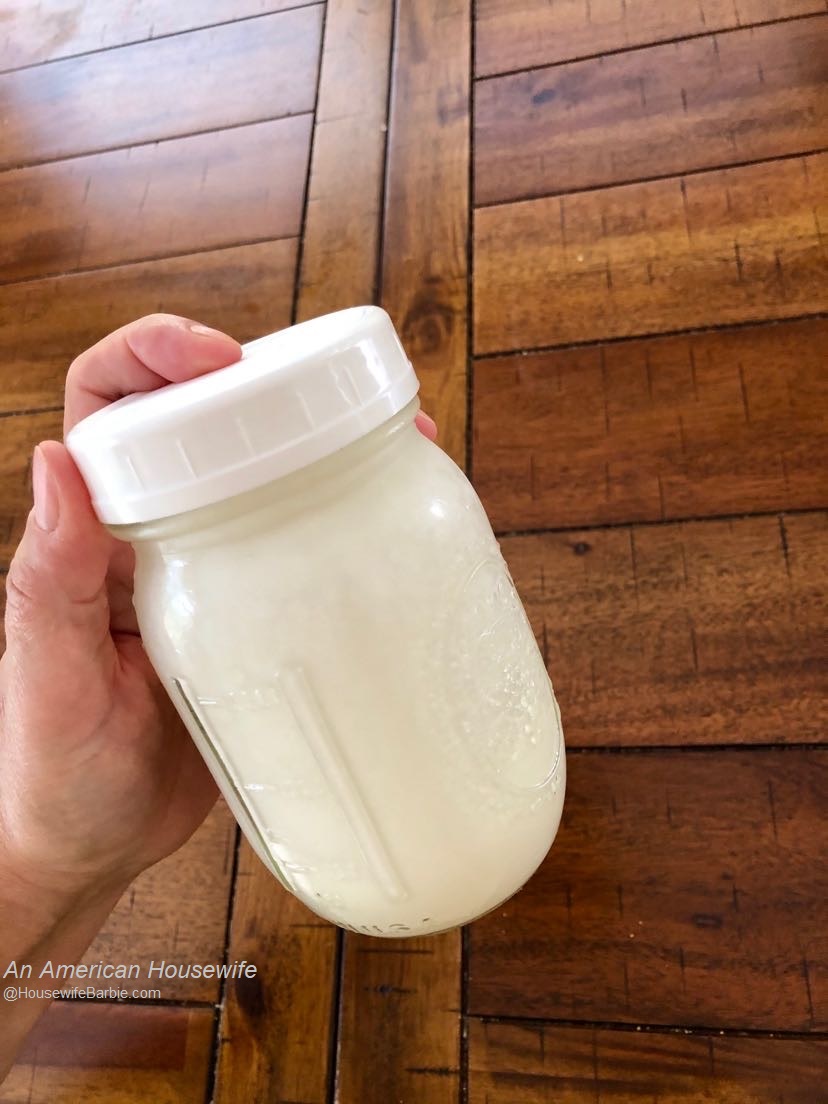
whipping cream in a jar


That awesome sloshing sound you've been waiting for that means your butter has separated from the liquid and you have made butter!


Open the jar and see your butter!


Poured out into a bowl.  Drain it and add your ice water to knead it and work it a bit to get out excess buttermilk liquid.
  Butter!


Print Friendly and PDF