Pages

3/30/24

100% Food Storage: "Burnt Ends" style chuck roast sandwiches

100% Food storage - last real grocery trip was November, 2023.  Today is March 30, 2024.  Yesterday I did a 'trial and error' of reconstituting some freeze dried food that I will post about later today or tomorrow (fail!) but quickly wanted to post what I had for dinner last night and what Mr. Husband will be taking to work today for his dinner.  

'Burnt Ends' at the store are really, really expensive.  Basically just the ends cut from smoked and grilled meats, but an easy 'cheat' version is made at home in your own oven or crockpot. 

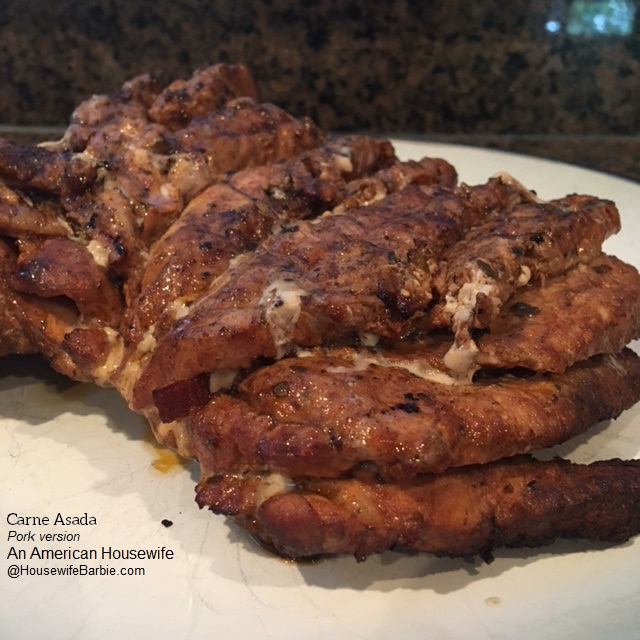
The photo above was taken before I broke the meat apart. 

Here is what I did....
 
 
Fake Burnt Ends

1 chuck roast (or use freeze dried or canned meat, but you'll have to allow for a different cook time)
butter
spices of choice (I used salt, pepper and Kinder's Woodfired Garlic)

In a crockpot, slow cooker or even an oven or fire safe pan for the grill if that's how you are cooking, place a stick of butter.  I used a container of home canned butter.   Place your meat (mine was frozen solid at the time and from the deep freezer storage from August).   Sprinkle heavily with spices of choice.  A hickory or mesquite flavor in your spices will give it a faked smoked/grill flavor as well.

Cook on high 6-8 hours in the slow cooker if it was put in frozen, less (2-3 if it was thawed) and even less if it's reconstituted freeze dried meats or canned meats:   or until it's dark, caramelized, and falling apart tender.  The parts around the edges that are 'burnt' looking have the best and most flavor - make sure you get the sides scraped to get all the flavor you can, then you'll probably have to soak the pan to clean as it's caramelized.

That's it!  Serve as is, with homemade bread or homemade buns (assuming you are cooking from food storage.  If you aren't, then use store bought buns).
Roasts from the deep freezer
Home canned butter
A quick photo of my 'daily bread' from the refrigerator bucket plopped into a pan to bake


Print Friendly and PDF

3/27/24

Food Storage Meal - plus some fresh greens from the garden Santa Fe Salad

Living on 100% food storage: Last real grocery shopping trip was November, 2023.  Today is March 27, 2024.


Tonight's dinner - Santa Fe Salad. 

Thankfully spring is starting to show its face and a family member has a greenhouse... and too much lettuce that was 'ready' and she can't use it all.  Win/win.  We got fresh greens and she got rid of it.  With gardens and warmer weather I'm excited about adding some new foods to the rotations.

I mentioned in a previous post I was making the sauce last night to use today.  All pantry items - as we have mayonnaise on hand yet.  Chicken - you can use freeze-dried, fresh, canned... what you have.  Normally I marinate and grill it but no time, and stormy cold weather so this time I cooked it in the instant pot in the marinade, refrigerated it until I needed to top the salad with it.  Lastly, the salsa - homemade with canned tomatoes. 

Already posted this marinade a LOT of times since 2008-ish.  But, here it is again so you don't have to go searching for it if you are interested.

Marinade:

1 cup water
2 T soy sauce
1 1/2 T sugar
1 T salt
1 T vinegar
1 t powdered chipotle pepper (could use cayenne, if it's all you have)
1 t hickory smoke flavoring
1 t paprika
1 t garlic powder
1/2 t onion powder
1/2 t round black pepper


Print Friendly and PDF

100% Food Storage: Fettuccini Alfredo from the Auguson Farms Italian Bucket (long term storage)

Last real grocery shopping trip November, 2023.  Today is March 27, 2024.


Last night I didn't really have plans for dinner - it was a busy day and before I knew it, it was 6pm and I had no idea what I was going to make.  I was the only one home last night at dinner time and I had plans to make something else as well (for the next day) so Mr. Husband would have it to take to work for his lunch/dinner. 

As I stood in the kitchen making the sauce for Mr. Husband and I to have to with our dinner the next day, I saw this package I had left on the counter from the day before when I had taken out the 2 pouches from the Italian Bucket storage from Auguson Farms.  (Posted about that below the day before yesterday - the lasagna).

Perfect, because Mr. Husband isn't a fan of fettuccini alfredo like I am (he likes red sauces, I prefer white) and this package uses ONLY WATER.  No work. 


Not the healthiest if you had to eat them daily as in a real life emergency situation.... look at the list of ingredients!  SO LONG.  I would prefer it to simply be fresh milk, butter, Parmesan cheese, cream cheese, parsley, garlic, pepper.... 


This is from the Italian food long term storage bucket I bought in... the spring of 2017 I believe. 
The best by date is November, 2042.


It was completely as expected - you add 4 1/2 cups boiling water and simmer and stir for 15 minutes.


Reminded me of camping.  
The taste is... fine.  Very much a 'mix' which is never good compared to fresh but all in all was completely fine.

I liked that the spices and milk ingredients in this one were loose and did not all clump up like the tomato products in the lasagna pouch.  This was loose and exactly like the pouches in 2017, etc.  It other words, time hadn't changed it at all.   I fully suspect it will be exactly the same in 2030 or 2040.  Well packaged and assuming no holes or critters would get into the pouches, this is a storage item that seems to do well with a test of time compared to the 'tomato' powder items.

It was good enough to finish off - and I was full and satisfied but I also felt 'too' full in a 'not really healthy' dinner kind of way.  But I suppose a big dinner full of pasta does that to you anyway.  A bit gassy from it as well, but all in all, it's a good product from storage.


Literally a picture of my dinner, as I was eating it...  Ha ha.


Print Friendly and PDF

3/26/24

100% Food Storage: Homemade - Airheads and Skittles

 100% Food Storage - last real grocery trip was November, 2023; today is March 26, 2024.


Prior to working our way through some of this food storage, we were a low-carb, keto family - so while I did store non keto and low carb items for 'just in case' I wasn't storing a lot since I knew we would have to rotate and use them, but we don't normally eat them.  Even if we like them... like flour for breads, sugar, and... Skittles.  
 
While my husband and most of the universe likes chocolate, I do not.  I don't crave most candy or even sugar or desserts, but Skittles... I do love them.  And I DID store some.  But they were used over the past 4 months as The Littles love Skittles and they are a special treat they enjoy as well.
 
I've been craving them big time this week. 

Being well stocked, I knew I had the ingredients.

Basically just 'taffy' but flavored with some citric acid as well as whatever flavors you wish.  
 
Since I keep a well stocked pantry, I have citric acid.  I also have LorAnn flavors like cherry and grape oil extracts.  I have organic orange extracts and raspberry and strawberry emulsion.  I had a couple packs of cherry and grape Kool-Aid.  I also have some 'True Lime' flavor packets.  Lemon extract?  I've got that too.  Freeze dried strawberries and raspberries?  Yep - I can pulverize those as well.

In the end the taffy was made.

Divided into 2 parts.

One flavored like red Skittles (I used a whole mixture of things to do so - and just kept taste testing).  Mostly strawberry and raspberry emulsion flavoring along with black cherry Kool-Aid and bit of cherry oil flavoring from Wilton.

The other was colored white and I used orange extract. 

(The final orange color and bright red would be after they were coated with a hard shell candy glaze.)


The hardest and most mind-numbingly boring part was making the tiny dots to become Skittles.
To make the little candies, let them dry and then I have to make the hard candy shell.

After awhile I just decided it was really like Air Heads tangy taffy (or a really tangy Laffy Taffy) if I left it in larger pieces so right now on the counter we have both.

I also realized I cooked the red version about 2 minutes longer than the white version, as I was adding flavorings while they were in the saucepans.  The red is just a tiny bit more firm - and the white a little too soft.  But when I tasted them together I realized I had a huge 'hit' of taste on my hands so now I've mixed most of them together anyway as the flavor is incredible.

It started raining and storming yesterday - STILL raining and the humidity level is so high the little Skittle dots aren't getting hard yet anyway... so I'm in no hurry to finish and coat them with the hard candy shell yet anyway.

Considering everyone loves them and keeps grabbing some of the taffy every time they walk through the kitchen, I'm pretty sure if I leave it all out sitting there for a couple days until the sunshine warms things up and the humidity level goes down, it will be mostly gone and I won't have to keep  making tiny little homemade Skittles after all.   :)


Print Friendly and PDF

3/24/24

100% Food Storage: Auguson Farms Lasagna from their Italian Pail


Tonight I used our 'daily bread' dough from the refrigerator (many, many previous posts about that one) to make pizza and cheesy garlic bread.  The pizza for Mr. Husband, and the garlic bread for me and he to eat with another food storage item from our long term level - the Auguson Farms Italian Pail bucket.

I bought this bucket kit at some point prior to a camping/hiking trip I was taking in 2017.  One of my daughters and I were doing a 2 week cross-country camping trip and were bringing everything we needed for 2 weeks (food, water, power, etc).  I bought two buckets - an Italian version and their Mexican version. 

We also had other freeze-dried food options so we only ended up using a few things from the Mexican bucket and making a pizza from this one.  We weren't impressed by either of them.  That's another reason we came home with most of the bucket items intact.

Today was the day to drag one of them out of storage again and see if we can use some of these up.

I opted for the lasagna package.  What I had in mind (wrongly, I found out) was the delicious cheesy lasagna sold by Mountain House.  This was... nothing like it.


One thing to mention is how great these are for long term in the fact they are good for at least 25 years.  For example, this packet of lasagna is 'best by" December 14, 2042.


The instructions are awesome because they are so easy (compared to a lot of the pouches in these buckets).  Simply add the contents to 5 cups boiling water and simmer for 20 minutes.

See the big blob in the photo?  That was the primary tomato powder and spices as they had solidified into a lump in the package.  No worries, as it broke apart and dissolved as the water simmered.

The meal however was, disappointing.
It tasted almost completely like chili powder and water with a little bit of pasta thrown in.

It needed help.
After simmering about 10 minutes (half the time) I removed 1 1/2 cups of the liquid and replaced it with a cup of bottled spaghetti sauce from the pantry and 3/4 cup water.  I added some salt to taste and then after more disappointing taste tests, added some cheese powder from the Mexican bucket and still needing help, added about 1/2 cup Parmesan cheese as well.

After simmering to complete the cooking cycle, served with the homemade garlic bread... and it was good.

On it's own however?  It would truly have to be an 'emergency' situation in order to eat it without being able to help it out with bottled sauces, salt and cheeses.  Not a winner... and we have 2 more packages in the bucket yet to use.


Print Friendly and PDF

3/20/24

100% Food Storage Breakfast: French Toast


Breakfast a couple days ago... French Toast.

Bread:  The homemade 'daily bread' I've posted about a hundred times already
Egg Powder
Powdered Milk
Vanilla
Syrup (can be homemade but I have bottles of it in the pantry storage)
Butter is home canned 2021


Print Friendly and PDF

3/18/24

100% Food Storage: Mexican Casserole


Yesterday morning I was putting something in the freezer when I spied this Rubbermaid container with 'something' in it - I couldn't remember what.  Inside was some of the extra 'fake' taco meat I had made a couple weeks ago.  I pulled it out of the freezer and placed it into the refrigerator to thaw for 'something' today.  And that is how this recipe came to be.

The idea was to use up some of this food storage imitation taco meat - which was already reconstituted for a previous post.  I saw next to it I had a food sealed package of corn tortillas leftover from last Fall (we don't normally eat them but we had a family get together so I had some random foods on hand left).  I grabbed those, a food sealed bag of frozen diced avocados, one fresh avocado a family member left here this week, one of my few remaining packages of frozen shredded cheese, and a can of enchilada sauce.  I had to go to the 2-3 year pantry to get a can of refried beans and a can of black olives.  I had some green chilies in the pantry so I grabbed those.

Lastly, the onions were freeze dried, and you all know how I hated the sour cream powder and did actually go to the store to buy a container of sour cream.  I used that in this recipe and finished it off with some homemade taco sauce (already posted).

Mexican Casserole

Reconstituted 'taco' meat
Refried beans
Green chilies
Cut up corn tortillas
Enchilada sauce
Sour Cream
Avocado
Cheese
Black Olives
Green onions
Taco Sauce

Layer the taco meat, beans, green chilies and corn tortillas.  Bake at 350 about 25 minutes.  Remove from oven and top with the rest of the ingredients.  Return to the oven for another 25 minutes.  Serve hot.  Goes well with flour tortillas and corn.

 NOTES:  I'm still using up the can of Auguson Farms imitation Taco Meat as I rotate out the oldest cans in our food storage - which are from 2012 ish.  Use that if you have it or use freeze dried ground beef, freeze dried diced beef, fresh or frozen ground beef or diced chuck, whatever you have.  Use freeze dried or canned chicken if you wish.


I happened to have some corn tortillas on hand in the freezer - which I normally don't.  What I do have however, is the ingredients to make them from scratch if I needed to, and I have one of the 'bucket' meals some of the popular food storage companies sell as a "Mexican Food" bucket that has a package of corn meal in it to make them as well.


Random... frozen avocado.  I also have freeze dried avocado if I need to break into that at some point.


Still blessed to have some fresh shredded (frozen) cheese and haven't had to use any of the freeze dried so  far, although I am out of cheddar cheese so if I want that I have to go dig through food storage to find a can of it.


Topped with my homemade taco sauce (recipe on the site a lot of times already) - and used freeze dried green onions.  Love black olives - and I have some in the 2-3 year storage.  Leave those off (obviously) if you don't like them.


 I don't have a finished picture of it.  I sent some with Mr. Husband for his dinner at work tonight and I had a LOT of it for my lunch today.  The rest is in the refrigerator and I don't  want to get up and go to the kitchen to take a picture of it.  So you get this... prior to baking.


Print Friendly and PDF

3/17/24

100% Food Storage: Making blueberry cherry jelly from frozen fruit

100% food storage.  Last trip to the grocery store was November, 2023.  Today is March 17, 2024.


I believe in wasting no food when there are other options.  Yesterdays canning task came about because last summer I had bought a bag of wild blueberries that were really awful - and not really good for fresh eating, as well as a bag of cherries that were also just not good; very blah.  I tossed them into the freezer for use in 'something else' down the line. 

I also do this with the last apple or two that has been ignored and starting to get old looking (peel, chop and freeze) and I pick out all the peaches from our favorite frozen fresh fruit mixture, because the peaches are never, ever ripe tasting or sweet and always sour and ruin the rest of the mix (strawberries, mango, papaya and pineapple). 

Yesterday I opened the freezer and decided it would be the day to use up these bags of yucky blueberries and bland, awful cherries.  I'd make jelly.  The fruit(s) would be great with all the sugar used to make jam and jelly - it would really bring out the flavor.

Regarding the cherries.  Normally you have to clean, pit and cut them.  Because they had been frozen and were softer than fresh, I started just taking off the stems and cutting them with my paring knife, which was a lot faster than pitting them.  But then I realized since I was making JELLY and not JAM, I was going to mash them a bit and boil them and then strain them through cheesecloth anyway... so I wasn't going to bother cutting.  Instead I took off the stems and just cut them in half quick and tossed them into the pot. 

To the cherries, I added the frozen wild blueberries as well.  Looking at them, I figured I wouldn't have quite enough juice to work with according to the directions, so I added a bag of my frozen apples as well.  As it all cooked down, I mashed with a wooden spoon.

Bring to a boil and simmer 10 minutes. 


Poured everything into a cheesecloth lined bowl and tied the ends so I could hang it up to drip and drain.

When it stopped dripping I squeezed it all around to get more juice out - turning and squeezing until I had nothing but pulp left in the cheesecloth.

The juice equaled right at 5 cups.  Since I was mixing cherry and blueberry, I went with the 5 cup average.

Juice according to package directions
Sugar according to package directions
Low Sugar Sure Jel Pectin

Boil for 1 minute

Ladle into jars.
Wipe rims.
Top and add rings.
Water bath the jars 5-10 minutes.
Remove and let cool.
Remove rings.
Wipe down.
Store.


Print Friendly and PDF

3/16/24

100% Food Storage: Beef Stew (made in the Instant Pot this time)

 100% Food Storage:  Last grocery trip was November 2023, today is March 16, 2024.
 

SLOW:  I've posted this recipe many, many times over the years.  It's my favorite beef stew and I typically make it in the crock pot and let it cook 5-6 hours.  It's a no-work recipe that tastes incredible.  However, I've never tried to make it in a 'rush' before.  I've never had to.  Yesterday... I did.  And it turned out great!

FAST:  Yesterday, time got away from us and suddenly I realized my husband had to leave for work in about 25 minutes and we needed to find him a dinner to take, as we had no leftovers to throw together this time. I looked at a package of ground beef I had taken out of the freezer that was lying on the counter, and suddenly decided to see if I could throw this beef stew together SUPER FAST by using the instant pot pressure cooker, but also because since we are using food storage, most of our foods are pre-cooked in various ways already, which would cut down time.

FOODS:  The package of ground beef was one I ground from chuck roast last Fall and food sealed for the deep freeze.  However, I could just as easily used freeze-dried ground beef, canned beef, leftover steak or hamburger, diced beef (either fresh or freeze dried), etc.  I had home canned potatoes and home canned carrots on hand (again, could use freeze-dried, dehydrated, canned, etc.).  I had sliced mushrooms in the freezer, and a package of dehydrated corn I had dehydrated myself as a 'trial' last summer when I bunch leftover from a family vacation. 

I've NEVER tried to make this 'super fast' before using a pressure cooker. But it turned out perfect and so good that I ended up going back for 3rds and we plan to have it today as well. 


Beef Stew

3 c cubed, peeled potatoes  (I used home canned)
4 medium carrots, sliced  (I used home canned)
1 medium onion, cubed  (Use dried minced or freeze dried, but I had one fresh on hand)
2 lb. steak or other beef, cubed or cut to about 1" pieces  (I used frozen ground beef, thawed in the microwave)
2 T oil  (had avocado oil on hand)
3 T flour
2 beef bouillon cubes  (used 1 1/2 tablespoons beef base)
2 c boiling water  (used cold from tap)
1/4 c white vinegar
1/4 c ketchup
1 T prepared horseradish (Horseradish Cream - the kind for sandwiches, looks like mayo)
1 T prepared mustard
1 T sugar
1 c peas  (didn't have, left out)
1 c corn  (used dehydrated - added dry)
1 c fresh sliced mushrooms  (used frozen, bought, sliced and froze last summer/fall)
I added a handful of sliced cabbage as well

Place the potatoes, carrots and onions in a slow cooker.  In a large skillet, brown the beef in oil.  Lay on the vegetables in the slow cooker.  Sprinkle with flour.  In a bowl, dissolve the bouillon cubes in the water and stir in the vinegar, ketchup, horseradish, mustard and sugar.  Pour over meat in the slow cooker.  Cover and cook on high about 5 hours.  Add the peas and corn and mushrooms.  Cook an additional 45 minutes.  Makes about 5-6 servings. 

Yesterdays Instant Pot Fast Version: 
Heated instant pot to saute with oil.  Added partially thawed ground beef, broke up and browned in pot.  Added onions and flour, blended.  Added the potatoes, corn and carrots along with the water, bouillon base, vinegar and ketchup.  Added the horseradish, mustard and sugar, stirred gently.  Topped with the mushrooms.  Put the top on, sealed it and put the timer on to pressure cook on high 20 minutes.

_________________________________________________


Having never cooked it this fast before or in the instant pot, I wasn't sure if it would be ready to send with Mr. Husband by the time he had to leave for work in about 15 minutes, so I also made a plan B.  I quickly cooked pasta on the stove (cold water/pasta method and in a cast iron pot for quick cooking), added some homemade spaghetti sauce I had, and sliced our homemade daily bread into a few slices, topped with home canned butter, fresh garlic and some garlic salt, and popped them under the oven broiler for a few minutes. 

Although the pressure cooker was just ending as he was ready to walk out the door to go to work, I had put together his spaghetti and garlic bread to take with him for dinner that evening so I had the beef stew for dinner, and he'll take it today to work for his dinner tonight.  The instant pot 20 minute version worked PERFECTLY.  


Print Friendly and PDF

3/14/24

100% Food Storage: Chocolate Chip Cookies from a Pancake Mix

  
We currently have a #10 can of buttermilk pancake mix that needs to be used up because it's been opened, but we also have a huge bag of pancake mix from Sam's Club (10 pounds).  That's a lot of pancake mix.

Today while the little ones were napping I grabbed the buttermilk pancake mix and flipped it over to the backside to see if they had any 'other' recipes to make with it.  Outside of biscuits, no.  But I didn't want to make biscuits.  I wanted to make cookies.  Considering the buttermilk pancake mix was the same basic ingredients that are in well, almost any baked good, I figured it was a good time to do some trial and error baking.

The trial commenced, the errors were null and the end result was delicious cookies.


This can of Auguson Farms pancake mix is from long term storage, and is 10+ years old (the date is rubbed off the bottom).  Still making perfect pancakes... and cookies.

The butter I used was home canned 2020.  I used a fresh egg in this one instead of egg powder, since I still had 1 left from baking the birthday cakes for a family member.

Buttermilk Pancake Mix Cookies

2 cups pancake mix
1 egg
1/2 c butter
1/2 c brown sugar
1/4 c granulated sugar
2 t vanilla
1 c chocolate chips and optional:  nuts, like Walnuts

Mix the soft butter and sugars in a bowl.  Add the vanilla and egg.  Blend.  Add the pancake mix and blend but don't over beat.  Stir in the chocolate chips and/or nuts.   Place by spoonfuls on a parchment lined baking sheet.  Bake at 350 about 15 minutes.  Cool on the baking sheet about 2-3 minutes, remove to a wire rack to cool completely.


Beating the home canned butter and sugars with the egg and vanilla

Adding in the pancake mix

Into the oven at 350 for 15 minutes


Chocolate Chip Cookies fresh from the oven


Print Friendly and PDF

3/13/24

100% food storage: Carne Asada Marinade (for street tacos) and the different LEVELS of food storage has paid off


Although we've been living 100% on food storage since November 2023, I can't say that one part of our food storage levels has been better than the other.  They have all came in handy and work together.

There are some days I go to the kitchen pantry and see exactly what I need to pull off a meal and say "Oh Thank you God for this stocked pantry!", but then the next day I will need a couple items and go to the 2-3 year pantry and 'grocery shop' and come into the kitchen with 3-4 items I needed and "Thank you God you put it so strongly on my heart to prepare... and I had these exact items I need!"     And yet, this week I've been ever-so-thankful for my freezers.  Oh thankyouGod for my stocked freezers.... what a blessing they have been over the past 4 months!!!

And that is why I'm thankful this week because yesterday I was craving 'street tacos' - made with grilled, marinated steak.  

Great on thin sliced pork and chicken.  Great on steak too.  And normally I would have sliced these steaks thinner or into strips to get more marinade on them but I was in a serious hurry/rush to get this done ASAP and get out the door to the library to story time with the 3 year old so I got it together as fast as I could and left. Leave your meat/poultry thick if you wish for a mild flavor, but slice and marinade a long time for an intense flavor.

I grilled these last night, served with a sauce I whipped up from ingredients in the fridge and cupboard, pulled out a food sealed package of corn tortillas I had saved from 'leftovers' from when we had family visiting last July (?)  August (?). 

Carne Asada Marinade

1/2 c soy sauce  (Used liquid Aminos)
3 garlic cloves, minced
1 T vinegar
1 small jalapeno pepper, chopped fine
1/3 c lime juice (from the freezer, squeezed and froze last Fall)
1/4 c lemon juice (used all lime juice this time, no lemon)
1/2 t either chipotle seasoning or cayenne
1 T (scant) chili powder, cumin and paprika
3/4 t dried oregano
1/4 c fresh parsley (you can use cilantro)
1/2 c oil (preferably olive oil)
pepper (about 1/2 t) but not salt as the soy sauce is very salty

Place all in a ziploc baggy (double bag) or in a ceramic or glass container, and add about 2 pounds thin steaks or other meat.  Let marinade overnight.  Grill until done, slice across the grain and serve.  I opted to serve with tortillas, salsa, sour cream, cheese, avocados and lettuce.   


Here is a picture of one of the many (many) times I've made this recipe - this time with pork.  I use this same marinade on beef, pork and chicken - and love them all.


Print Friendly and PDF

3/11/24

100% Food Storage: Yuck sour cream powder so I caved and bought a container, and we have fresh greens


A family member had some extra avocados to use up and gifted us 3 of them, which we put to use last night for dinner.  We had "BLT's" but without tomatoes, since fresh vegetables are scarce when you are doing 100% food storage and it's winter time so you don't have an active garden.  Instead we had BLA's.  Bacon, lettuce and avocado.  And dare I say they are better than BLT's anyway.  Ha ha.

The greens... we had greens - fresh from a deck planter.  A family member who works at a green house bought 3 containers of lettuce for us a couple weeks ago.  We had beautiful warm weather for the last couple weeks - except for a few nights when it did get down below freezing but the lettuce (covered) survived.  It felt so amazing and good to fresh greens last night!  However it did freeze again last night and they were *not* covered, so I have to go out and check them after I am done typing this post.  I had planted lettuce and spinach seeds a few weeks ago as well and thy were all sprouting (you can see in the photo) so I want to check in the cold snap killed them off.

SOUR CREAM:  I think I posted in one of the previous posts how disappointed I was in sour cream powder.  I gave it many tries in many different ways but... no.  I can't do it.  Yuck. 

I gave up and today I stopped by the store and picked up a couple items - one of which was a container of fresh sour cream.  Now, with the avocados we were gifted along with some sour cream, long term storage taco 'meat', etc. I'm sure I can throw together some yummy Mexican meals of some sort. 


Maybe 'ok' at first but once opened, it goes off quickly.  I tastes like....  hmm... cucumbers.  Kinda.


Print Friendly and PDF

3/10/24

100% Food Storage: Shrimp and Pasta Alfredo

 100% Food Storage since November, 2023.  Today is March 10, 2024.


Although we do have full sized freeze dried shrimp in long term storage, I didn't have to break into that one yet as we still have 2 bags in the deep freezer from last... summer?  I don't recall when I bought them honestly.  But it's on my mind to use one of them up - and it would be nice to mix up the chicken/turkey/beef/pork rotations I've been doing.  

Although I don't have fresh cream and I'm hoarding (haha) the last of the cream cheese I have, I do have jars of Alfredo sauce in our 2-3 year storage so I grabbed that. 

The other night with dinner I served the last bag of mixed vegetables from the freezer - and we had leftovers, which I mentally added to this recipe as I was planning it.  Lastly would be the pasta (whatever shape happened to be in the kitchen pantry right now would be fine) and to top it off, a little bit of the smoked Gouda I have in the refrigerator that had previously been in the deep freezer, and that I vacuum food seal after every use so it stays fresh and perfect.

And that's how this dish was born.

If you are using freeze dried shrimp, pour it into a container with a tight fitting lid and cover with water, to re-hydrate at least 6-8 hours (overnight) before draining and using as you would fresh.


Into a pan of water on the stove, cook whatever amount of pasta you want.

Into a pan on the stove:

Oil/butter and shrimp with about a tablespoon fresh minced garlic or a teaspoon of powdered garlic.
Cook about 3 minutes until they are all turning pink.
Add the leftover (or pre-cooked) veggies of choice.  Broccoli is especially good in this one.
Add the Alfredo Sauce.
I added a bit of dried parsley too.
When warmed through, turn off heat.

Pour drained pasta into a serving dish.  Top with the Alfredo Sauce mixture.  Salt and Pepper to your own taste.  If desired, top with a bit of smoked Gouda, or some crumbled bacon.


Print Friendly and PDF

3/9/24

100% Food Storage: Not too Spicy Chicken and Spinach

 100% Food Storage:  last grocery trip was November 2023.  Today is March 9, 2024


I've posted one of our family favorite 'go to' recipes more than a few times on An American Housewife - the Spicy Chicken and Spinach one.  But it's not actually spicy unless you want it to be by adjusting how much of a couple ingredients you use.

Basically it's really just a chicken and spinach dish - and not really a casserole either unless you choose to bake it.  AND sometimes I make it 'creamy' by adding some cream cheese or sour cream and other times I don't. 

Sounds confusing, but basically it's such a simple, quick and easy recipe, you can play with the ingredients and whether or not you feel like baking it. 

Food Storage Options:

Chicken - Freeze-dried (reconstituted), vegetarian chicken flavor, canned, home canned, or fresh
Spinach - dehydrated, fresh or freeze dried
Onions - freeze dried, dehydrated or fresh
Peppers - freeze dried, dehydrated or fresh
Butter - you can leave it out and not saute the peppers/onions if using dried or use canned butter or fresh
Cream Cheese - leave it out if you don't have it, or use some powdered if you wish
Tomatoes - canned, fresh or freeze-dried
Jalapenos - leave out if you wish, or use canned, fresh, dehydrated or freeze dried
Mushrooms - optional - fresh, frozen, freeze dried or dehydrated
Cheese is optional - fresh, freeze dried or frozen, thawed


Spicy Chicken and Spinach Casserole

3 cups cooked, diced chicken  (I used pre-cooked turkey I had froze but canned works great in this!)
10 oz. spinach (frozen, thawed or use fresh and cook just enough to wilt it)  (I used dried, from #10 can)
Peppers - green and yellow (I had fresh, frozen and dehydrated pieces)
Onions - about half a medium yellow onion or about 5-6 green onions, diced/chopped (I used dried, minced)
Butter to saute' the peppers and onions ( I used home canned butter with water to reconstitute, cook onions & peppers)
8 oz. cream cheese  (I still had a block in the fridge as, unopened, lasts for months  in your fridge)
14 oz. diced tomatoes or 1 1/2 cups prepared salsa  (I used canned diced tomatoes)
1/3 cup jalapeno slices or mild yellow peppers depending on your spice level of choice (I used from a jar)
1 t cumin
1 t chili powder
1 cup grated cheddar cheese (left out)
Mushrooms (I used a pack I had in the freezer I had food sealed last Fall)

In a sprayed/greased casserole dish layer the spinach.  Top with the chicken.
Saute' the peppers and onion in butter in a pan until tender and add the cream cheese. When melted, layer over the chicken.
Top with the salsa or the diced tomatoes, add the jalapenos or yellow peppers and spices.
Top with the cheese.
Bake in a preheated 350 oven for about 30 minutes or until heated through and the cheese is all melted.  Can serve with sour cream if you wish or you can add the sour cream to the dish with the cream cheese.  


Reconstituted the onion and spinach along with cooking the frozen peppers in a pan with some avocado oil and butter and a little water.  Added the chicken, tomatoes, mushrooms.  When it was all softened and simmering, added the rest of the ingredients.  Warmed and served.


Didn't get a 'final' photo... I was hungry, it smelled great and I was ready to eat.  Here is me heating it through.


Print Friendly and PDF

3/8/24

100% Food Storage: Quesadillas


Last night was a very simple dinner as it was just me home at dinner time.  Quesadillas.
We still had a few small tortillas in the deep freezer - although they are easily made homemade later on if we need to.
I prefer to make them in a cast iron pan with butter to crisp them and make them golden brown.
The butter was canned butter (in the photo below) from 2020 or 2021 (the label is turned away and I don't want to go into the kitchen right now to look, as I'm typing this in the office).
I like onions on mine, but we obviously have no fresh onions right now so freeze dried it is!  I chose green onions, although you could use minced dried onions as well.
Lastly - the cheese. 
Not only do we keep blocks of cheese in the deep freezer, but when they are opened, I always use my vacuum food sealer to seal them tight for storage in the refrigerator.  This means our cheese lasts and doesn't get moldy or go bad!   So I had a food sealed 1/4 block of cheddar and a bit of Queso Fresco in the refrigerator which I used and then promptly resealed the rest of the cheddar again - which if we don't care to use it, will still be perfect a month or two from now (although we love cheese so it will probably be used this weekend as I cook with it all the time).
Freeze dried cheese options we have on hand are cheddar, colby and mozzarella as well.


Print Friendly and PDF

3/7/24

100% Food Storage: Grilled Steaks (either frozen from your deep freeze or the freeze dried variety)

 100% food storage on hand - last grocery trip was November 2023.  Today is March 7, 2024.


Although I have some freeze dried meats in full form like the steaks above, I haven't had to use them yet as I had a well stocked freezer as of November 2023 when we started to live 100% of food storage.   (Note:  most food storage companies do 'pieces' of meat but a simple search will show you there are at least 2 companies doing full sized, uncooked meats that you can buy for your long term storage.)   

As regular readers know, we have been primarily low carb and keto for about 20 years, but doing food storage life, that isn't a priority and we've been using up all the flour left over from holiday baking, and what is in the short term storage, as well as using regular products that may have sugars in them.  We aren't doing much sugar, but if we use products with it in, it's not an issue.

However, with Mr. Husband having a scan done this morning, they send out instructions before hand to do low carb meals prior to the scan.  So yesterday I put away the homemade 'daily bread' that he couldn't have, and brought a package of steaks out of the deep freezer.   These were dated April 2023 and you can see they are perfect.  Don't worry about 'best buy' dates.  I know people under 30 freak out over them but once you do your homework you find the dates on products are to 1) get you to toss it and buy MORE product from the company and 2) for their own protection so you can't sue them and 3) the quality or texture might change on a few foods, but for most, it will not.

Anyway!  So steaks were brought out, and I had one (1) bag of vegetable mix left in the deep freezer as well.

Here is a quick photo of the steaks with the simple marinade I always use in one way or another - I don't measure.


Steak Marinade

1/3 c soy sauce
2 T oil
1 T brown sugar
3/4 t garlic, minced (about 1 clove)
1 t ground ginger
1 t seasoning salt (like Lawry's) 

Mix all ingredients, whisk until blended and cover your favorite steaks with it.  I find it easy to use a gallon sized Ziploc baggy - place 4 or 5 steaks in it, add the marinade, flip it over a couple times to cover the meat and refrigerate for at least 30 minutes, up to about 3-4 hours.  Turn often to make sure the meat is marinated evenly.  Grill as usual to your favorite level of 'done'.


NOTE:  I often use Liquid Amino's or Coconut Aminios instead of soy sauce.  The photo above is Bragg's Liquid Aminios (similar in taste to soy sauce but healthier).  I used brown sugar 'sweetener' (zero sugar, low carb), and regular salt as I don't usually have Lawry's on hand and don't really fret it.


Print Friendly and PDF

3/5/24

100% Food Storage: Jalapeno and Cheese Smothered Pork Chops

Last grocery trip was November, 2023.  Today is March 5, 2024.


I'm ever-thankful for the stocked freezers we've had.  The pork is getting low, but we haven't had to resort to the freeze-dried pork yet and I still have some home-cut pork chops. 

One of our regular favorite recipes (posted a few times already) is the pork chops, marinated in salsa, grilled and topped with a mixture of cheese(s), crumbled bacon and jalapeno.  So, so good... and this was a quicker, easier, oven version similar to that.

Pork Chops
Cheese of choice (I used queso fresco as I'm hoarding the very last of our cream cheese and I was out of shredded cheddar without going to the long term storage area and looking for the freeze dried cheddar.  I will ... but not today.)
Jalapeno slices from a jar we still have in the fridge
Bacon (was going to use crumbles but they are in the deep freezer, with some heavy things on top today)
Spices - salt and pepper and a chipotle mixture (use what you wish)

Laid a strip of bacon down, topped with a pork chop, layer of cheese, a sprinkle of your spices, top with jalapeno slices and lay a slice of bacon across it all.  Bake at 375 or 400 until it's crispy and golden brown.  Flip them over carefully as the bacon strip on the bottom for moisture and non-stick needs to be crisped up.  Hit the 'broil' and let them cook a few minutes until crisp.  Remove them from the oven, flip back over and serve.


Print Friendly and PDF

3/4/24

100% Food Storage: Daily Bread Dough made into Pizza


Yesterday afternoon I took my 'plan' for dinner and tossed it out, and decided to make pizza.  Much easier and faster since I have my 'daily bread' dough in the bucket in the refrigerator every day.

Using the bucket dough (already posted about so many times regular readers are tired of it, I'm sure) I floured my hands, grabbed about a third of the dough and plopped it onto some parchment paper I had sprinkled with a bit of corn meal.

I used my fingers and hands to press it out to a round.  

Precook:  Preheat the oven to about 425 or 450 with a pizza stone in it, and then slid the parchment onto the stone to precook the pizza round for about 7-8 minutes.  Remove and let set (or you could freeze them at this point if you wished to save them for a later meal).   I did two pizza crusts this way and let them hang out on the counter, and turned off the oven until I was ready to come back and make them for dinner.

I made both into simple pepperoni pizza using homemade sauce from pantry tomato products and spice, pepperoni I have in the freezer (will switch to vegetarian pepperoni bites from long term storage when I need to), shredded mozzarella I still have a couple food sealed bags in the deep freezer but will use #10 canned freeze dried mozzarella reconstituted when I need to, and some parmesan - the green can version you can buy at the store, which I have a couple of in the 2-3 year food storage pantry.

Delicious and easy.  Thank you God for our daily bread.... or err, um, pizza dough!   


Print Friendly and PDF

3/3/24

100% Food Storage: Country Gravy (White Gravy)

100% food storage.  Last grocery trip was November 2023 and today is March 3, 2024.


As I previously posted, we had mashed potatoes and chicken the night before last.  I made extra for lunch/dinner the next day. 

I wanted gravy with it the first night, but didn't want to bother making it.  However, I knew when I had the leftovers the second day I would get my gravy.  I wanted 'white' gravy or 'country' gravy, which I love and was craving, but I have always, (always) made it homemade. 

I've never in my life made gravy from a mix or a powder. 

I taught myself to make gravy as a teen by watching my mother and grandmother and honestly have never, ever bought a gravy mix in my life.  My kids now also only make gravy from scratch - brown gravy and white, country gravy (sausage gravy)... biscuits and gravy are a favorite and they all make them from scratch.

I picked up a couple of these at Sam's Club at some point in the past few years and I knew I had them in long term storage, although I had never opened one or tried one because... hello, I seriously just make it all from scratch.

Well, homemade country gravy takes milk, and yes, I was prepared to either use evaporated milk, reconstituted with water, or mix up a container of Country Cream milk....

Speaking of which - This is Country Cream milk and I think is by far the best tasting instant milk (or powdered milk) out there.  Seriously.  The preschooler even prefers this over store bought whole milk.  Vitamins D and A, and real milk.  That's it.  Wholesome and good - and creamy. I do use regular store brand dry milk powder (like Carnation or Walmart Great Value Brand)  for every day (prior to food storage living) for my pizza dough, etc. but I wouldn't drink it. 

This is the stuff that is drinkable.


Anyway!  I remembered I had gravy mixes in our 2-3 year old pantry and grabbed one, wondering if I needed to use milk to make it.

You don't!  It's just add water. 


I kind of chuckled and laughed at myself... being middle aged before I ever learned how to use a 'mix' to make gravy. 

So, 1 1/2 cups of water put to boil while you mix 3/4 cup gravy mix with 1/2 cup cold water, then add it to the boiling water.  I kept it on the heat and whisked until it just got thick, then removed from heat.

First taste test:  well, it's not homemade.
Second taste:  Ok, not homemade, but... still ok.
Placed it on my mashed potatoes and started to eat my dinner.
Third and Fourth bites:  this isn't bad at all.

After that I just really liked it.  It's creamy, smooth and good!  I finished off almost all of it, because truth is, I'm a gravy girl.  I only eat potatoes or biscuits with it because it's probably not socially acceptable to eat it as a soup with a spoon.  Ha ha.

I am thrilled with this product not only because it actually tastes good (and mine is like, at least a couple years old at this point - I didn't bother going to check the best buy date on it because I'm in the office typing this and the product is in the kitchen) but because this is a GREAT option for food storage.

Just add WATER.

That's it.
Now you have a pantry friendly gravy you can also add sausage to for biscuits, ground hamburger to for hamburger gravy on potatoes, use as is for chicken, potatoes, etc.


Print Friendly and PDF