Pages

11/7/22

Instant Pot Sugarfree and Low Carb Cinnamon Pumpkin Cake with Streusel Topping

A re-post from almost exactly one year ago!  


Instant Pot Cinnamon Pumpkin Cake with Streusel Topping

Crumb Topping:

1/2  c almond flour 
1 T good quality coconut flour
1/4 c Swerve Brown
1/4 c butter, soft
1/4 t cinnamon

Pumpkin Cake: 
 
1 c almond flour 
1/2 c natural sweetener(s) - I use Erythritol, monk fruit and some allulose mixed
1/4 c vanilla or unflavored whey protein powder (I use Isopure)
2 T coconut flour
2 t baking powder 
1/2 t cinnamon, ginger
dash of cloves and nutmeg
1/4 t salt 
2/3 cup pumpkin puree 
2 eggs
3 T butter, melted
1 t vanilla extract 
 
Glaze
1/4 - 1/3 cup powdered sweetener(s) - I use a mixture of 2-3 I keep in a container in the pantry
1 T cream cheese (optional)
2 tablespoon cream 
1/4 teaspoon vanilla extract 

Place the dry ingredients in a large bowl and whisk to combine. Put the eggs, pumpkin, butter and vanilla in another large bowl and mix until smooth. Stir the wet ingredients into the dry ingredients.

Grease a small cake, bundt or springform pan that fits inside your instant pot.  
 
Pour the batter into the pan.  To make it easier to pull your pan out of the instant pot, use a long piece of aluminum foil, folded over a few times and set the pan in the middle of it, pulling the sides up and over the pan so you can 'lift' it out easily when it's done. (Or if you are lucky enough to use a 'sling' now made for lifting pans out of your instant pot, use that! I don't have one though...)
 
Sprinkle the crumb topping over the batter.  Set a trivet in a 6-quart Instant Pot and pour in 1 cup of water. Place the pan on the trivet, seal the lid, press manual cook, and set the timer for 35 minutes. Let the pressure release naturally. 
 
Open lid and let cool in the instant pot for 10 minutes before removing.

Mix the glaze ingredients together in a small bowl or processor. Drizzle the glaze over the cooled cake.


 Making the crumb topping up


I might add about 1/4 c chopped pecans to this next time.... 


In the pan...


Sprinkled the crumb topping on - but also you can see the foil I use as a 'handle' to lower and raise the pan into the instant cooker.  I think some people cover the whole top with foil as well - I assume to keep the excess condensation from running back onto the cake?  If you are using a springform pan, you'll want to wrap the outside of the pan with foil for sure so no water seeps in through the seams of it.

In the instant pot (or in my case, the Cosori)

  Here is a photo of it 'done' and out of the instant pot, cooling on the stove.


 Ready for the glaze


You wouldn't have to put a glaze on it if you didn't want to.


It's just a basic glaze - sweeteners, a little cream cheese, a bit of cream and a dash of vanilla. 

Was great with coffee - and it freezes well.


Print Friendly and PDF

Open can testing of dry-canned potatoes with butter over a year later... and canning more potatoes in these times of food shortages and empty shelves at the grocery

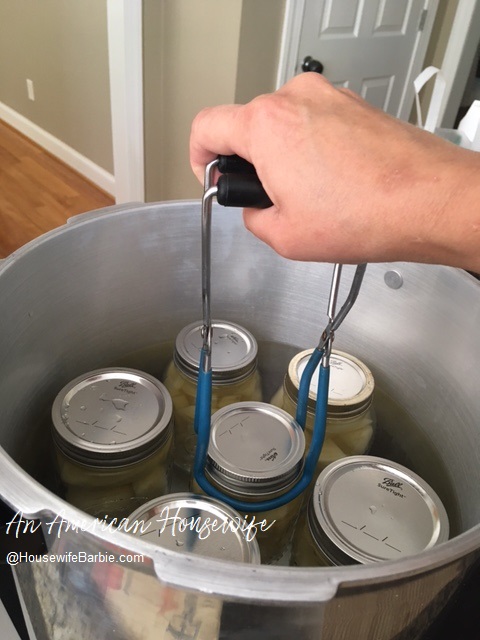
First - just some regular canning of potatoes...  (water and salt)
 
A couple weeks ago I canned more potatoes.  Although I would love to have potatoes at every meal (they are one of my favorite foods and perhaps one of the most versatile foods you can use) we are low-carb and sugarfree most of the time, by choice, so starchy vegetables like potatoes aren't enjoyed as much as I would like.


UPDATE TO DRY-CANNED POTATOES:    A few years ago I opted to try dry-canning potatoes instead of the typical way of covering them with water.  Just for fun. I ended up doing some plain and others with butter.  I LOVED them.  (I also dry canned apples.)  I researched it first, and did a couple tests to be sure I felt comfortable with the process, but then I jumped in and did a few batches and ended up adding 'dry canning' them to my regular canning.
 
Now, I can potatoes in all sorts of ways because there are so many ways to use them.  Small, diced, chunks, larger chunks, french fry shape, thin wedges... and some traditional water covered, others dry.  Some with butter, some without.  I grab a certain shape or style depending on what I need them for.

I went ahead and saved one of my dry canned potatoes with butter that had been put up in September of 2021 to open at least a year later.  That was this Fall.  A couple weeks ago I grabbed one to use in dinner that night but made a point to take photos first and do a quick review for An American Housewife.   


The seal was incredibly tight and took a bit of work to get off (a good sign).
Inside the potatoes looked fine and smelled... like potatoes.

 
I dumped them out into a bowl and took a good look... and smell.
They were cold, and straight out of the glass canning jar so the butter was still a bit congealed...

 
Here is a close up.
They tasted good and had a great texture and didn't seem any different from the potatoes tested at the earlier marks of a few months.  We were over a year later and the butter canned dry potatoes were perfect.  They went into the crockpot with dinner that night so I don't have a picture of them after they were heated where the butter is melted and they just look like... well, potatoes.


If you have a pressure-canner (potatoes can't be canned safely by the water bath method) potatoes are one of the cheapest and easiest to put up... and in the event of hard times, they are a blessing!


Print Friendly and PDF

11/5/22

Roast Beef Sandwiches - Slider Style

A pan of sandwiches and green beans going into the warm oven to save for my husbands dinner later


Last month (or was it earlier?) I had a photo on my Instagram of roast beef sandwiches we had that night for dinner.  My husband eats later at night after he works out and showers, so this photo above was the sandwiches leftover from the meal, along with the green beans, which I placed in one pan and popped back into the still warm oven to keep for him.  

I thought I added the recipe to the site but when I went back to check, I didn't see it.  Not surprising, I have found I'm so busy lately I rarely have time to post anymore.  I grabbed my cellphone and took a few photos the next time I made them, hoping to get them posted.  I never did.  But tonight?  I'm racing with the clock to type this quickly, and get it up as ten other things are going on around me, dinner is ready and Mr. Husband is literally expected to drive into the driveway at any second!

But it needs to be here to make it super easy for me and my kids to find to make these.
 
Roast Beef Sandwiches

2 T olive oil
2-3 t minced garlic
1/4 t red pepper flakes
1/2 lb. sliced roast beef (mine comes from Sam's Club in the meat/deli area)
1/2 c beef broth
1 t Worcestershire sauce or, a little balsamic vinegar or red wine
2 t liquid aminos or soy sauce
2 t dried parsley
2 t dried basil
1/4 t salt and dash fresh cracked black pepper
1/2 t oregano
provolone or swiss cheese slices
buns

In a skillet, heat the oil.  Add the garlic and dried red pepper flakes.  Heat for 1 minute then add the roast beef slices, broth, Worcestershire, liquid aminos, parsley, basil, salt and pepper and oregano.  Heat through.  Lay bottom buns in a pan, top with the meat.  Drizzle the sauce over, top with cheese slices and the top bun.  Drizzle the top with a little more sauce.  Heat in an oven until the cheese melts.


These are not photos from the same night as the very top photo - these were another night we had them!


A little more on top... optional


I sometimes put a wire cookie cooling rack on the bottom of the pan and the sandwiches on top, which keeps the sauce completely off the bottom bun if you don't want any liquid on the bottom.  Other times I don't bother.  If I don't use too much sauce, it doesn't really affect the bottom bun.  If you use a LOT of sauce and the bottoms get a bit soggy, just flip them over and back into the oven to crisp up the bottoms.  Flip again and serve.


Print Friendly and PDF