Showing posts with label Holidays. Show all posts

12/2/24

It's that time... the 2024 Christmas Cookie List


Briefly popping in to the mostly-neglected recipe blog to update my 2024 Christmas Cookie List.
I really should say 'idea' list though as I brainstormed a list a couple weeks ago, but more than likely will change and adapt it as I go along.  There are currently 17 recipes on the list but I usually end up making between 22-26 so I know I'll have more when I make up the trays and boxes.  


2024 Current Christmas Cookie Idea List

  1. Russian Tea Cakes (or sometimes called Mexican Wedding Cakes)
  2. Angel Bars
  3. Cream Wafers
  4. English Toffee (maybe)
  5. Harris Fruitcake
  6. Gateau Bonbons
  7. Pretzel Bites with Rolos, Kisses and M&M's
  8. Peppermint Meltaways
  9. No Bake Cookies
  10. Peanut Blossoms
  11. Peanut Butter Fudge
  12. Salted Nut Chews
  13. Sugar Cookies - Trees for sure, maybe Mittens and Hats too.
  14. A second style Tree shaped sugar cookie
  15. Molasses Cookies
  16. Macarons
  17. Chocolate Chip Cookies with Red and Green M&M's


Reposting an older blog post page because I already have links included on that year's list and I don't feel like taking all the time/work to link anything right now.  PAGE:  https://www.housewifebarbie.com/p/blog-page_2.html


Almond Macrons
  Mexican Wedding Cakes (or Russian Tea Cakes)
  Fruitcake Bars (no bake)
  Molasses Ginger Cookies
  Homemade Chocolate Truffles
  Cream Horns (easy with Puff Pastry!)
  Cut out Sugar Cookies with an easy Glaze
  Peppermint Meltaway Cookies with Crushed Candy Canes
  Homemade Girl Scout Style Thin Mints
  M&M Kiss Pretzels
  Cream Wafers
  Peppermint Pretzels
  Candy Striped Cookie Sticks
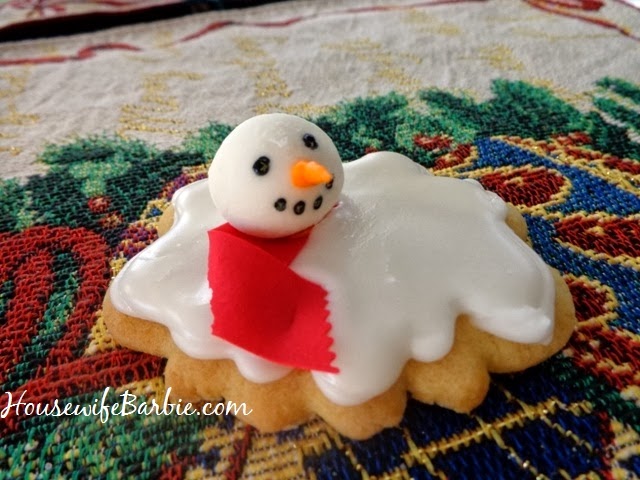
  Melted Snowman Cookies
  Stenciled Icing Sugar Cookies
  Peanut Blossoms
  Peanut Butter Fudge
  Sugar Cookies:  Snowflakes with Edible Glitter
  Red Velvet Cake Balls
  Gateau Bon Bons
  Swedish Rosettes
  Peppermint Teacakes
  Salted Nut Chews
Sugar Free, Low Carb Cinnamon Spice Cookies
Sugar Free Mexican Wedding Cakes
Mini Peanut Blossom Muffin Tin Cookies
Mittens and Winter Hat Sugar Cookies


Print Friendly and PDF

2/10/24

Raspberry Macadamia Cheesecake Cookies


I made two sizes - these are the larger 3-4 inch size, warm with a fresh raspberry glaze


Valentines Day is coming up this week, so it seemed like a good time to make the family some cookies.  These are cheater cheater cookies - (cheater cheater, cookie eater) because they use a cake mix instead of having to come up with the flour, sugar, etc.

Raspberry Macadamia Nut Cheesecake Cookies

1 white cake mix
1 egg or equivalent egg powder/water to equal one egg
1-2 t vanilla
1 - 8 oz. pkg. cream cheese or powdered cream cheese with water to equal 8 oz.
1 stick butter (1/2 cup) (canned, or butter powder/liquid to equal)
1/3 c freeze dried raspberries
1/2 c macadamia nuts (you could use white chocolate chips if you wish)
optional:  sugar to roll the dough balls in

3/4 c powdered sugar
1 T corn syrup
1 t raspberry extract or emulsion (or use more freeze dried raspberries if you don't have this)
vanilla - dash
milk, cream, coffee creamer or anything similar, even water in order to thin the glaze


Mix the cake mix, egg, vanilla, soft cream cheese and butter.  It will be thick and sticky.  Stir in the nuts and raspberries.  Form balls or scoop to size, roll the dough into granulated sugar before placing it on a greased or parchment paper lined pan.

Bake at 350 for about 11 minutes.  Let the cookies on the cookie sheet for about 3 minutes, remove to a wire rack to cool.

Mix the glaze and spoon or drizzle over the cookies, either letting it drip, or smooth it out with the back of a spoon or butter knife, etc.  Let cool completely and let the glaze harden.


Just barely stir in the raspberry pieces - too much and they'll break down and turn your cookie pink.


Warm from the oven, with fresh glaze... I made 2 sizes.  These are the small 1 1/2 inch size.


A couple of the ingredients from the pantry


Print Friendly and PDF

12/20/23

A Cookie A Day Until Christmas: Graham Cracker Marshmallow Fruitcake Bars (No Bake)


I was 'gifted' these fruitcake bars on a plate with various other cookies and candies by a co-worker at my job, years and year (and years) ago.  I would have been about 21 years old at the time and although my husband and I enjoyed tasting the other goodies, neither of us wanted to taste the 'fruitcake' bars because neither of us liked fruitcake.  Finally, I relented and picked it up to smell it and then taste it.  Whoa!  This isn't fruitcake!  This isn't even remotely similar to fruitcake at all.  It was so good that I later had to ask my co-worker, (who became a dear, dear friend) for the recipe.

That was back around 1991 and I've been making this recipe ever since.  That dear friend passed away from breast cancer a few years ago and although I think of her a few times during the year for random reasons, it's without a doubt that she comes to mind every single year when I make these bars.

Not at ALL like fruitcake except they use candied fruit and nuts; it's a graham cracker and marshmallow base and once people get over the 'fruitcake' connotation, these bars fly off the serving plate.
 

No Bake Fruitcake Bars

1 lb. butter*
1 lb. mini marshmallows
3/4 c evaporated milk
1 lb. pecans
1/2 lb. walnuts
1/2 lb. whole green candied cherries
1/2 lb. whole red candied cherries
1 lb. raisins
1 lb. graham cracker crumbs

Melt the butter, marshmallows and evaporated milk in a pan on the stove over low to medium heat.  In a very large bowl mix the rest of the ingredients.  Add the melted marshmallow mixture.  Stir and mix well.  Press into a greased or foil lined 9X13" pan.  Press flat and freeze or refrigerate overnight.  Thaw a bit before slicing to make it easier.  Slice into 3 long sections or rows and slice each row into thin slices to serve.

**I've been using a little less butter over the past few years (perhaps 3 1/4 sticks instead of 4) and it's been perfectly fine.  Feel free to cut back a bit on the butter if you want to try it that way.  You can also change the amounts of the nuts, raisins and cherries, etc. I've used craisins some years, and doubled the red cherries and halved the green cherries, etc.  You can play with this recipe a bit.  


An easy way to press into the pan is to use a piece of plastic wrap on the top and then press or roll it flat.


Print Friendly and PDF

Hundreds of Christmas Cookie Recipes - lists and photos and links... oh my!

Older post, re-posting for 2022!


For the past 12 years or so I think the average number of different recipes I make is somewhere around 24-26.  


I've been doing this for SO LONG that I don't really care to re-invent the lists and posts yet AGAIN. Seriously... I think this particular version of my site goes back to 2006.  Instead... I'll just cut and paste of the many lists I've made at some point in the past, as well a few random photos of goodies and links - no particular order or reason.

IF YOU WANT TO SEE MORE JUST USE THE SEARCH FUNCTION ON THE PAGE OR CLICK ON THE CHRISTMAS OR COOKIE OR CAKE OR DESSERT LABELS.

December 1st:  Molasses Cookies
December 2nd:  Chocolate Caramel Thumbprints
December 3rd:  Peppermint Pinwheels
December 4th:  Candy Striped Cookie Sticks
December 5th:  Peppermint Teacakes
December 6th:  Peanut Butter Patties
December 7th:  Peanut Butter Fudge
December 8th:  Sugar Cookies:  Snowflakes with Edible Glitter
December 9th:  Swedish Rosettes
December 10th:  Cream Wafer Cookies
December 11th:  Cherry Poppy Seed Winks
December 12th:  Peppermint Pretzels
December 13th:  Candy Pretzels
December 14th:  Homemade Truffles
December 15th:  Cream Horns
December 16th:  The Best Brownies
December 17th:  Red Velvet Cake Balls
December 18th:  Glazed Sugar Cookies
December 19th:  Gateau Bon Bons
December 20th:  No Bake Chocolate Bars
December 21st:  Peppermint Meltaways
December 22nd:  Melted Snowman Cookies
December 23rd: No Bake Fruitcake Bars
December 24th:  Mini Peanut Blossom Muffin Cookies


 RANDOM LINKS FROM OVER THE YEARS......... 2006 - 2020


Peppermint Melt-aways


 Christmas Cake Balls

Cream Horns


Print Friendly and PDF

Baking Spirits Bright for 2022 - Christmas Cookies and Candies


Cookie Ideas and recipe links:   Baking Spirits Bright in 2022 


Print Friendly and PDF

Christmas Goodies for 2022 - PLUS my almond chocolate truffle recipe


ALMOND TRUFFLES - so, my almond truffles have a creamy almond flavored center (no hard nut) and are a staple around our house for years and years.  It's funny that each time I post about them on my site I mention I should take some new photos, as I just usually use the ones I already have - like I did on the post about the truffles from 2018. (Truffle post link here)

But this year I DID take new photos!  OK - so I quickly snapped a couple on my cell phone.. and they suck but this site isn't about pretty photos - it's about the food.  :)

Creamy Almond Truffles


Almond Truffles

1/2 c evaporated milk
1/4 c sugar
2 cups milk chocolate chips
1/2 t almond extract
1 c finely chopped toasted almonds
OR 1 cup melted chocolate almond bark for dipping (or extra chocolate chips)
and melted white almond bark for drizzling

Combine evaporated milk and sugar in small saucepan. Cook over medium heat until mixture comes to a full boil. Boil 3 minutes, stirring constantly. Remove from heat. Stir in chips and almond extract, stirring gently until smooth. Chill mixture about 45 minutes until it can easily be shaped into balls. Roll into the crushed nuts or dip in melted chocolate. Drizzle or sprinkle with nuts if desired. Chill to harden quickly.

NOTES:  Normally I just do the typical truffle 'ball' shape. It's quick.  It's easy.  It's easy recognizable as a truffle.  But this year I mixed it up a little by making shapes.  Then, I realized I had some leftover royal icing in a decorator bag sitting right there on the counter from another cookie, so I grabbed it and topped them all with a dollop. 

They turned out really pretty and it's nice to do something different with them after all these years.  Same recipe - just played with the shapes. 


 You can see the truffles sitting behind this box of goodies...


Print Friendly and PDF

12/13/22

Pinecone Cookies (Wooden Mold Pinecone Cookies)


Not a great photo - but I was taking it quickly on my phone while also playing 'superheroes' with a busy 2 year old toddler!  Ha ha.  I don't think it shows how detailed and realistic they really are!


It took some trial and error, some thinking, some patience.  In the end, I figured out what worked for me, and although these photos are from my 'first' trial run, this is a cookie that will now be made in triple batch so it can be an addition to our cookie trays and boxes this year.

NOTES:  Use your favorite gingerbread or chocolate cookie recipe.  I opted for a chocolate sugar cookie dough because no one in our family likes gingerbread.  (I make our 'gingerbread men' out of chocolate sugar cookie dough as well!)  A dry, non-sticky dough works best and using one with little or no baking powder or baking soda will help keep the details and edges on these cookies sharp.  You can also keep them nice and detailed by placing the baking sheet and cut-out cookies into the freezer for 10+ minutes before baking.  I did not do that for the cookies in these photos as this was my trial and error afternoon - first run.

Pinecone Cookies

1 c butter
1 1/2 c sugar
2 eggs, room temp
1 1/2 t vanilla
3 1/2 c flour
2/3 c cocoa
1/4 t baking powder
1/4 t salt
powdered sugar optional

Cream the butter and sugar until light and fluffy.  Add the vanilla and eggs and mix well.  Add the flour, cocoa, baking powder and salt.  Mix a nice dough similar to playdoh, not too sticky.  If it's too sticky, add another tablespoon or two of flour.  If it's too dry and crumbles, add a teaspoon or two of milk or water until it comes together.  Form 2 disks, place in refrigerator until ready to use.

Prepare your pinecone mold with cooking spray oil like Pam.  Dusting the mold with cocoa, flour, etc. does not help it come out easier and the best thing I found was to re-spray the mold every 2 or 3 cookies.  Press a piece of dough into your mold.  You can keep it thick or use a knife to cut/scrape the excess dough off the back.  Thunk it on a counter top a few times to get it to start to come loose from the mold, help it a bit with your finger or tip of a butter knife, but the best way to get it out is to thunk it a few more times on the counter as it makes its way out on its own.

Place on an ungreased baking sheet.  Repeat to fill the sheet.  Place in the freezer 10 minutes while you preheat the oven to 350.  Bake about 12 minutes until done.  Remove to wire to cool completely.

To decorate with 'snow' hold the cookie up, vertically and use a sieve with powdered sugar in it to lightly shake back and forth over the cookie so it falls on it as if it were snow.  The edges of the pinecone sticking out is where the powdered sugar will gather - giving it a snow dusted look.

Serve or freeze until needed.  You can freeze them without the powdered sugar, and add that just before serving at a future date.


This is the pinecone mold


Print Friendly and PDF

7/3/22

Cherry Dessert Trifle Recipe: Grandma's Vintage Cherry Dessert Recipe Meets White Cake and Becomes a Trifle


I love to look 'back' and see what I was doing on certain days in years past.  I did this when I was younger and kept diaries, I've done this with old calendars I've tucked into an office drawer or storage box and I do it with recipes as well.

It is a holiday weekend here in the States but I'm not out celebrating... I'm home.   I'm waiting on a refrigerator delivery.  If you follow me on Instagram, then you already know that story.  They didn't show up yesterday (well, they paused for 10 seconds in the street in front of the house and drove off, claiming no one was home so they didn't have to deliver).   After some phone calls they are supposed to deliver (again) today.  

Sitting here this morning, enjoying morning coffee, I briefly wondered what I was doing 10 years ago and what I was making.  I clicked back to 2012 and saw a yummy dessert I had made.  I blended my Grandma's Cherry Dessert recipe with an 'extra' white cake I had made and came up with this dessert. 

Cherry Dessert Trifle


______________________________________________


Original Post:  July, 2012

Just because I used a from-scratch white cake doesn't mean you have to.  Simple use a white cake of your choice.  You can also play with the filling.  Blueberry, cherry, strawberry...  whatever you wish.  I particularly like cherry pie filling with this and although I do sometimes make my own, I had a can of cherry pie filling in our camping supplies and it was the perfect 'quick' filling I needed.

Cherry Dessert Trifle

1 white cake of your choice
1 can cherry pie filling
1/2 cup (approximate) graham cracker crumbs
2 T melted butter
2 cups whipped cream (you could use spray whipped cream in a can)
1 c heavy whipping cream (or use 2 cups Cool Whip)
2 T sugar
1 package cream cheese

Cut the cake into cubes.  This is sometimes easier if it's frozen first.  But they don't have to be 'pretty' as no one will see them. Place 1 cup of the whipped cream in the bottom of a glass dish.  Top with the can of cherry pie filling and push down a bit into the crevices of the bowl between the cake squares.  Smooth evenly on top.  Mash the graham crumbs with the melted butter and place over the cherry layer.  Mix the whipping cream with the sugar and cream cheese.  Beat smooth.  Spread this over the graham layer.  Top with the last cup of whipped cream.  Add a cherry or strawberry or blueberry for garnish to compliment your filling.  Chill at least 2 hours if you can before serving but up to 6-8 hours.


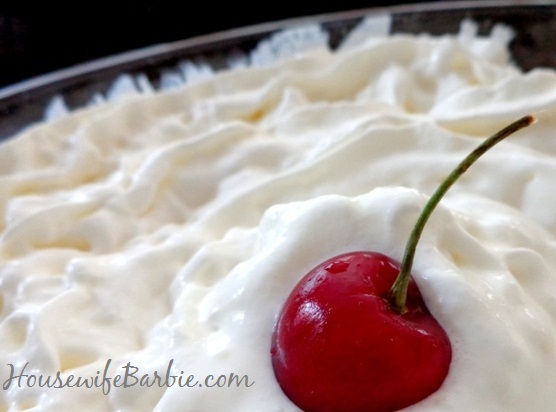
I think this tastes best with cherry filling

I left off the melted butter this time but it was too powdery. Add the butter to the graham crumbs.

Mixing the cream, sugar and the cream cheese.  I love this layer.


Print Friendly and PDF

6/18/22

An American Housewife: Keto Coconut Custard Cream Pie - (including the pie crust - with a secret ingredient making it simple)


I had a few reasons to make this pie this weekend.  The first being to use up rainbow colored coconut sprinkles in my pantry that were taking up space for months and months now (since I don't cook with coconut flakes often).  The second was to do a trial run using the pancake mix as a pie crust. 

I have a Birch Benders Keto pancake mix in the freezer that basically just lives there rent free (also taking up valuable space) because frankly, I don't really care for pancakes made from it.  I won't waste food though so when I try a keto or sugarfree/low carb food I'm not thrilled with, I find other ways to use it up.  

I was going to make the typical almond flour crust for this but saw the pancake mix and decided to try it.  It worked great!  It was seriously perfect as a pie crust and didn't puff up at all during baking, and wasn't in the least bit pancake like.  I don't care for it as a pancake mix, but I'm happy with using it as a pie crust mix now.


Keto Coconut Pie

Pie Crust:
1 cup Birch Benders Keto Pancake Mix
1 egg
1/4 c softened butter

Filling:
4 eggs
2/3 c natural sweetener of choice (like erythritol/monkfruit mixtures)
1/2 t vanilla
1 t coconut extract
1/4 t salt
1 can Thai Coconut Milk (13.5 oz. can)
1 t xanthan or other keto thickener
3/4 c unsweetened coconut flakes


Mix the keto piecrust mix with the single egg and softened butter in a bowl.  Mix well until it is completely mixed and forms a ball of dough.  Spread and press into a pie plate.  Bake at 350 for approximately 12-15 minutes.  Remove and let cool while you make the filling.

Mix the eggs, sweetener, vanilla and coconut extracts and salt in a bowl, beating well.  

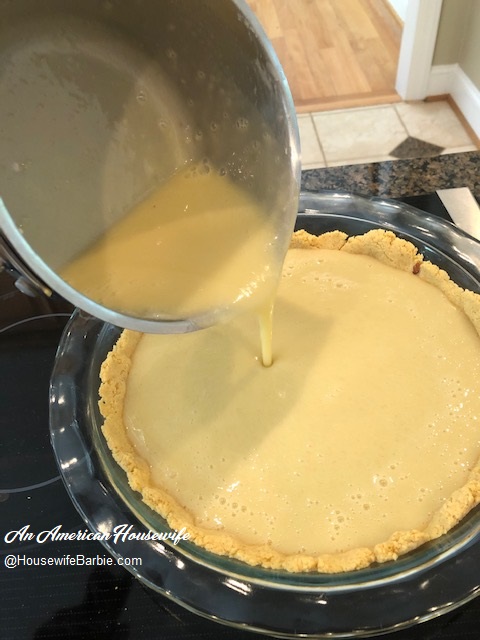
In a small saucepan on the stove, whisk about 1/3 cup of the coconut milk with the thickener.  Stir over medium heat until it starts to thicken.  Slowly drizzle this over the egg mixture in your bowl.  Pour it all back into your saucepan and heat, stirring constantly for another 2-3 minutes, then pour into your pie shell.

Top with the coconut flakes.  Bake at 350 for 35 minutes or until the custard center is 'set' and hardly jiggles when you wiggle the pie plate.  Remove and cool completely on a wire rack.  It will set up more as it cools.


I didn't care about how 'pretty' the pie crust was, so I just pressed it in and baked it quickly.


The filling, ready to pour into the crust


The custard filling


My coconut flakes are multi-colored as I used them for sugarfree 'sprinkles' on cookies previously.


A rainbow colored coconut pie


This is before it went into the oven.  It turned golden brown on parts after baking (see top photo).


Print Friendly and PDF