Showing posts with label Beverages. Show all posts

2/11/24

Birthday Cake Coffee Creamer


Quick photo of mixing up some coffee creamer yesterday.  I don't use creamer in my hot coffee, but I do when I have iced coffee.  My husband likes peppermint mocha creamer in the winter time, but yesterday I was thinking Birthday Cake flavor sounded good.  It's a 'taste and adjust to your own likes' type thing though - so if anyone is reading this and wanting to make it, just keep tasting it and adjust your flavors based on what you have on hand and what you like best.

Base:   1 can sweetened condensed milk
Add about 1 cup worth:  Whole milk, half and half, cream - (shelf stable, powdered made into milk, cream powder with water, etc.)
Extract:  Cake flavor and vanilla;  OR a mixture of vanilla/almond;  OR   vanilla/almond/butter extract; OR LorAnn Princess flavor with a dash of extra vanilla


Shake well or use an immersion blender briefly to mix.  Store in your refrigerator.  Use as you wish in any coffee drink, or even hot chocolate drinks, or hot milk. 


Print Friendly and PDF

1/31/24

Refilling Nespresso pods


Just a quick filler post while I sip coffee... and was thinking about it.

My favorite coffee right now is the Vertuo Nespresso. 

I tried the 'foil' lids you use when you refill a Nespresso pod with your own coffee - I like them!

  • I empty the collection basket from the back of the machine, and cut off the foil top.
  • After washing, let them dry completely.
  • Using foils that had been purchased as well, I refill each of the pods and apply the foil top make them 'new' again.
  • The coffee brewed this way tastes much better than refilled k-cup pods!

Doing this, I can use up the ground coffee and the coffee beans I have in the pantry. I will be able to do this until my package of foils are gone.  At that point I'd have to decide whether to invest in more foils (about $10 I think?) - I really don't want to spend any money though.  


Print Friendly and PDF

1/23/23

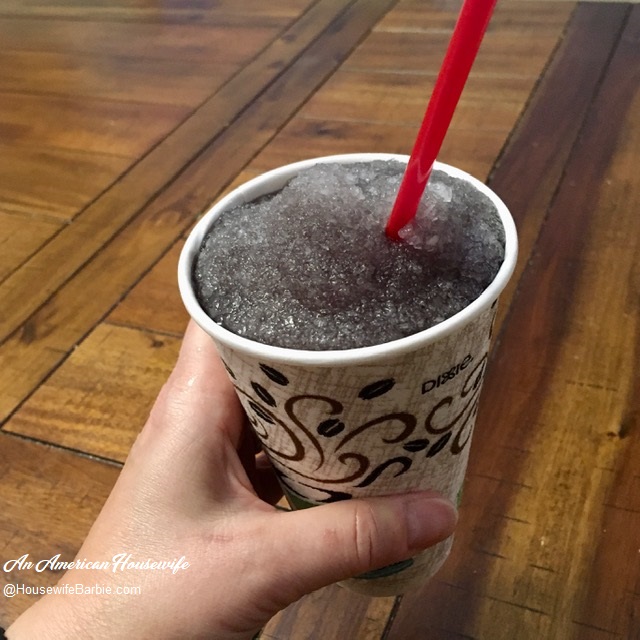
Sugarfree Homemade Slushees (or Slurpees - different areas call them different things and I've lived all over the country so I use both!)


I'm a slurpee-slushee-Icee kind of girl... but I almost never, ever buy them because they are full of sugar.  I've think I've only had 2 or 3 in the past 10 years.  Instead, I typically make due with crushed ice and water-flavor drops or sugarfree flavored syrups, which is fine. But when I want the real deal, or as close to the real deal as I've come here at home, and still be sugar-free this is the one I use.

This weekend I've been on a homemade slushee kick at night and craving them.  This is actually a really good way to use up some of those 'odd' flavor oils and extracts that come in a variety package  that you had to buy because you needed 'one' of the flavors and the rest just sit in the cupboard, or you randomly bought because they looked good, or were a good sale.  (This is why I have cherry flavor - it came in a variety pack that I needed the peppermint oil in, and the grape flavors were on clearance and I thought they sounded good but I've never, ever used them for anything other slushees.)

I WISH I could do a home version of the Icee.  Blue Raspberry is my favorite but Icee's are made with a special machine to get their texture, if you blend this one on high until it's frothy it's kinda close, but basically made, these are more of a slurpee/slushee.

đŸ‘‰These are typically made with Club Soda but I don't have any right now.  What I DO have is a few cans leftover from Christmas entertaining of sugar-free Sprite.  This was a great way to use those up (we don't drink them, but were for entertaining guests).  You can use Sprite or 7-up if you don't have club soda.

Play around with flavors; I have grape and black cherry Kool-Aid powder packets on hand so that is what I make.  You could do Lime or Orange or whatever flavors you wish.  Just make sure your flavor extracts 'match' or compliment your Kool-Aid flavor. 

Last hint:  I like to add a little bit of citric acid to mine sometimes as I love sour things more than sweet and a sweet/sour slushee is yummy when you like things like sour gummies, etc.

This makes one large or 2 small slushees

SUGAR FREE SLUSHEE

1 cup or mini-can club soda or sugar free sprite or 7-Up
1/4 c granulated sweetener (I like to use erthritol and monk fruit blends)
1/4 t (scant) dry Kool-Aid powder mix (grape and cherry shown in my photos)
1/4 t (scant) extract or oil flavorings - taste test to see what your level of flavor is preferred
1 1/2 c (or so) crushed ice
A good blender

Put the soda, sweetener and flavorings into a blender and blend or pulse smooth. Add the ice and continue to pulse or blend a little bit until all the bigger chunks of ice are uniform and tiny.  Pour into a large cup (about 12 oz) or make 2 smaller.  Taste test to know next time if you like to add more or less of the powder, extract or sweetener.  Also, if you like sour candies/drinks try adding about 1/2 t of citric acid granules to kick it up a notch.


My grape sugarfree slushee... ready to enjoy last night while I watched episodes of Friends on my computer


Blending the mixture to crush the ice uniformly....  you can taste test at this point and add a little more powder, extract or even sweetener if you think it needs more of something.  I like the amounts as they are written above but everyone has different tastes!


I don't measure the ice, I just fill the cup with crushed ice from the refrigerator and toss it in.  This is about 1 1/2 cups as it's a 12 oz. to-go coffee cup.


These oils keep forever and never go bad... but you still want to use them up, right?  Ha.  This is my grape flavoring.


The dry Kool-Aid packets... here is grape and black cherry.


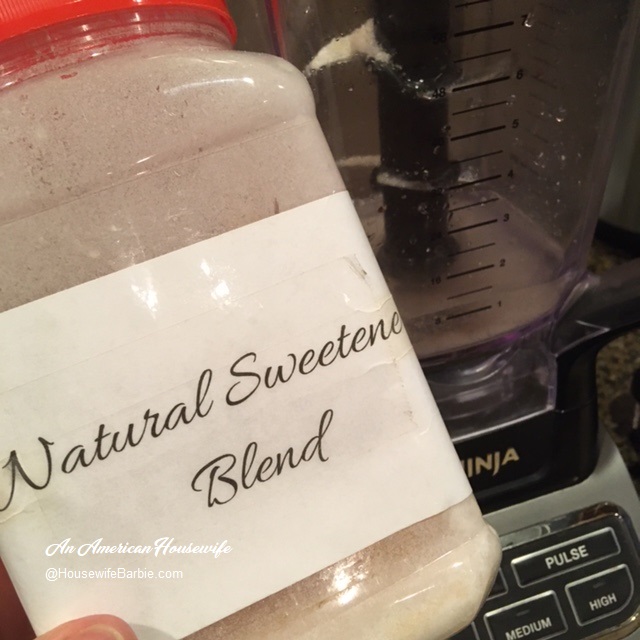
I like the flavor of mixing more than one natural sweeter so I keep a container in my pantry where I dump in new bags of sweetener(s).  Use what you like.


I bought these for some of the house guests we had here at Christmas last month.  We don't drink them so they were leftover, but because I don't have club soda in the pantry right now, these work well.


You can use extracts if you have them (the bigger bottles that you find in the baking aisle at your local grocery store, or you can use flavored oils, which are more intense so you can use a little less.  I like strong flavors so I use the oils since I have them on hand anyway, but I also have emulsions and extracts I use too depending on what flavor I want that day.  


Print Friendly and PDF

9/24/22

Sugarfree Sweetened Condensed Milk Recipe - trials using some powdered heavy cream and previously frozen almond milk from my emergency storage

This post has multi-levels of information! 

1)  A homemade sugarfree version of sweetened condensed milk
2)  A keto version of sweetened condensed milk
3)  Wanting to do a 'trial' recipe using previously frozen almond milk from my deep freezer
4)  Using some heavy cream powder from our emergency storage


In regular baking, there are many recipes that use sweetened condensed milk.  It's so easy to grab a can off the shelf and make the baked goods.... but not so easy when you are sugar free and/or keto or low carb. 

In 2015 I posted a recipe for a sugarfree keto version of sweetened condensed milk, followed up by a post in 2019 because it's so awesome to use in my favorite homemade keto ice creams. 

A few weeks ago I whipped up a batch of sugarfree sweetened condensed milk so I could have some on hand in the refrigerator for my favorite ice cream, cheesecake and bar recipes.  However, I had to play with my recipe to use things I had on hand since I was low on heavy cream and I wanted to try using previously frozen almond milk from my freezer storage. 


I believe in prepping for emergencies (if you follow me you already know that).  One of the things I've tested over the past 2 years is freezing things like whole milk, almond milk and heavy cream.   Milk freezes beautifully short term but I found heavy cream and almond milk separate.

My goal was to see if using previously frozen almond milk and powdered heavy cream powder could result in positive outcomes in cooked recipes (hoping the separation would come together or cook into the final product).  And it did.

Sweetened Condensed Milk - sugarfree

2 1/2 c heavy cream
1 c almond milk
1/2 c powdered sweetener mixture of 2-3 kinds; like monkfruit, erythritol and xylitol
1 T butter
1/4 t xanthan gum

In a saucepan, place the cream and milk and bring to a boil, reducing to medium low immediately.
Add the sweeteners, butter and xanthan gum.
Simmer, stirring, until it's thickened and reduces by half.
Let it cool down about 20 minutes and pour into sterile, glass jars
Store in the refrigerator


NOTES

This time I added the butter, sweetener and xanthan at the simmering stage instead of waiting til the end; no problems.

I only had a little bit of heavy cream so I substituted the Hoosier Hill Powdered.  I used the directions on the container (3/8 cup of powder to 1 cup water) but then added another tablespoon or so to make it nice and thick(er) for my use.

The big trial was my almond milk.  I wanted to know if I could stock up and save containers in the freezer.  It separates upon thawing and although you can shake and blend it and it comes together a little bit, it doesn't go back to the original state, which makes it gross to drink but seems to work beautifully in cooked items like this condensed milk, puddings, etc.  


You can see how the separated almond milk and the powder make a rather grainy liquid before cooking. No worries it was smooth as normal once it simmered!


This was a video that I took a photo from showing it being stirred while cooking

Thickening up!!  Smooth and perfect.


_____________________________

The almond milk I buy and freeze are the plastic containers I buy at Sam's Club.  They are grainy and separated upon thawing and I was afraid they were useless but in cooked goods, they turn out perfectly.

I mentioned my emergency storage heavy cream in the post above.  I have Hoosier Hill Farm's brand and it performs wonderfully.  I can't speak to other brands. 


Print Friendly and PDF

4/24/22

A good day for an iced coffee frappe' (blended) kind of like a yummy coffee slushee!


I use ALL kinds and flavors of coffee when I make iced coffee!  I just happened to want to use up the last of the beans in this particular bag.  This day I used a rum barrel aged coffee bean, ground myself, brewed as an espresso over ice and added a splash of sugar-free vanilla syrup and topped it off with whipped cream and a sprinkle of espresso powder!


THIS ICED COFFEE:

4 oz. espresso
3-4 cups ice
splash of sugarfree vanilla syrup
Whipped Cream
Instant Espresso Powder sprinkled on top


Print Friendly and PDF

3/1/22

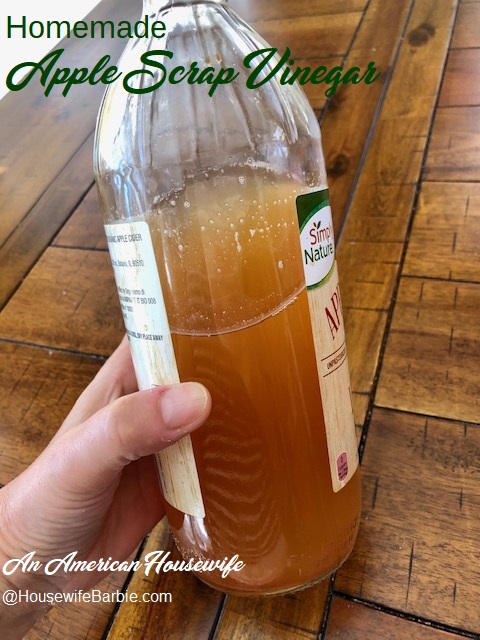
Homemade Apple Scrap Vinegar (also called Homemade Apple Cider Vinegar - although there is a difference, including in the acidity level)


In our family, we don't waste food.  Before anything is discarded, thought is given to what else I can do with it.  When it comes to apples, I love getting the peels and scraps to make into homemade apple scrap vinegar.

Apple cider vinegar at the store is pretty expensive! You can make a similar homemade apple scrap vinegar for free.

You can't use it for home canning as it's not acidic enough but I don't use my apple cider vinegar for canning anyway.  We use it for daily health, or in a healthy tea or usually - salad dressings and side dishes like cucumber salads, etc.  

I love it because it's a little more 'drinkable' than the more acidic cider version, meaning it's not as strong.  It's not as 'harsh' on the palate but still has all the healthy, yummy goodness.)

It's SO EASY and all you need are apple scraps, a container and something to cover it with.

And time.  About 2-3 weeks.


My little 'ghost'...  


Take a peek under the cheesecloth... 


No longer fizzing, it's done fermenting.  It tastes and smells like a fresh apple vinegar smell.


Time to strain it into the container I'll be keeping it in.


In my case, I use an old apple cider vinegar bottle. 


Apple Scrap Vinegar

Apple peels and cores leftover from pie, applesauce, snacking, etc. (washed before you peeled them of course)
A clean glass jar or crock (nothing metal)
Sugar
Cheesecloth and a rubber band
Water

Place your scraps and peels into a very clean jar or crock - the size, according to how much you have.  It can be a tiny jar with one or two apples' scraps or a whole lot of cores and peels from a major home canning project and maybe use a large gallon jar.  

Add water to fill, making sure it is enough to cover the peels and cores. (I've never had a problem using water from the tap.  Our water is 'city' water but it works just fine in my apple vinegar and my homemade wines.)

Add sugar of your choice - and the amount doesn't have to be precise.  For my 2 cups of water I used 2 'scoops' of sugar which was probably close to about 2 tablespoons. 

Mix a bit, and make sure the liquid covers the apples.  They may float up and peek over the water a bit, that's fine - because you'll be pushing them down at least once day.  If you have a crock made for fermenting, you can use the weights to keep it down as well.

Cover with the cheesecloth to keep little fruit flies, dust, etc. out but also to let the gases escape as it ferments so it doesn't fizz all over the place and do a little blowing up so to speak. Secure with a rubber band.  Now, set it in a nice, calm, warmish out of the way place.   

For the next week or two, check it at least once a day, and using a clean utensil every time, push the apple scraps down into the water a few times to swish it.  Cover it back up.   Do it again tomorrow.  And the next day.

Within a few days you should start to smell a little apple cider vinegar smell.  It should be a good, fresh smell.  You can also taste it and it will be a light taste, but over the next few days should get stronger.  

Keep checking and pushing down the scraps until it no longer ferments - or shows 'fizzing' around the edges.  When it's 'still' it's done working.  At this point, strain it into your container through the cheesecloth.  Cap it loosely and let it sit another 2 weeks to develop an even deeper flavor.

Now you can use it.  Dressings, salads, teas, drinking, cooking... cleaning.  Whatever you use your regular apple cider vinegar for, except (again) canning as this isn't strong enough. 


 Don't have enough 'scraps' yet?  No problem.  Keep popping them into a container
in your freezer until you get an amount you want to turn into apple scrap vinegar.
Here is my new 'batch' of scraps started in the freezer.


Print Friendly and PDF

7/16/19

Low Carb and Sugar Free Frozen Margaritas


Low Carb and Sugar Free Margaritas

1 c water*
1/2 - 3/4 c natural sweetener(s) of your choice
Zest of 1 orange or 2 teaspoons dried
1/2 t xanthan gum
1 c fresh lime juice
1 1/2 c tequila
lime slices
ice
salt

In a saucepan, place the water and sweetener with the orange zest.  Sprinkle xanthan gum over lightly while whisking briskly. Don't use a stick blender - I did once and it got really thick.  And don't use too much xanthan or you'll end up with... pudding. Most recently I only used about 1/4 of a teaspoon and found that's about right for me.

If you know you really like your margaritas a little sweeter, add a little more natural sweetener and taste test.  I used to use just less than cup total of a mixture of 2-3 natural sweeteners to get the best flavor.

Heat over medium low to medium (gently) until it thickens. Remove it from heat, strain through a wire colander to remove the bits of orange; and let it cool while you juice enough limes to equal 1 cup.

You can cheat and use store bought lime juice - it won't taste quite as fresh, but no one will probably notice or care.  I've done both.

Mix the sweetened mixture with lime juice and tequila.  Chill.

Salt the rims of your margarita glasses and use as is, or pour over crushed ice.

For a frozen, place a cup of mixture in the blender with some ice and pour into your glass.  Garnish with a lime slice or an unbrella.

*Everything can be adjusted to your taste. Add more sweetener, more lime, more water or less tequila to get the taste you like.


*Notes:
I have jotted down in pen at the bottom of my piece of paper that I had scribbled this recipe, that I used 'more water'.  So again, as thick and 'strong' (use more/less tequila if wanted) as you need/want the imitation triple sec (the orange mixture you cook on the stove) to be is up to you.  But remember it will be very liquidy once you add that tequila and the ice gets all melty.


I have some old paper drink umbrellas on hand from... must be years ago... because I barely remember buying them.  But I just checked and there are OODLES of them on Amazon.Print Friendly and PDF

4/21/18

Homemade Kool-aid Popcicles (using Kool-Aid and Jello gelatin)

Today is... warm!  And sunny!  And it has me looking forward to more warm and sunny days even though deep down I know starting tomorrow it's going to be rainy and cold.

I decided I wanted to make homemade popcicles and I was so surprised to search my site to see I haven't blogged about these since... get ready for it... 2007!  It's time. 


The recipe is the same one my Mom used to make these for me and my siblings back in the 70's.  And the little white popcicle molds in the photo?  Those are the actual Tupperware popcicle molds I ate my little homemade popicles from back in 1973!   My mother handed them down to me when I had kids of my own.


Homemade Kool-aid Popcicles

3 oz. jello
1 c sugar or sweetener of choice
1 pkg. dry Kool-Aid
2 c cold water
2 c boilding water

Mix all. Pour into your molds. Freeze as usual.


Print Friendly and PDF

3/16/18

Ruby Red Grapefruit Margarita


Ever since I can remember - meaning, as far back as a toddler - I have loved grapefruit flavored things; like drinks.  Diet Squirt, Fresca... I'm all over it.  But interestingly enough, I hate actual grapefruit.  On the flip side; my husband has never liked Squirt or Fresca or grapefruit 'flavored' things and loves grapefruit.  Go figure.

This week grapefruit juice was on sale so we picked up a bottle.  Actually, two because it was buy one, get one free.  On a whim, I decided to make grapefruit margarita's out of it just to see what I thought.  In the end, it's definitely grapefruity... like the 'real' grapefruit taste that my husband loves and I do not.  But it was also enough 'margarita' taste from the triple sec and lime to offset the grapefruit and because it's a frozen drink, that always is a plus in my book no matter what!  We used the 'diet' version (less sweet) of the juice.  I think regular grapefruit juice would be perfect in these but they quite tart with the 'half sugar' version and needed a bit of sugar syrup or sweetener to offset the pucker. 

Absolutely worth making again - especially this summer on a hot day!


Ruby Red Grapefruit Margaritas

1 c  ruby red grapefruit juice (I used Diet for half the sugar content of regular)
1/2 c  fresh squeezed lime juice (about 4 limes)
1 c  triple sec orange liqueur
3 c  ice
1 c  silver tequila
1 lime cut in wedges, optional Kosher salt

Rim the glasses with a lime wedge and dip in salt.  Set aside.  Combine the grapefruit juice, lime juice, triple sec and ice in a blender. Pour in the tequila, stir.


Print Friendly and PDF

5/10/17

Two recipes today: Italian Crescent Roll Squares and Lemon Poppy Seed Muffins!


This morning as I opened the editor to decide on a recipe I thought to myself "I wonder what recipes I posted on this day in the past?"  So I quickly just opened up an old random page and found a post from May 10th.  It just happened to be 2007 which is kind of neat considering it's now 2017.

So todays post is a blast from the past archives - originally posted on this day in 2007.  Re-posting 10 years later for 2017.  A hot Italian Sandwich made with crescent rolls - and a recipe for Lemon Poppy Seed Muffins!


Italian Squares


2 pkg. crescent rolls

14 oz jar roasted red peppers (drain)
1 can artichoke hearts, chopped
4 T Italian dressing, prepared
1/4 lb. pepperoni
1/4 lb. ham, sliced thin
1/4 lb. Genoa or Hard Salami, sliced thin
1 small can sliced black olives
1/4 lb. Provolone Cheese
1/4 lb Swiss cheese
1/2 c grated Parmesan cheese
3 eggs


Spread 1 roll of crescent rolls into the bottom of a 9" x 13" baking pan and seal the edges to make a crust. Layer the Ham, artichokes, Swiss cheese, Salami, Provolone, olives and Pepperoni over crescent roll bottom. Spread well drained peppers over top of the meats and sprinkle with black olives. Beat the eggs and cheese together pour over the top of the olives.

Use the 2nd container of crescent rolls to lay out on a piece of plastic, seal the edges and then lay it over the top, pressing seams to seal. Cover with foil. Bake at 350° for 25 minutes. Remove foil and bake an additional 15 minutes, until golden brown. Cool 10 minutes before cutting.


Lemon Poppy Seed Muffins


2 cs (280 grams) all-purpose flour
1 T poppy seeds
1/2 t (3.5 grams) salt
1/2 t (2.5 grams) baking soda
1/2 c (113 grams) unsalted butter
1 c (200 grams) granulated white sugar
2 large eggs
1 c (240 ml) plain yogurt (do not use non fat yogurt)
1 t (5 grams) pure vanilla extract
Zest of one lemon

Preheat oven to 350 degrees F (177 degrees C) and place rack in center of oven. Line a muffin pan with paper liners or else spray with a vegetable spray. Set aside.

In a small bowl, stir together flour, poppy seeds, salt and baking soda. Set aside.

In bowl of electric mixer, fitted with the paddle attachment, cream the butter and sugar. Beat in eggs, one at a time, beating well after each addition. Add the yogurt, vanilla, and lemon zest and beat until well blended.

By hand, stir in flour mixture until just moistened. Do not overmix. Spoon batter using either two spoons or an ice cream scoop into greased or paper lined muffin tins and bake for 18-20 minutes or until a wooden toothpick inserted in center comes out clean. Cool muffins on wire rack for 5 minutes before removing from pan and serving.


For The Glaze:
1/2 c (60 grams) powdered sugar
1 T fresh lemon juice

Stir together the powdered sugar and lemon juice. The mixture will be runny. Once the muffins are removed from the oven, wait five minutes, and then drizzle the glaze over the muffins with a spoon.


Print Friendly and PDF

3/28/17

MCT Oil Infused Coffee (using Caveman Coffee Co.)


Thanks to Caveman Coffee Co. for the coffee, and MCT oil used in today's post.  Find them at:  http://www.cavemancoffeeco.com


If you listen to what we thought we knew about coconut oil in the 70's and 80's, it's all false data.  It turns out this was due to studies using hydrogenated and partially hydrogenated coconut oil. That form of coconut oil does contain trans fats, and also contributes to a rise in serum cholesterol levels. That is not the coconut oil of today.  When you know better, you do better; and today we know more about coconut oil.

Coconut oil has about 119 calories and 13 grams of fat per tablespoon, similar to olive oil. It contains medium and short-chain triglycerides which break down in the body and are used primarily for energy production, not stored as body fat. Typically it’s recommended you consume one tablespoon of 'healthy fats' a day and if you are opting to use a coconut oil as that healthy fat (as many on Paleo diets do) then this is a great way to do it and even better way is to use a pure MCT oil derived from coconut oil.

MCT oil is liquid at room temperature and is tasteless. It's a great choice for those who don’t like the taste of coconut oil or who need a liquid oil at room temperature and not a solid.  (Look for MCT oil sourced only from coconut oil because many are sourced from palm oil, which is responsible for the destruction of the rainforest and has destroyed the natural habitat of the orangutan and Sumatran tiger.)   MCT's are easily digested, absorbed, and used as energy for the body.  MCT oil is colorless and virtually odorless.

When I found out Caveman MCT is made from coconut oil and is sustainably raised. I was happy to try their product in my "healthy fat infused" coffee trial. From their site:  "Caveman Coffee Co. MCT oil is sourced sustainably and is derived 100% from coconuts. We have made a choice to cut out Palm Oil MCT entirely. We believe in sustaining our environment and preserving the life in our rain forests."

This past week I've been trying a new morning coffee.  Coconut Oil (per MCT oil) infused coffee.  Using Caveman Coffee Co. Compostable coffee capsules and Caveman Coffee MCT oil.

Done right, I think you'll like this!

Do not just add oil to your coffee cup and expect to like it and drink it.  Well, you might, but it's kind of gross.  You know oil and water don't mix.  So you'll have a cup of coffee with a layer of oil floating on it.  Instead, blend it.


HOW TO MAKE IT

I know a lot of people use a blender to blend their coffee and MCT oil.  

Those people obviously like to clean their blenders more than I do or have more time to clean their blenders than I do.  

I suggest a stick blender.  I own a Cuisinart brand stick blender.  It's QUICK and EASY and FAST and works right in my coffee cup.  NO MESS.

I do have to say I like my coffee dark.  And strong.  And black.  Probably stronger than most of my readers.  So I opt more for an 'espresso' sized brew of the coffee capsule (k-cup).  I brew at 4 ounces but of course you can brew at the normal 8 oz. or whatever size you wish.

Add your MCT oil (I'd start with just 1 teaspoon and slowly work your way up after you see how you do.  It can have a laxative effect for some in larger doses.)  Now use your stick blender, placed into your cup, hit the button and blend for about 5 seconds and you get a creamy, frothy, amazing 'latte' style drink.  And if you wish to make a flavored latte drink, just add a splash of your favorite sugar free coffee syrup or sweetener!

It's heavenly.

A creamy, foamy latte style drink


Here is another thing I like about the Caveman Coffee brand... eco-friendly coffee pods!  Bypassing the plastic that is quickly filling our landfills, by producing packaging for their coffee and their k-cup style pods with materials that can be composted and used in your garden.


The coffee used in this coconut oil infused coffee trial is Caveman Coffee Co. Sabertooth Roast.

The Sabertooth Roast is smoky on the nose, with notes of campfire marshmallows, vanilla pipe tobacco, and toasted hazelnuts. It touts a balanced smoothness with a hint of lemon peel on the finish.


Thank you Caveman Coffee Co. for providing the ingredients for this post.


________________________________

Print Friendly and PDF

1/2/17

Is that a dessert wine? Cupcakes and Wine!


Honestly, I'm not sure where this came from originally... I found it long, long ago and kept it in my personal files.  It just so happens today is my daughter's birthday and we have cupcakes.  And wine.  And when I saw this old image in my personal saved files I just chuckled and thought;  Yeah, that's fitting!

For the record - we have a chardonnay and a rose' wine and the cupcakes are vanilla.  Apparently we've paired the wrong wines with the wrong cupcakes.  ;)


Print Friendly and PDF

3/4/16

Low Carb and Sugar Free Margaritas


Low Carb and Sugar Free Margaritas

1 c water
1/2 - 3/4 c natural sweetener(s) of your choice to equal 1/2 - 3/4 c
zest of 1 orange or 2 teaspoons dried
1/2 t xanthan gum
1 c fresh lime juice
1 1/2 c tequila
lime slices
ice
salt

In a saucepan, place the water and sweetener with the orange zest.  Sprinkle xanthan gum over lightly while whisking briskly.  I tried a stick blender once and it got really thick - if  you want your 'syrup' really thick, use a stick blender and/or a little more xanthan gum.  If you know you really like your margaritas a little sweeter, add a little more natural sweetener and taste test.  I use about a cup total of a mixture of 2-3 natural sweeteners to get the best flavor.  Heat over medium low to medium (gently) until it thickens.  Remove it from heat, strain through a wire colander if you wish to remove the bits of orange; and let it cool while you juice enough limes to equal 1 cup.  You can cheat and use store bought lime juice - it won't taste quite as fresh, but no one will probably notice or care.  I've done both.  Mix the sweetened mixture with lime juice & tequila.  Chill.  Salt the rims of your margarita glasses and use as is, or pour over crushed ice.  For a frozen, place a cup of mixture in the blender with some ice and pour into your glass.  Garnish with a lime slice.  *Everything can be adjusted to your taste. Add more sweetener, more lime, more water or tequila to get the taste you like.


Print Friendly and PDF

3/18/15

Homemade Shamrock Shake like McDonalds


Other blogs would probably take the time to doll this simple shake up; cutsie little glass or jar, whipped cream, sprinkles, whatnot.  

Remember though; that's not me.  That's not my blog.  I'm not a food-blog wanna be. This website was started as my personal site long before those were 'the thing'.   I give myself a pat on the back when I remember to take a picture on my cellphone before serving it to my family. 

So feel free to cutsie up this shake as much as you want.  All I needed was a minty Shamrock Shake to whip up quickly and take outside where we were enjoying a fire on the patio before dinner.


Minty Shamrock Shake
2 1/2 cups vanilla ice cream
1 cup milk (I used almond milk)
3 drops green food color (about)
2 drops food/candy quality peppermint oil
3 drops food/candy quality spearmint oil
3/4 t vanilla extract

Place in a blender.  Pulse then blend on high til smooth.  You may need to add more milk if it's too thick or more ice cream if it's too thin to your liking.  You can make it cute with whipped cream, a cherry, etc. or just enjoy it as it is.


Print Friendly and PDF

5/29/14

A quick post to clear my files... Homemade Icee


This isn't really a recipe - but I need to clean out some of these files that are in my "post" folder!  

Simply add your ICEE flavoring to ice in a blender (I use my Mr. Coffee Frappe Maker) with a bit of your favorite brand sparkling water (you don't have to use carbonated water if you don't want to or if it's for the Little's who wouldn't care or know the difference anyway).  

Blend, pour and serve!  


Print Friendly and PDF

5/10/14

.... and homemade Rose Petal Wine


I'm really having fun with my foray into 'flower' wines. When you have a view like I do from my kitchen window (photo above) how can you not jump from dandelion wine to violet wine and rose petal wine? I'm actually not a wine drinker usually (ok, I rarely drink anything with alcohol in it... ever.  But making wine is so much fun!!!).

I decided to make my Rose Petal Wine in roughly the same way I made the Dandelion Wine (link) and my Violet Wine.  Using my own roses, I knew they had not been treated with any chemicals.


After picking my roses I put them into a crock and heated a half gallon of water on the stove to boiling.  I then poured the boiling water over them to steep.  While I left the dandelions for a couple days, I didn't do so with the rose petals because as you can see from the photos, the boiling water got all the color out of them right away, and there isn't much flavor to impart so that was immediate as well.  As a matter of fact, it was obvious that roses are part of the cabbage family as I could definitely note a cabbage undertone.


After the boiling water the petals were quick to lose their color.


After just 1 afternoon of seeping them, I strained and drained them, discarding the used petals and keeping the rose water.

After I added;

5 cups of sugar
1/2 t ginger
1/4 c lemon juice
1 t dried orange peel

I then decided to add 1 T frozen cranberry juice concentrate to deepen the rose shade just a bit.  

I warmed it briefly on the stove while I started about 2 teaspoons of yeast in a cup with a bit of warm water and a teaspoon of sugar.  Most people just add the yeast direct, but starting it has yielded really good results with my other two wines so I did this one too.  Your liquid can't be 'hot' or it will kill the yeast, so barely warm, I added the frothy yeast, stirred, and then poured into a clean, sterilized jug.  Topped off with a washed out balloon with a couple holes pricked into it, it went into the closet with the Violet Wine to ferment and bubble for a few weeks.


The Dandelion Wine was bottled.  The Violet Wine is on the tail end of fermenting as the bubbles and gas have almost ceased.  The Rose Petal Wine is fermenting and smells heavenly.  It seriously smells so good!  Even to someone who isn't a big wine drinker.  Somehow making my OWN wines makes me want to drink them all that much more!


You may also be interested in;
        

Green Wine Bottles (750ml Bordeaux) Case of 12 Bottles
Mushroom Corks (30)
Portuguese Double Lever Corker
#8 Straight corks 7/8" x 1 3/4". Bag of 30


Print Friendly and PDF