Showing posts with label Sauces and Gravies. Show all posts

3/13/24

Carne Asada Marinade (for street tacos) and the different LEVELS of food storage has paid off


There are some days I go to the kitchen pantry and see exactly what I need to pull off a meal and say "Oh Thank you God for this stocked pantry!", but then the next day I will need a couple items and go to the 2-3 year pantry and 'grocery shop' and come into the kitchen with 3-4 items I needed and "Thank you God you put it so strongly on my heart to prepare... and I had these exact items I need!"     And yet, this week I've been ever-so-thankful for my freezers.  Oh thankyouGod for my stocked freezers.... what a blessing they have been over the past 4 months!!!

And that is why I'm thankful this week because yesterday I was craving 'street tacos' - made with grilled, marinated steak.  

Great on thin sliced pork and chicken.  Great on steak too.  And normally I would have sliced these steaks thinner or into strips to get more marinade on them but I was in a serious hurry/rush to get this done ASAP and get out the door to the library to story time with the 3 year old so I got it together as fast as I could and left. Leave your meat/poultry thick if you wish for a mild flavor, but slice and marinade a long time for an intense flavor.

I grilled these last night, served with a sauce I whipped up from ingredients in the fridge and cupboard, pulled out a food sealed package of corn tortillas I had saved from 'leftovers' from when we had family visiting last July (?)  August (?). 

Carne Asada Marinade

1/2 c soy sauce  (Used liquid Aminos)
3 garlic cloves, minced
1 T vinegar
1 small jalapeno pepper, chopped fine
1/3 c lime juice (from the freezer, squeezed and froze last Fall)
1/4 c lemon juice (used all lime juice this time, no lemon)
1/2 t either chipotle seasoning or cayenne
1 T (scant) chili powder, cumin and paprika
3/4 t dried oregano
1/4 c fresh parsley (you can use cilantro)
1/2 c oil (preferably olive oil)
pepper (about 1/2 t) but not salt as the soy sauce is very salty

Place all in a ziploc baggy (double bag) or in a ceramic or glass container, and add about 2 pounds thin steaks or other meat.  Let marinade overnight.  Grill until done, slice across the grain and serve.  I opted to serve with tortillas, salsa, sour cream, cheese, avocados and lettuce.   


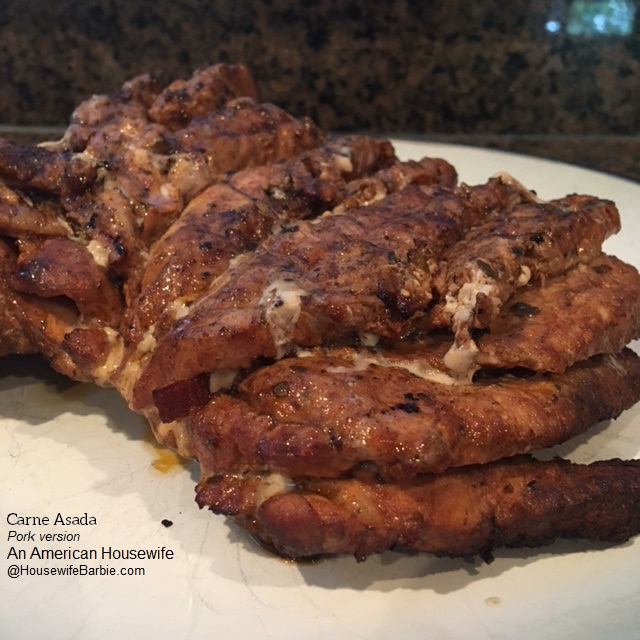
Here is a picture of one of the many (many) times I've made this recipe - this time with pork.  I use this same marinade on beef, pork and chicken - and love them all.


Print Friendly and PDF

3/7/24

Grilled Steaks


Here is a quick photo of the steaks with the simple marinade I always use in one way or another - I don't measure.


Steak Marinade

1/3 c soy sauce
2 T oil
1 T brown sugar
3/4 t garlic, minced (about 1 clove)
1 t ground ginger
1 t seasoning salt (like Lawry's) 

Mix all ingredients, whisk until blended and cover your favorite steaks with it.  I find it easy to use a gallon sized Ziploc baggy - place 4 or 5 steaks in it, add the marinade, flip it over a couple times to cover the meat and refrigerate for at least 30 minutes, up to about 3-4 hours.  Turn often to make sure the meat is marinated evenly.  Grill as usual to your favorite level of 'done'.


NOTE:  I often use Liquid Amino's or Coconut Aminios instead of soy sauce.  The photo above is Bragg's Liquid Aminios (similar in taste to soy sauce but healthier).  I used brown sugar 'sweetener' (zero sugar, low carb), and regular salt as I don't usually have Lawry's on hand and don't really fret it.


Print Friendly and PDF

3/3/24

Pioneer brand Country Gravy (White Gravy)


As I previously posted, we had mashed potatoes and chicken the night before last.  I made extra for lunch/dinner the next day. 

I wanted gravy with it the first night, but didn't want to bother making it.  However, I knew when I had the leftovers the second day I would get my gravy.  I wanted 'white' gravy or 'country' gravy, which I love and was craving, but I have always, (always) made it homemade. 

I've never in my life made gravy from a mix or a powder. 

I taught myself to make gravy as a teen by watching my mother and grandmother and honestly have never, ever bought a gravy mix in my life.  My kids now also only make gravy from scratch - brown gravy and white, country gravy (sausage gravy)... biscuits and gravy are a favorite and they all make them from scratch.

I picked up a couple of these at Sam's Club at some point in the past few years and I knew I had them in long term storage, although I had never opened one or tried one because... hello, I seriously just make it all from scratch.

It's just add water.

I kind of chuckled and laughed at myself... being middle aged before I ever learned how to use a 'mix' to make gravy. 

So, 1 1/2 cups of water put to boil while you mix 3/4 cup gravy mix with 1/2 cup cold water, then add it to the boiling water.  I kept it on the heat and whisked until it just got thick, then removed from heat.

First taste test:  well, it's not homemade.
Second taste:  Ok, not homemade, but... still ok.
Placed it on my mashed potatoes and started to eat my dinner.
Third and Fourth bites:  this isn't bad at all.
After that I just really liked it.  It's creamy, smooth and good!  I finished off almost all of it, because truth is, I'm a gravy girl.  I only eat potatoes or biscuits with it because it's probably not socially acceptable to eat it as a soup with a spoon.  Ha ha.

I am thrilled with this product not only because it actually tastes good (and mine is like, at least a couple years old at this point - I didn't bother going to check the best buy date on it because I'm in the office typing this and the product is in the kitchen) but because this is a GREAT option for food storage.

Just add WATER.

That's it.
Now you have a pantry friendly gravy you can also add sausage to for biscuits, ground hamburger to for hamburger gravy on potatoes, use as is for chicken, potatoes, etc.


Print Friendly and PDF

2/26/24

Food Storage: A 'vintage' style chicken stuffing casserole, topped with my favorite pot pie filling


Again, I almost didn't take ANY photo of dinner, but at the last second, grabbed my phone and got one picture right before I finished dishing some up to eat.  :)

This is a mixture of two different recipes I've made for years.  I knew I wanted to use up a bunch of bread I had in the freezer (more on that in a second).  I also had some packages of cooked chicken mixed with the vegetarian chicken from the #10 cans I posted about previously.  The first thing that comes to mind when I want to use up our leftover bread is a simple 'comfort' casserole that is a stuffing/chicken casserole.


Bread from the freezer

Ever since my husband and I were very first married, I've taken the ends of the bread, or bread that is starting to get hard or stale, and popped it into a Ziploc in the freezer to use later in recipes. You should never throw our or waste any food - because you can always make something else from it.


This time we have all kinds of bread to use. And I decided to make a triple batch.  I tripled the batch and then put 2 of them back into gallon sized Ziploc baggies in the freezer for future meals.


This is a spice/herb mixture for the stuffing.
We've never, ever been one to buy the 'Stovetop Stuffing' brand mixes from the store - but that's basically what this is, as the original recipe most people use starts with a box or two of Stove Top.


Choices for chicken

Fresh, frozen, freeze-dried and reconstituted, canned, home canned... whatever you have to work with.


The original grandma recipe is simple:

Stove Top Stuffing Mix(es)
Chicken breasts - boneless
1 can cream of chicken or mushroom soup
1 empty soup can of water per box of stuffing used

Mix the stuffing mix, spices and the water and soup.  Place in a greased casserole dish.
Lay the chicken breasts on and salt and pepper or even add cheese to top.
Bake until the chicken is done.

Serve.


SUBSTITUTIONS I USED TO MAKE IT FROM MY FOOD STORAGE

For the 'stove top' stuffing spice mixture, I threw together a mixture from 3 different 'recipes' of sorts.  It's really just parsley, thyme, poultry seasoning, chicken bouillon, etc.  You can do a quick internet search to find one you like.  I used all dry spices from the cupboard along with some 'chicken base' instead of dry, crushed bouillon cubes or powder.

My bread was of course, from the freezer.  You can also just cut up or tear up your daily homemade bread.  I don't bother drying mine out in the oven, I always use it fresh.

The chicken was reconstituted 'vegetarian' Auguson Farms fake chicken, mixed with some precooked chicken.

I used a lot of bread this time around, but only one can of soup so I decided to make my favorite pot pie filling and top it with that.  That is the creamy filling with some carrots and peas you see in the photo above. 

The filling is from a recipe I've posted many times over the years - my favorite pot pie.   This time I used 1/3 of a can of peas from food storage, along with 1/2 a jar of home canned baby carrots.


Old Fashioned Turkey Pot Pie

1 10 oz. package mixed carrots and pea's or all veggies
1/4 c butter
5 T flour
1/2 t salt
1/4 t poultry seasoning or sage
1/8 t pepper
2 c chicken or turkey stock (or use 2 cups water and 2-3 boullion cubes)
1 c milk
3 c chicken or turkey
1/3 c chopped onion or 4 green onions, chopped completely and cooked until tender in a bit of water
1 c cooked and diced potatoes (or use canned or dice and cook them with the onions)


Prepare the pea's and carrots (or mixed veggies). I like to cook them in the microwave while I prepare the rest. Melt butter in saucepan. Blend in flour, salt, poultry seasoning or sage, and pepper. Gradually add stock and milk. Cook and stir over medium heat until thick and smooth. Add vegetables, turkey and cooked onions and potatoes. Pour into a greased shallow baking dish. Make a biscuit topping and top the vegetable mixture. Bake at 425 degree's for 25 minutes until the top is golden brown. About 6 servings.

Biscuit Topping;

Mix

1 1/3 c flour
1 1/2 t baking powder
1/2 t salt

Cut in
2 T butter
3 T shortening

Add 1/2 c milk (scant) and stir with a wooden spoon until a dough forms. If it's too wet and sticky add one or two more tablespoons of flour. Pat down on a lightly floured surface and roll out to the shape of your baking dish. If you prefer you can cut into wedges or squares and simply top the vegetable mixture that way too. (Up to you!).


Print Friendly and PDF

2/17/24

Food Storage - homemade taco sauce AND hits and misses on sour cream powder, stored Velveeta, canned Queso (taco night)


FIRST TRIAL:  did it work?

 
The first thing I'm going to note for my future reference are the FAILS.

I do have sour cream powder in my pantry but it's one of those food storage items that is more for baking and cooking than it is for actually trying to make 'sour cream'.  Cookies, cakes, beef stroganoff, yes... actual sour cream?  No.  BUT... I wanted to try something new to me to see if it would work.

Spoiler alert... it didn't. 

Sour cream powder has the fat taken out.  I saw a can of shelf stable 'table cream' in the pantry and thought to myself "I wonder if I could mix that with the sour cream powder to get a sour cream taste/flavor with the creaminess of the actual table cream, which would provide the 'fat' for taste and texture?"

The texture was great.  The smell and taste however were not anything even remotely close to sour cream.

Determined to try a couple more things before failing completely, I tried to add some lemon juice.  Nope.
I tried a little vinegar.  Nope.

Those were my best guesses.  I then covered it and let it chill for 4 hours to see if the flavor would improve.  It didn't.

I asked for other family member input and we all agreed it was a cross between 'cucumbers' and 'cheese'. 
I had some on my tacos.  It made me enjoy them less.  I didn't like them. I ate them (not wasting food) but I didn't like them.
I threw out the fake sour cream.  
Fail.

OTHER FAILS:  I am trying to use up and rotate out 'older' products and also test out what is storage-safe and a complete waste of money.  While getting the table cream out of our 2-3 year pantry for my sour cream trial, I spied a box of Velveeta that had been pushed to the back, and had another product sitting on it - so that it was completely missed this whole time and I didn't even know it was there. 

Velveeta was 'original' style and best by date was December 2022.  So, it was just over 1 year past. 
Opening it up, it stuck to the foil and basically was pulling apart in huge pieces, and looked like rubber.  (Granted, it kind of does anyway... it's not a real quality food product to begin with!  But it was a trial to see what options I could store for 'cheese' variety.)

It had a very slight 'off' smell - still edible, still fine and safe to eat if we needed to, or if it would have been mixed in with pasta to make homemade mac and cheese in an emergency food situation, but since we are not in that "we have turned into Venezuela" situation YET in this country, it wasn't a food I was ok with eating (yet) or serving to family.  It went into trash.  *NOTE*  I've been VERY happy with the tightly sealed, smaller envelope style packages of Velveeta style cheese sauce.  But the boxed Velveeta isn't sealed well enough through the sealed foil to store very long.  I would not want to use it past it's best-by date unless we absolutely had to.

Canned white Queso:  It was the popular Rico's brand and I've posted a couple weeks ago when I opened and tried other cans of it and the yellow cheddar version.  I think this is the last can of white queso in the 2-3 year storage pantry and knowing it probably wasn't going to be at its top quality, I grabbed it as an "OPEN AND TRY" with no expectations task.

And I was right.  It looked fine, tasted... fine and was... fine.  But it was also just a little bit off in flavor just enough that in order to use it without hesitation, I'd want to mix it in with the taco meat to form a nacho dip, or use in hot pasta, etc.  

Honestly, I think I'm being a little too judgemental over the canned Rico's cheese because even when it's freshly bought and brand new, I have issues with the chemical 'taste' that comes through.  I have a very, very sensitive nose that can smell chemicals and preservatives better than most, so I think the canned cheese (2021) is fine for everyone... else. 

But, I have small packs of Velveeta in the regular pantry I can use if I need to in the near future.   I tossed the can.


ON TO DINNER:

I've already posted about this product - but we had more of it last night.
Vegetarian, (imitation) Taco Meat.
Surprisingly good (see previous posts for more in depth chit-chat about it).


TACO SAUCE:  Regular readers know we always keep homemade Taco Bell style taco sauce on hand... always.  I haven't bought taco sauce in years and years because homemade is just so easy and tastes better.

We ran out a few weeks ago and I just hadn't made up another batch yet.    This is a 'half' version of my regular recipe, as I make the whole 3 cup version, using the whole little can of 6 oz. tomato paste, and keep it in glass jars in the refrigerator. 

HOMEMADE MILD TACO BELL SAUCE

Just grab a saucepan and add;

1 1/2 cups water
1 t corn starch

Stir until dissolved. Add;

1/2 a can of tomato paste (use 3 oz.)
1 1/2 T vinegar
2 t chili powder
1 t salt
1/2 t cayenne pepper
Heat to a boil, reduce heat and simmer about 5 minutes, stirring every so often. Cool.


To make a hotter version, add another teaspoon of chili powder, and another 1/2 teaspoon of cayenne - but I wouldn't serve it to children, it's far too spicy and 'burny' for little ones.  To make it even milder for the little ones, leave out the cayenne all together.  A nice mild, taco bell flavor sauce all can enjoy.

Print Friendly and PDF

2/4/24

Homemade Spaghetti Sauce Mix

 Tomato sauce in the pan and getting ready to add the dry mix from my pantry.


I first posted this dry pantry mix on my blog in 2009.  One of my friends from work at the church gave me a copy as she was making copies for a women's Bible study that weekend.  I have kept a jar of this in my pantry at all times since then.  It's so very good and so easy and so fast!

You seriously only need to mix 1 tablespoon of dry mix to 8 oz. tomato sauce.  My family doesn't eat much sugar so I use less than called for because I think it's just a bit sweet or I used low carb/keto natural sweeteners like erythritol with monkfruit instead of sugar.  We also love garlic so I use fresh minced garlic as well as adding a little fresh minced basil from the garden.  Green or red peppers?  Mushrooms?  Browned sausage or ground beef?  Go for it!  Also, sometimes I like to add it to petite diced tomatoes instead of plain sauce.

All you need to make the spaghetti sauce is tomato sauce from your pantry and this mix...  Let this simmer while you cook some pasta and 20 minutes later you can be eating spaghetti. 


Simple Spaghetti Sauce Mix

1/4 c cornstarch
1/4 c sugar (I suggest using less if you don't eat much sugar or don't like things especially sweet)
1/4 c dried parsley flakes
1/4 c dried minced onion
1 t garlic powder
1/4 t red pepper flakes
2 T Italian seasoning

Mix 1 heaping tablespoon of spices into 8 oz. of tomato sauce.  Heat and simmer on low for 20 minutes.  Serve.


Print Friendly and PDF

1/10/24

Sausage Gravy with Biscuit Bread made from the Pancake Mix #10 can

One of my favorite 'comfort food' breakfasts, sausage gravy and 'biscuits'. 


Sausage Gravy and Biscuits

Brown about a pound of sausage (or as much as you want - amount doesn't matter)
Flour -  When brown, add about a 2 teaspoons of flour per pound-ish 
Garlic Salt to taste
Ground black pepper to taste - but a little heavy as it's a main part of the sausage gravy
Milk of any form;  dry milk, evaporated milk with some water added, half and half, cream, reconstituted milk, etc.

Brown the sausage in a skillet or pan - using some oil, shortening or bacon drippings to start it out if it's a bit dry.  When brown, sprinkle flour over the mixture and work in with your spatula for about a minute.
Add milk/cream of whatever style you are using or have.  Adjust as thick or thin as you like your gravy.  Bring it to a boil, and be prepared to add a little more or add water to thin because the flour will start to thicken the gravy when it hits the boiling point.  When it's as thick/thin as you like, add garlic salt and pepper to taste.
Serve over biscuits.


One or two teaspoons flour per pound (or so) of sausage


Mix it as you bring it to a boil and then reduce the heat


It will suddenly start to thicken as it hits the boiling point.  Add more milk or some water to thin if you need to.


Serve with biscuits, or in this case the bread I made using the long term storage "pancake mix" - posted about a couple days ago.  https://www.housewifebarbie.com/2024/01/living-on-food-storage-lofs-auguson.html 


The 'bread' is basically just a crumbly biscuit in bread shape and I had some left, so I made this sausage gravy to day for breakfast to use up the bread.  We have a bit left yet (because we also have our daily regular bread for sandwiches and toast) so tomorrow I may use it for a cheese and egg biscuit or similar. 


Print Friendly and PDF

1/7/24

Homemade Pizza Sauce


I mentioned in the previous post I used my homemade pizza sauce from the freezer.  I started to make our pizza sauce years ago and try to always have some on hand in the freezer.  I make a triple batch and scoop it into food sealer bags for future use.  I opened my last bag last night to make the pizza pull apart bread so today I wanted to hurry and get another triple batch made while I could (because a precocious 3 year old and grumpy 11 month old don't allow me to do even a smidgen of what I hope to get accomplished... I do things when I can.)

Today's pizza sauce is made from a variety of food storage items.  

The celery is from my 'long term' storage of #10 cans.
The diced tomatoes were from the 'short term' storage of 2-3 year foods. 
I only have a few fresh onions left from my last grocery shopping trip (November, 2023) so I decided to use dried minced onions today and save the fresh for other meals. 
The garlic... we love garlic in this family.  I only have about 3/4 cup of fresh garlic cloves left, which I have in the deep freezer.  I decided not to use them in this dish, but I didn't really want to use dried garlic granules as I like a fresher taste.  I remembered I had grabbed a large container of minced fresh garlic from Sam's Club on one of my last shopping trips - totally a random "I should put one of these away for future" purchases.  I CANNOT TELL YOU HOW HAPPY I AM THAT I DID THIS!   I got the garlic from our short term storage and was so glad to use it in this sauce, especially since I was using dehydrated onion and celery - at least the garlic would be fresh.

Last note:  In the future I may have to opt to use my long term tomato powder to make this but currently I have a decent stock of canned diced tomatoes in my 2-3 year short term storage so I'm using all the short term options I have before having to resort to the 10-30 year long term items.  To use the tomato powder, just add the water and salt to make it a 'sauce' and a 'paste' as needed in the recipe.  BETTER YET if you use the powder to make the tomato paste, but have fresh tomatoes from your garden or canned tomatoes to use for the 3 cups diced.

Here is one of my pizza sauce posts from 2014: https://www.housewifebarbie.com/2014/09/homemade-pizza-sauce.html


Pizza Sauce - triple batch

6 T Olive oil
6 T Butter (from my freezer but I have home pressure canned butter when I need it)
1 1/2 c chopped, yellow onion (I used dehydrated minced, rehydrated)
3/4 c chopped celery (I used long term food storage, rehydrated)
2 T fresh, minced garlic  (short term food storage but I will use powdered when my fresh is gone)
3 - 6 oz. can tomato paste, or use tomato powder from storage
3 c fresh, diced tomatoes or use diced, canned tomatoes or use powdered tomato from storage
1 T dried basil
1 T dried oregano
1 T fennel
1 1/2 t salt
3/4 t pepper
1 T honey or sugar

Cook the celery and onions in a bit of butter and olive oil in a hot pan til tender.  Add the garlic.  Cook about 1 minute so you don't burn the garlic.  Add the tomato paste and diced tomatoes.  Put into a food processor and pulse for a few seconds or use a stick blender.  You can skip this step if you don't care if your pizza sauce is smooth.  Put back in the pan and add the rest of the ingredients.  Simmer slowly for about 20-30 minutes.  Makes about 6 medium to large pizzas.  I scoop about a cup or two into food sealer bags and freeze them for future use.


 The celery is long term storage - bought in the Spring of 2012.  
I opted to use dried minced onion as well because in a sauce that simmers like this, I didn't want to 'waste' the few fresh onions I have yet.  Here is two small ramekins with hot water, rehydrating them a bit before I added to the sauce.  By the time the sauce simmers and is done, they are fully hydrated so it's not really important to hydrate them complete beforehand.  I just hydrated a little bit to get a visual estimation of how much I wanted to use to equal fresh.  I used about 1/2 cup minced onion and about 1/3 cup dried celery - then rehydrated.  I didn't use up all the onion though, and put some of it into a little Rubbermaid container in the refrigerator for a future meal.
The garlic I was SO THRILLED to realize I had bought on the spur-of-the-moment at Sam's Club a couple months ago 'just because' I thought I might want to put one into my 2-3 year short term storage.  I will switch to garlic granules once this is gone, assuming we are still doing 100% living on food storage and not buying anything from the store yet.
  The onion and celery in the butter and olive oil.....
 
One of the items I regularly picked up an 'extra' of at Sam's Club over the past few years is diced tomatoes, as they can be used in so, so, so many different foods.  This one, from our short term (2-3 year) food storage is marked with a Sharpie 2022.  This makes it easy for me to see at a glance which cans/boxes/jars I want to grab first to use up.  Use your oldest first!
Spices are relatively cheap and I would often pick up a couple extra on my regular shopping trips to Walmart or Sam's, etc.  All my spices are from my pantry and since I keep a well stocked pantry, generally speaking, I should be fine on spices for as long as we are doing the "100% food storage" living. 
Print Friendly and PDF

3/10/23

Peruvian Chicken, Cilantro Sauce and Cold Onion Cabbage Mixture

No photo for this one because it was SO GOOD I didn't care to stop to take a picture.  Not even the 2nd day.
I was hungry, it was incredible so I just ate it and didn't care.

And then I had it again in a wrap for 'brunch' with extra shredded cabbage, and it was still so good that I had 2 more for dinner that night. 

Personal Note:  THIS is the awesome, yummy one - and the one our daughter took a picture with on her phone because I raved about it.  ALSO:  this is the sauce I mixed with Green Goddess Dressing the next day and served as a dressing for the Cabbage, Black Olives, Avocado, Garlic Salt, etc. "First Communion" Salad that was incredible and there were no leftovers.

Peruvian Chicken, Cilantro Sauce and Cold Onion Cabbage Mixture

1 large package thigh thighs, or a whole chicken
3 T avocado or olive oil
2-3 t fresh lime juice
1 t lime zest, fresh or dried
2 t minced fresh garlic
1 t onion powder
1 T kosher salt
black pepper
1 t oregano
1 T paprika
1 T cumin


2-3 jalapenos
2 cloves garlic
1/3 c cilantro or 3/4 fresh
2 T olive or avocado oil
1/3 c mayo
1 T vinegar
1/2 t kosher salt
2 t fresh lime juice
1 t lime zest

1 c onions, sliced thin
1 c shredded cabbage
1 T lime juice
1 t apple cider vinegar
salt
1/2 t sweetener of choice like sugar


Combine the marinade ingredients in a small food processor or use a stick blender.  Blend until thick and spread all over the chicken.  Roast at 400 until done.  About an hour for boneless thighs, or 1 1/2 hours for a whole chicken.  Remove and let the chicken set for at least 15 minutes or longer.  Can be prepared ahead as well.

For the sauce, combine the ingredients and blend with a stick blender or small processor until smooth.  Taste test for salt and pepper.  Combine the onion/cabbage mixture, and store in the refrigerator until needed.

1)  Serve the chicken hot with the cold sauce and the cold onion mixture.
2)  Serve the chicken cold on a tortilla wrap with the sauce an onion/cabbage mixture in it and add more cabbage
3)  Can also use Green Goddess Dressing in place of the cilantro sauce if you can't eat spicy foods or mix them.


Print Friendly and PDF

1/31/23

From my Instagram: Homemade Taco Sauce

If you are clicking here today because you saw my post on the crunch wrap supremes and homemade taco sauce I was making today, here is the taco sauce!

No sense in re-creating the wheel as I've posted this recipe numerous times in the past.  Here is a re-post of one from 2021. 


2021...


It takes less than 10 minutes and I can make 4 bottles worth in one recipe!  

I've been making this for 20 years. I used to put it into small mason jars or re-purposed dressing jars, iced coffee bottles, etc.  but a number of years ago they started to sell Taco Bell sauce in the grocery store and once in a while I'd buy it.  I then save the bottles and reuse them.  

I'm doing this from memory but it's so easy and follows a 4-3-2-1 pattern, I'm sure you'll memorize it in a minute as well!


Taco Sauce

3 c water
3 t corn starch

Place in a sauce pan on the stove, turn on the heat to medium high and whisk. When it's all mixed in, add;

1 - 6 oz. can tomato paste
4 t chili powder
3 T white vinegar
2 t salt
1 t cayenne pepper powder

Whisk over medium high heat just until it starts to bubble and thicken, turn down to simmer and simmer for a few minutes before removing from heat and letting cool down before you pour it into whatever containers you wish.


There is a video on my story on Instagram today that includes me whisking and stirring the taco sauce on the stove.

Here are some random photos I took quickly with my cellphone of me whipping up a batch quickly while the baby was playing and giving me a few minutes to do so! 


Sauce is done - filling the bottles


 _____________________________________


Print Friendly and PDF

1/9/23

Buffalo Hot Wings with Homemade Buffalo Wing Sauce


This is a 'quick and sloppy' post - in which I literally am uploading a couple photos from my old cell phone - not even brightening them to make up for the ugly yellow lighting in the kitchen.  I really just want to make sure I get the wings recipe posted - although I'm sure I've posted it a couple times previously over the years; when your site has been active since about 2006, there are a lot of recipes for the search engines to wade through - and many of my pages are not google indexed for weird reasons that I have no idea about or how to fix... so it is what it is.

When I post recipes it's usually for my own personal collective use, but often they are with a particular child of mine in mind.  I want them to be able to find the recipe(s) when they need or want them.  This one is for my son.

Buffalo Hot Wings

Chicken wings and drumettes - as many as you wish
1 c hot sauce like Frank's or Crystals
1/3 c oil (olive, canola, vegetable)
1 t cayenne powder
1-2 t minced fresh garlic
1-2 t sugar or sweetener
1/2 t worchestershire sauce
fresh black pepper - about 1/8 - 1/4 t
1 egg yolk
2 t water
2-3 T cornstarch or 1/2 t xanthan powder

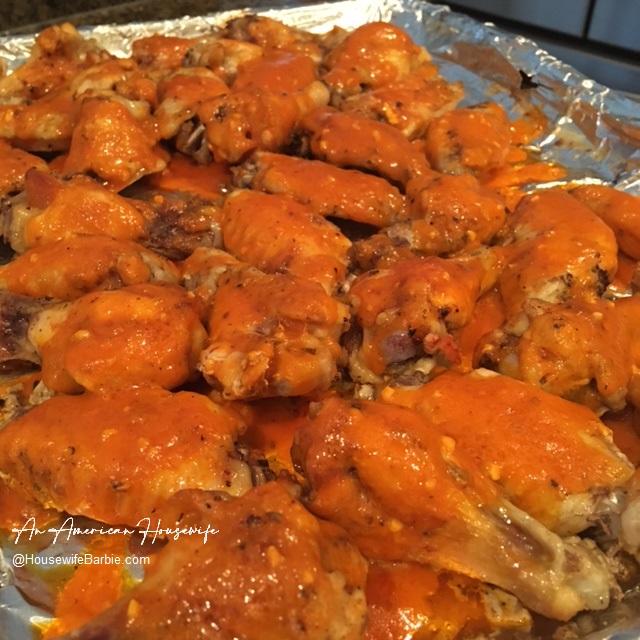
Cook the wings as you like (oven, grill, etc.)  While your wings are cooking according to package directions or your preference, make the sauce.  In a saucepan, mix the hot sauce, oil, cayenne pepper (optional - can leave out for less hot wings), garlic, sugar and worchestershire and pepper.  Whisk or stir briskly and heat until it comes to a slow boil.  As that is heating blend the egg yolk with water and corn starch.  Whisk in to the hot mixture and stir as it thickens.

Take the chicken wings/drummies and baste, spoon or pour some of the sauce over all, as heavy as you wish.  Return to the oven and bake or broil a few minutes until the sauce is nicely adhered and a bit drier.  Remove from the oven and serve - goes well with celery and ranch dressing and/or salads.  Serve the extra sauce in a dish along side for dipping the wings in.


Print Friendly and PDF

10/3/22

Creamy Chicken with Spinach and Bacon - no cream cheese in this sauce


Typically I make this dish in various ways based on what I decide to throw in, but usually it includes cream cheese.  This time around I really did not want cream cheese in a sauce; I wasn't in the mood for it, as it's just so, so rich and I didn't want that rich of a sauce.   I left it out and we did not miss it a bit.  It was so, so very good.  Mr. Husband took all the leftovers to work with him the next day for lunch and told me three or four different times how much he really loved this dish.   I found that so funny because it's basically the same type dish I typically make; just sans cream cheese this time.
 
Creamy Chicken with Spinach and Bacon

Boneless, skinless chicken thighs (6-8)
olive oil
butter
6 t minced garlic
1 small onion
1/3 c crumbled, cooked bacon
1 1/2 c half and half or heavy cream
2 handfuls fresh spinach or a handful sized helping of frozen, chopped
1/2 - 3/4 c parmesan cheese
dried red chili pepper flakes
Italian seasoning
salt and pepper

In an instant pot cooker, heat to 'saute' setting, add the oil.  Salt and pepper the the chicken and sear it in the oil.  Add about 3/4 c water to the cooker, seal and cook about 8 minutes until done.  Release steam.  If you opt to cook them in a pan on the stove, heat the oil, season them and sear them in the pan.  Once they are seared, add about 1/2 cup water and continue to cook until done.  Remove them and the broth from the pan and set aside.

In the skillet place the butter, cook the onion for 2-3 minutes until starting to soften, then add the garlic and cook 1 minute more.  Pour in the broth from the instant pot or the pan you cooked the chicken in.  Let this simmer to reduce a bit while you crisp the bacon pieces.  I use 'real bacon pieces' from the store and microwave them to crisp them but you can also dice or cook bacon slices and crumble them.  Add the bacon to the broth/onion/garlic mixture.

Add the half and half or cream and the seasonings to taste.  Add the spinach leaves, stirring gently to wilt them and mix in.  Add the parmesan cheese and red pepper flakes; let it simmer to reduce and thicken.

Spoon as much of the sauce over the chicken in your serving dish as you would like.  You can serve the extra sauce with the meal, as a topping for a side dish like mashed cauliflower or potatoes, or refrigerate it in an air tight container to use as a quick meal in a few days simply by cooking up some boneless chicken again and topping it.  


I made this dish because we had been out of town and had just returned home; I hadn't gone to the grocery store for fresh groceries yet and needed to use what we had on hand.  Thus, I used a red onion and some green onion instead of a yellow onion.


Adding the cream or half and half, and the rest of the ingredients


The spinach and parmesan

Stirring and letting simmer to thicken a bit


Print Friendly and PDF

8/27/22

Sugar Free Orange Chicken (Keto Orange Chicken)


This week I made this for dinner again, and although I have a hand written index card in my recipe album, I had my laptop in the kitchen anyway, so I was just going to bring my recipe up to use instead.  Low and behold, it wasn't coming up on my site search. 

Sometimes Google does that - and not all my pages are indexed - I have a hard time even finding my own recipes.  I started to question myself if I had ever even published it?  But I was sure I had... at least two or three times over the years (or so I thought.)   Since I couldn't find it quickly, I opened my recipe album and used my hand written version.  Not a big deal.

But this morning I remembered I was going to check this 'when I had time' and sure enough - I HAVE posted it a couple times.   

I'm re-posting it again now to hopefully make it QUICK AND EASY to find in a google search.  I also will just add a couple of the quick photos I snapped with my old cellphone to show the sauce as it's being whisked and the chicken chunks as I breaded them and popped them into the oven.


Sugar Free Orange Chicken
(sugar free and low carb)

1 T oil
1 T ginger powder
1 T fresh minced or chopped garlic
2 T rice vinegar
1 T sesame oil
2/3 c (scant) white vinegar
3 T liquid aminos (soy sauce alternative) or soy sauce
1 t xanthan gum (thickener)
1 c granular sweetener mixture of your choice
1/2 t red pepper flakes
1 1/2 t dried orange zest
1 t orange extract

Heat the oil in a pan, add the rest of the ingredients as you whisk, bring to a boil and turn down the heat to simmer.  Simmer until it reduces a bit and thickens to a nice sauce.

Use over prepared chicken chunks, and serve with a side of riced cauliflower and you can add broccoli.

Notes: This is the perfect recipe to make the day after you make homemade 'chicken nuggets' or chicken chunks.  Make double, save half for this meal the next day. 


_____________________________


For Chicken Chunks or Nuggets:

4 boneless skinless chicken breasts
egg whites
oil
Breading:  depending on your level of acceptable carbs use 3-4 cups crushed rice crispies, panko crumbs, crushed pork rinds or  a mixture of crushed pork rinds with almond flour, or keto bread crumbs
2-3 t paprika
2-3 t onion powder

Cut the chicken into chunks.  Mix 3 or 4 egg whites (depending on bit your chicken breasts are) with about 3 t oil of your choice in a bowl.  Put the breading of choice and spices in a second large bowl or a Ziploc baggy.  Now dredge the chicken into the egg white oil mixture and then breading, place on a heavily oiled pan (I line mine with foil for easy clean up).  

Spray with Pam or drizzle with more oil or butter of choice and bake at 450 until the chunks are done, starting to get brown on the tops and crisp.  Remove from the oven (about 25-30 minutes depending on the size of the chunks you cut).   

I brush the chicken with a light sauce made from:

6 T melted butter
5 T tapatio' sauce

This makes our orange chicken spicy like General Tso's but with a heavy orange flavor too.  You don't have to brush the chicken chunks with anything though if you like your orange chicken sweet but not at all spicy.


 Brushing the nuggets with melted butter (you can use oil or just spray with Pam too)


Into the oven


Mixing up the sauce....
 
 
Whisking - an action shot!  Ha ha.


A QUICK and easy side to this is to microwave a bag of store bought riced cauliflower, if you
don't feel like making your own sides to this meal.


Print Friendly and PDF

5/13/22

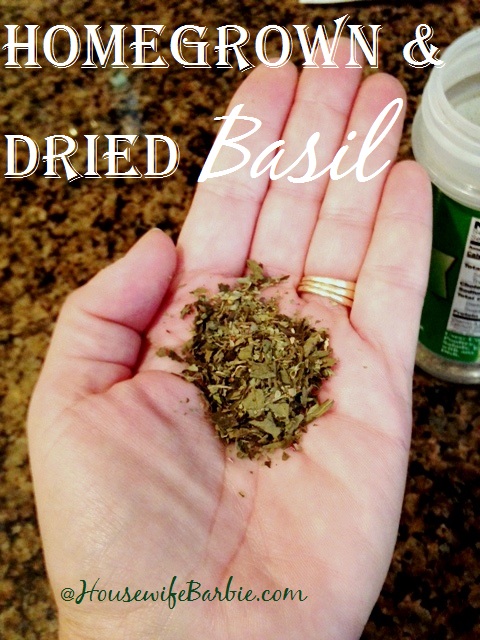
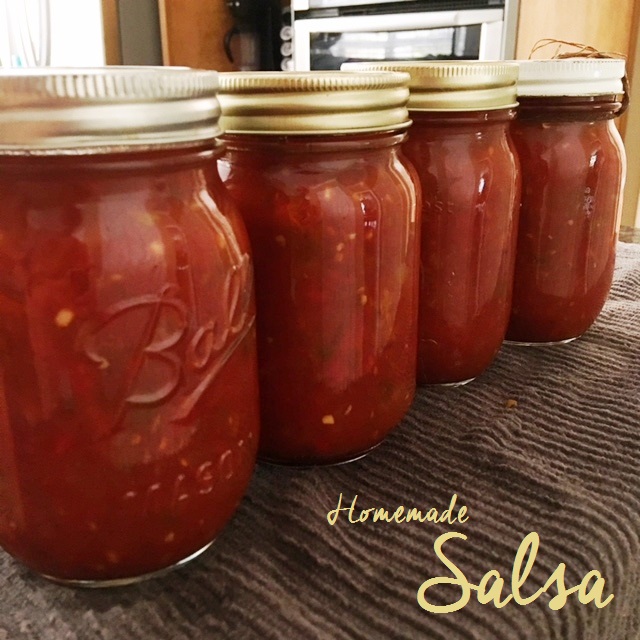
Homemade Canned Salsa and How to Quick Dry Fresh Basil


If you planted basil this spring, it's probably already 'ready' because it's one of the easiest herbs to grow and grows so well and so fast!  I have done a few posts on it already and don't need to reinvent the wheel again but the photo above is a link to one of those posts if you are interested.

Another recipe posted many times on my site since I started it in 2006 is our family favorite canned salsa.  We have 3 salsa recipes we tend to like and make often; this recipe (below) is the one I use for canning and have for over 20 years now.


Homemade Salsa


10 Cups of peeled, seeded and chopped tomatoes
5 c chopped onions
3 sweet banana peppers, diced
4 jalapenos, seeded and diced
2 t minced garlic
1 green pepper, chopped
1/2 red pepper, chopped
1 1/4 c vinegar
2 T chili powder
2 1/2 t salt
1 1/2 t cayenne pepper
1 T sugar

To peel/skin your tomatoes easily just put them in boiling water. Skins will split in 10 seconds - 2 minutes. Remove as soon as the skin splits and lay on a clean towel to cool until you can handle them comfortably - or you can dip them into a bowl of ice water if you wish. Some tomatoes won't split but they are still ready;  if it has been in the water for over a minute, lift it out and look at it and feel it. If it looks tight and ready to burst, yet it feels like a water balloon, then remove it to cool. It's ready.  The second your fingers or a knife touch the skin it will probably split on contact.  Tomatoes can be seeded and the juice canned separately or you can use the whole tomato in your salsa and skip that process.  Up to you.

Mix all the ingredients for your salsa and simmer 1-3 hours.

While simmering, be sure to either run your jars and lids and seals through an extra hot dishwasher cycle or boil them in another pot of water so they are hot and sterilized when you are ready to use them.  Ladle salsa into the jars with about 1/2 inch head space at the top.   Wipe the edges completely clean with a clean cloth and place the lid on it and then the ring.  You don't have to tighten them hard - just a quick twist to hold the seal/lid on during the process.  Simmer them in a water bath for 25 minutes for pints, 35 for quarts.   (Originally this old time recipe did not call for a water bath.  The heat from the salsa and the jar will seal the lid.  However, I always water bath can them.)

Remove from the water, set on a towel on the counter and let them cool at room temperature.  You will hear popping noises.  That is the lids sealing.  When completely cooled, store in your pantry or cupboard. 


Print Friendly and PDF

3/5/22

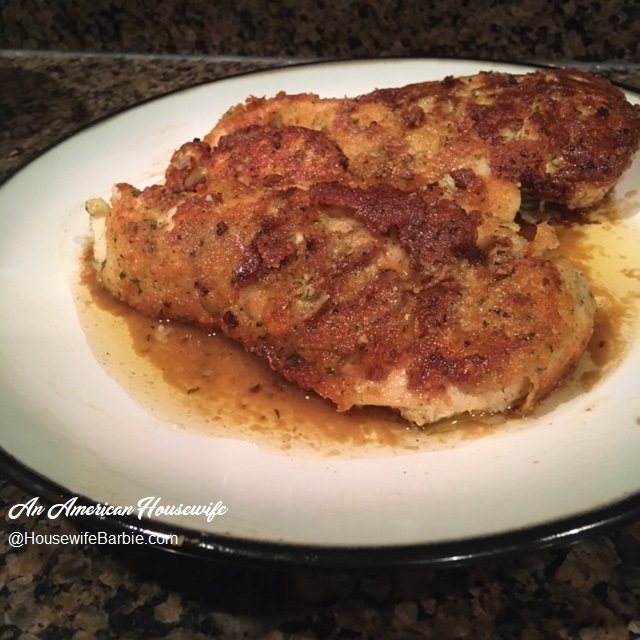
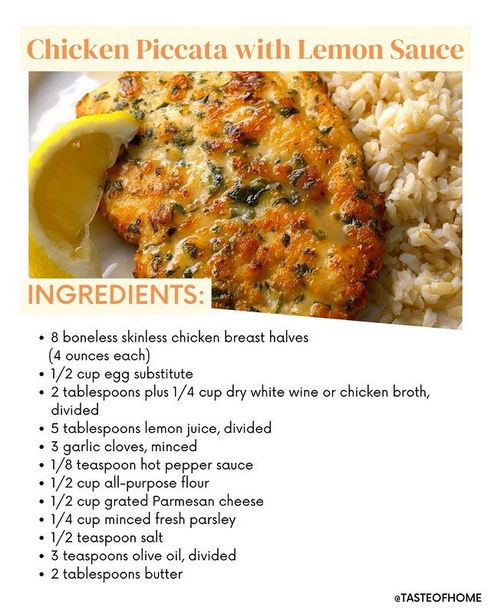
Lower Carb Crispy Chicken with Lemon Garlic Sauce - adapted from a Chicken Piccata without Capers recipe

Double breaded chicken breasts (keto flour) - with a tangy lemon sauce

Not a great photo but I almost didn't take a picture with my phone at all because I was so busy cutting off and breaking off bits and pieces to eat... but I MADE myself take a picture so I would remember to add this recipe to my blog so I could make it again.  Many times.

Last night I heavily adapted a 'chicken piccata with lemon sauce' recipe that strangely, doesn't have capers in it.  Which is actually why it originally caught my eye because when I had seen it posted on social media, I expected to see capers.  Nope. No capers - which is good because 1)  I don't usually keep them on hand and when I do buy them, I use them once or twice and then they sit in my refrigerator forgotten for the rest of the year.  And 2) I like the taste of capers - but mentally I have a hard time eating them.  Maybe it's the texture or how they look?  If I chop them up and use them in a tartar sauce, it's all good.  If they are in a dish as a round little wrinkly ball, not-so-much.  

But it didn't matter because this recipe didn't call for them.

I wouldn't be making it as it was anyway - as it needed to be adapted since I planned to do a lower carb version.  This was just the basis for the dish I did make last night - and the inspiration for it was 'chicken piccata' without the capers. 

Lower Carb Crispy Chicken with Lemon Garlic Sauce

2-4 large skinless chicken breasts, sliced lengthwise into 2 or 3 thinner slices each
2 eggs
2 T dry white wine
2 T chicken broth or stock
2 T lemon juice
3 t fresh minced garlic
1/4 t mild hot sauce like Frank's
1/2 c King Arthur Keto Flour
1/2 c grated Parmesan
1 1/2 T dried parsley
1/2 t salt
3 T lemon juice
3 T chicken broth/stock
2 T butter
Olive Oil

Mix the eggs, wine, lemon juice, garlic and hot sauce in a shall bowl.  In a second bowl, combine the keto flour, Parmesan, parsley and salt.  

Dredge the chicken breasts in the egg mixture, then the flour mixture.  If you like breading (I do) then do it again a second time.

In a non-stick skillet, cook the chicken breasts in olive oil until they are done.  Don't crowd them, this may take 2 or 3 batches.  Remove to a plate.

In the same pan, add the butter, then the 3 T more of lemon juice and the additional 3 T chicken broth.  Bring this to a boil while stirring.  Simmer/slow boil, until it reduces to a thick sauce.  The flour from the chicken breasts help thicken it.  When it's reduced to the consistency of a nice sauce, pour over the chicken breasts.

I served with seasoned riced cauliflower (remember - low carb here - no rice).  I simply riced the fresh cauliflower in the food processor by pulsing.  When the sauce for the chicken was done, I poured it over the chicken on the plate, then (without washing the pan) brought it back to the stove and tossed the riced cauliflower in it - adding a couple pats of butter, some salt and pepper and Mrs. Dash seasoning.


Print Friendly and PDF