Showing posts with label coconut. Show all posts

5/19/25

Low Carb Keto No Bake Cookies (and a few other versions of vintage No Bake Cookies including those cooked in a saucepan)


I rarely post anymore and I've removed almost everything from my site except the bare minimum but once in a great while I still pop in to add a recipe as it makes it easy for me to find them myself.  And, at least for now I'm still keeping my site open to the public, so you get to enjoy all the collected recipes as well.  (I may start up again in the future and build the site back but life kicked me in the teeth (again) in 2024 and this site fell down on the priority list.)

The no-bake cookies my family (my Mother) has been making since the late 1970's and our family continues to make to this day are not the kind most people know as no-bake cookies as typically they make the ones you boil in a saucepan for 3 minutes.  I have that recipe, yes I make it sometimes, but the family favorite of our family is truly NO BAKE.

We make these without fail every single Christmas and various times through the year.  They have oatmeal, butter, cocoa powder, sugar, vanilla and powdered sugar, etc....  which a couple of which, are things we do not eat when we are eating low-carb and sugar free.  

Replacing the oats with flaked unsweetened coconut works well and I found a recipe that used a mixture of coconut, pecans and peanut butter; I found it to be pretty good - a 'keeper' anyway although it's not the keto low carb version I make when I do a copycat of my mother's version.  For now I'm keeping that one tucked away.


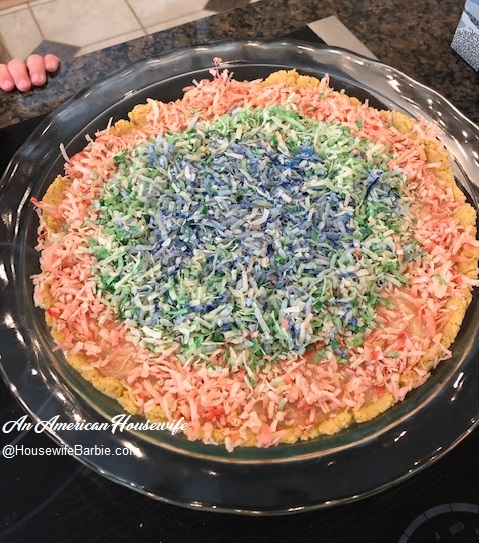
This version of a low carb, sugar free
No Bake Cookie

1 1/2 c crunchy peanut butter
1 1/2 c unsweetened coconut flakes
4 T butter
1/2 c powdered sweetener such as allulose/monk fruit
2 heaping T cocoa powder
1 heaping t good quality vanilla paste or extract
1/2 c chopped pecans

Mix all together in a large mixing bowl with a paddle attachment or by hand.  Scoop mounds with a 1 1/2" cookie scoop or use a large spoon and form into mounds on parchment or wax paper.  Smash each mound with the palm of your hand just a little bit to form a nice flat circle, but still quite thick.

Let stand until they harden a bit and form a bit of a crust (depending on the humidity and temperature of your house this can be in an hour or could be 4-5 hours.  You can also just leave them out overnight.)


 ___________________________________________


In May of 2012 I posted this version, which uses oats and are not low carb, but are sugar free. 

No Bake Cookies

1/2 c butter
1/2 c unsweetened almond milk (or regular milk, but milk does have sugar in it)
2 c sweetener substitute
4 T cocoa powder
3 c oatmeal
1 c natural, no sugar added peanut butter
1 t vanilla
*optional:  you can add unsweetened, shredded coconut or chopped nuts if you wish

In a saucepan, bring the sugar substitutes, cocoa, butter and milk to a boil.  Whisk quickly until smooth.  Remove from heat.  Add the oatmeal, peanut butter and vanilla.  Stir to blend.  Drop by tablespoons on parchment or foil and let set until hardened a bit so they don't fall apart!  After about 2 minutes or so you can shape them a little if you wish (I flattened mine a bit) or leave them in haystacks.  Let harden and cool completely.  


In February, 2016 I posted this version - which I think almost every housewife in America was making back in the 1970's and is still popular today.  This is the kind that is cooked in a sauce pan and then spooned out into mounds.  (In 2016 I started to make this version using natural sweeteners like erythritol, monkfruit, etc.  and used almond milk in place of dairy milk).

No Bake Cookies

1 c granulated sugar
4 T butter
1/2 c milk
1/3 c cocoa
1-2 t vanilla
3 c oats - quick or regular

Combine sugar, butter, milk and cocoa in a saucepan and bring to boil over medium heat. Boil 3 minutes, stirring frequently. Remove from heat. Stir in oatmeal and vanilla.  Drop portions onto foil or parchment paper. Let stand until firm.


Low-carb and sugar free - no oats in this one. The unsweetened natural coconut flakes take the place of the oats.


Print Friendly and PDF

12/20/23

Baking Spirits Bright for 2022 - Christmas Cookies and Candies


Cookie Ideas and recipe links:   Baking Spirits Bright in 2022 


Print Friendly and PDF

6/18/22

An American Housewife: Keto Coconut Custard Cream Pie - (including the pie crust - with a secret ingredient making it simple)


I had a few reasons to make this pie this weekend.  The first being to use up rainbow colored coconut sprinkles in my pantry that were taking up space for months and months now (since I don't cook with coconut flakes often).  The second was to do a trial run using the pancake mix as a pie crust. 

I have a Birch Benders Keto pancake mix in the freezer that basically just lives there rent free (also taking up valuable space) because frankly, I don't really care for pancakes made from it.  I won't waste food though so when I try a keto or sugarfree/low carb food I'm not thrilled with, I find other ways to use it up.  

I was going to make the typical almond flour crust for this but saw the pancake mix and decided to try it.  It worked great!  It was seriously perfect as a pie crust and didn't puff up at all during baking, and wasn't in the least bit pancake like.  I don't care for it as a pancake mix, but I'm happy with using it as a pie crust mix now.


Keto Coconut Pie

Pie Crust:
1 cup Birch Benders Keto Pancake Mix
1 egg
1/4 c softened butter

Filling:
4 eggs
2/3 c natural sweetener of choice (like erythritol/monkfruit mixtures)
1/2 t vanilla
1 t coconut extract
1/4 t salt
1 can Thai Coconut Milk (13.5 oz. can)
1 t xanthan or other keto thickener
3/4 c unsweetened coconut flakes


Mix the keto piecrust mix with the single egg and softened butter in a bowl.  Mix well until it is completely mixed and forms a ball of dough.  Spread and press into a pie plate.  Bake at 350 for approximately 12-15 minutes.  Remove and let cool while you make the filling.

Mix the eggs, sweetener, vanilla and coconut extracts and salt in a bowl, beating well.  

In a small saucepan on the stove, whisk about 1/3 cup of the coconut milk with the thickener.  Stir over medium heat until it starts to thicken.  Slowly drizzle this over the egg mixture in your bowl.  Pour it all back into your saucepan and heat, stirring constantly for another 2-3 minutes, then pour into your pie shell.

Top with the coconut flakes.  Bake at 350 for 35 minutes or until the custard center is 'set' and hardly jiggles when you wiggle the pie plate.  Remove and cool completely on a wire rack.  It will set up more as it cools.


I didn't care about how 'pretty' the pie crust was, so I just pressed it in and baked it quickly.


The filling, ready to pour into the crust


The custard filling


My coconut flakes are multi-colored as I used them for sugarfree 'sprinkles' on cookies previously.


A rainbow colored coconut pie


This is before it went into the oven.  It turned golden brown on parts after baking (see top photo).


Print Friendly and PDF

12/31/21

Vintage Candy Recipes from the 1941 Candy Booklet: "The Candy Book"


When December started, I thought it might be fun to feature some vintage candy recipes from my collection.  I got as far as scanning a couple of the pages and then life took a different turn.  We had some unplanned things pop up and priorities changed; holiday baking and goodies took a backseat to life and of course, posting vintage recipes from an old 1941 candy booklet was so far down the priority list that it literally was off my radar.

I now have zero interest in posting this fun vintage recipe run that I had planned.  I happened to see these unused files on my laptop today and realized I should probably just post all of them here along with the images - in one post.  This way, if anyone in the universe is looking for any of these old vintage candy recipes that their grandmothers or great-grandmothers (or even great-great-grandmothers) made, they can be found.  

If you right click on the image and open it in its own browser window it will be very large and easily readable if you are having trouble reading the print in the current fit-to-page size.

Cocoa Fondant Fudge
Condensed Milk Candy
Whipped Cream Fudge
Caramel Cream Squares
Malted Milk Nut Dainty
Nut Kisses
Baked Fruit Fudge


Barley Sugar
Brittled Almonds
Horehound Candy
Tropical Nuggets
Ginger Bars
Stick-Jaw
Butterscotches
Almond Butter Crunch
Rice Flakes Candies


Fruit Creams
Gingerees
Peppermint Creams
Baltimore Layer Candy
Maple Creams
Maple Brittle
14-Minute Maple Candy
Maple Molasses Gems


Coconut Caramels
Coconut Drops
Coconut Dainties
Coconut Cones
Coconut Straws
Coconut Squares
Simple Cooked Marzipan
Uncooked Marzipan


Make Up And Use Later Marzipan
Marzipan Goodies
Golden Marzipan
Honey Glazed Cherries


Chocolate Fudge
White Fudge
Almond Fudge
Chocolate Maple Fudge
Sour Cream Candy
Molasses Fudge
Panocha
Maple Panocha
Coffee Panocha


Gumdrops
Pralines
Turkish Paste
Rainbow Candy


Print Friendly and PDF

11/30/20

Homemade Sugar Free Almond Joy Bites

Originally posted in 2012 - repost for 2020


My husband teases me that I'm the only person on the planet that likes Almond Joys.  I know that isn't true because I only buy Almond Joy candies at Halloween in one mini-bite sized bag and I know that one purchase isn't keeping them in business!

Right now I'm cutting out all sugar and ironically, even though I never crave sugar or chocolate - knowing I can't have it just makes me want it.  I don't like chocolate.  I can go six months and not even think about it.  But... decide to go completely sugar free and my brain starts to crave it just because I can't have it.  Silly brain.

So today I whipped up some Almond Joy Bites.  Sugar Free and quite easy.  It's funny though, after I mixed them up and made 8 bite sized candies to set on foil, I scraped the last of the chocolate mixture out of the bowl (about a half teaspoon), ate it....  and had no craving for any more.  See?  It's all mental.  :)

Sugar Free Almond Joy Bites

1/3 c Hershey's Sugar Free Chocolate Chips
1/4 c Shredded Coconut  (Unsweetened)
1 t Torani Sugar Free Vanilla Syrup
1/4 c Almonds, Unroasted & Unsalted 

Amounts are up to you.  This is approximately what I used and it made 8 little inch rounds or bites.  If you added a bit more or less coconut or almonds or even vanilla syrup, you can adjust it to your personal taste.

Chop the almonds either by the edge of a rolling pin in a ziploc or with a chopper.  Place all ingredients in a microwave safe bowl and microwave 1 minute, stir.  If it's not quite melted, give it another 15 seconds.  Stir again.  Drop by spoonfuls onto foil.  You can leave them free form or shape them a bit with your fingers to make them round.  Let them set to harden for about an hour or put them in the refrigerator for a quick set.  I got 8 rounds from this amount.


*If you don't care about sugar; just use regular chocolate chips.  Enjoy!


Print Friendly and PDF

2/4/20

Chocolate Trail Mix - Sugar Free and Low Carb

https://amzn.to/31qvULB


Sorry to say this isn't a specific recipe for those of you who like to be told exactly, precisely how much to use, down to the half teaspoon.  The amounts are guesstimates and you can change them up a little to what you like.  It's not rocket science.  Play with the recipe and use what you like and how much of some of the ingredients that you like. Also note the brands of ingredients you use will effect your carb and sugar gram count.  Look for zero sugar on your labels.

My husband LOVES this chocolate trail mix to snack on at work and on his hour plus long commute to work and home again every day. 


Chocolate Trail Mix

3 cups salted mixed nuts
2 cups whole cashews
1/2 - 1 cup sugar free, all bran cereal (the sticks kind, to add some crunch to the mix)
1/2 c sugar free coconut flakes
*whatever kinds of nuts or other items you wish to add - keep carbs & sugar free in mind
10-12 ounces sugar free chocolate chips (I used a mixture of Lily's Milk Chocolate and Hershey's Sugar Free)
2 T butter
1/2 - 3/4 c natural sweetener - confectioner's or whirl granulated in your food processor first
3/4 c peanut butter - lowest sugar content brand that you love
1-2 t vanilla extract

  • Lay a piece of foil out on your countertop.
  • In a large bowl place all your dry ingredients; the nuts, coconut, cereal and anything else sugar free and low carb you like in your mixtures.
  • In a microwaveable bowl place the butter, peanut butter and chocolate chips.  Microwave about a minute, stir.  If the chips are still quite hard, microwave another 30 seconds and stir again.  The heat from the butter and peanut butter will start to melt them.  Stir until melted, microwave another 20 seconds at a time if you need to but don't overcook the mixture.
  • Add the sugar substitute sweetener and vanilla.  Stir smooth.Taste and see if you want more sweetener, vanilla, etc.  If you want less peanut butter flavor, melt more chocolate chips with a little butter and add it to the mixture.  Stir and taste again.
  • Pour this over your mixed nuts/coconut/cereal in the bowl and stir until it's evenly distributed.
  • Dump out on the foil and spread it around.
  • Depending on how much chocolate mixture used compared to how much dry mixture you had, you might have a heavily covered mixture or a lightly covered mixture.  (Mine is light - you can still see the nuts through some of the chocolate).

If you want small pieces you grab by the handful, spread it apart.
If you want to have bite-sized chunks of the mixture, either press it with your hand or with a second piece of foil on top so the mixture is pressed together (like mine).

You can let it harden on the counter, or place the foil in the refrigerator or freezer to speed it up.  I grabbed small walnut sized portions, gently pressed them together a bit and dropped them into the empty mixed nuts container.  When it was filled, I placed the top back on and placed the whole thing in the refrigerator.  This way it's in both chunks and pieces, the way my husband likes and he can take the whole container to his office with him and keep it stored easily.

You can keep this on the counter or in the refrigerator.  If it's summer time or your house is kept really warm, you'll want to store this in the fridge.  If you've used a high ratio of peanut butter or butter compared to the chocolate, it won't harden as much as if your chocolate chip ratio is higher.  So a higher peanut butter/butter ratio would be best kept in the refrigerator so it stays hard.   


Print Friendly and PDF

7/10/17

Homemade Samoa's or Caramel DeLites - (A Lower Carb and Sugar Free Samoa Option Too!)


This is my version of the Samoa's - otherwise known as Caramel DeLites - depending on what area of the country you live in and which bakery the Girl Scouts in your area use.  Our family eats sugar free most of the time so my version is sugar free, but you can make yours (and make them much easier) by using non-sugar free products.

To make these completely homemade start with your favorite shortbread or butter cookie recipe.  I had flower shaped sugar-free, wheat free cookies in our freezer when I planned to make these but I ended up using them as a crust for a sugar free cheesecake.  When I made this batch yesterday I 'cut corners' by using some Murry brand sugar free cookies so that cut down the time needed to make my cookies from scratch.  If you don't need sugar free cookies as your base you might want to try Salerno Butter Cookies, or another brand of flower shaped cookies to cut down on the prep/bake/cool time needed for that step.

The other thing worth noting: the homemade caramel.   I need ours to be sugar free so I make it from scratch. You can use my recipe with regular brown sugar or white sugar and make your own caramel but another 'hack' would be to use about 12 ounces of store bought caramels that you melt with about 1 tablespoon of water over medium low on the stove top or in the microwave.  Just heat til it starts to melt, stir smooth. 

I also use sugar free chocolate chips of course - but for those making these not sugar free, just use regular chocolate chips of your choice.


Homemade Samoas or Caramel DeLites

1 1/2 cups melted store bought or homemade caramel
18-24 small flower shaped cookies homemade or bought
7 oz. coconut - unsweetened or sweetened depending on your needs/taste
1 pkg. chocolate chips
1 T coconut oil - solid or shortening

Lay your cookies down on foil.
Place an additional piece of foil off to the side to put your cookies after dipping the bottoms in chocolate.  You can use a cookie cooling rack if you want or just lay them on the foil direct.
Melt or make your caramel** to equal about 1 1/2 cups caramel (12 ounces).
Stir the coconut into the caramel sauce.  Working while it's warm, top each cookie with a spread of caramel coconut mixture.  You can do this with a butter knife, small spatula, an empty frosting decorator bag without a tip in it, etc. depending on stiff or runny your filling is.  Sometimes it's thicker than other times.  Do what works best.
If you wish (you don't have to) you can use the end of a wooden spoon handle to make the hole in the center of the filling after you've placed it on the cookie.
When you are all done, melt the chocolate chips with a bit of coconut oil or shortening.  Only melt JUST until it starts to melt - stirring to finish the melt process and get it smooth.  Don't over cook it or use too high heat as chocolate burns and seizes up solid. 
When it's smooth, dip the bottoms of each of the cookies into the chocolate and lay them on the rack or the foil to harden.
When you are finished dipping the bottoms, use a fork or ziplock baggy to drizzle the rest of the melted chocolate chips back and forth over the tops of the cookies.  Either place them into the fridge or freezer to harden "faster" or if it's a really hot and humid day; or just let them set for a few hours until the chocolate hardens.


**If you are making homemade sugar free caramel from my recipe link, be sure to cook it just until little brown flakes of 'burnt butter' start on the bottom of the pan to give it a nice dark caramel color and taste.  Not cooking it long enough makes it more of a butter toffee.  I also found adding a 'smidgen' of molasses to it helps bring it to 'caramel' instead of toffee.  I also use about 1/8 xanthan gum to each 2/3 cup sweetener to thicken it to a caramel instead of a sauce or ice cream topping.  Remember your caramel can be a little liquidy as the coconut is going to be mixed into it and that will firm it up. 


Faster than homemade cookies bases:  store bought

Homemade caramel sauce - you can also use store bought caramels

Stirring in the unsweetened coconut - you can also use regular sweetened coconut

Depending on how liquidy your caramels are, determines how firm the filling gets. Work while it's warm.

Top the cookies - a 2nd person helping make holes makes swift work of this step

I use about 3/4 of a bag of chocolate chips and about a tablespoon of coconut oil

I hate dipping cookies and candies... I really do.

Drizzle chocolate back and forth over the tops

Let them harden or pop them into the freezer to speed the process


Print Friendly and PDF

8/4/16

Homemade Old Fashioned Sour Cream Donuts - (Whole Grain Sour Cream Donuts)


I do not have a donut cutter, but I have various sizes of round cookie cutters, so I used one large and one small to cut the donut and the hole.  The only other hint I have this recipe would be use fresh, clean oil to fry - as the flavor of the oil is a big part of how your finished donut tastes.

Homemade Old Fashioned Sour Cream Donuts

3 c flour
1 1/2 t baking powder
3/4 t salt
1/4 t nutmeg
2/3 c good quality sugar
3 T butter, soft
1 t vanilla
2 egg yolks
1/2 c sour cream

In a bowl, place the cake flour, baking powder, salt and nutmeg.  In a mixing bowl, beat the butter and sugar until fluffy and creamed together well.  Add the vanilla and egg yolks, beat briefly, add the flour mixture and the sour cream.  Mix just until blended smooth.  Chill for about 30 minutes while you prepare the oil for frying and get out a sheet of parchment paper, sprinkled with flour.

Roll the dough out about 1/2 - 3/4 inch thick.  Cut out rounds and smaller rounds in the center for the donut shapes.  When the oil is hot enough to sizzle drops of water but not too hot (I use about a number 7 on my 1-10 stove) carefully add about 4-5 donuts in 1 inch hot oil.  They should cook about 1 minute per side - if they are dark immediately, your oil is too hot - remove from heat and turn it down.  If they sink and are taking 2-3 minutes to get golden brown, your oil is too cold and they are going to be a greasy mess.  Remove and throw away.  If they break apart, you don't have enough flour in the dough - gather up the cut raw donuts, put them back in the bowl and mix in 1/2 or more cups flour until you have a nice dough you can work with. 

When both sides are golden brown, remove with a slotted spoon, drain on thick layers of paper towels.  Drain well.  If the paper towels are saturated with oil for the 2nd batch, use new ones.  You want them drained nicely.

You can sprinkle with powdered sugar, sprinkle with a mixture of cinnamon and sugar, or eat plain but to make them like bakery and store bought donuts, use a simple glaze.

3 c powdered sugar
3 T warm water
dash salt
dash vanilla

Whisk and then dip the tops of the donuts into the glaze, place on a wire rack or parchment paper to let the glaze harden.  These donuts are best the next morning after setting overnight in a container that allows air flow - nothing with a lid or air tight. 

Showing the 2 cookie cutters I use - round circles


One large cookie cutter ring for the donut
A smaller one for the holes


Fry in hot, shallow oil


Dip the tops in a glaze and let harden
These are best stored in an open air container - nothing air tight or the glaze gets sticky wet


Print Friendly and PDF

12/10/14

A Cookie A Day Until Christmas... 24 Christmas Goodies and Cookie Recipes


This is just a few of the thousands of recipes I've posted on my site since 2006.  What I did in  2012 was post this list as a 'cookie a day 'til Christmas' list.   Since then I made it's own page (in the link bar above) as it has a pretty good list of favorites for Christmas.  If you need some ideas, you can check them out.  Most of these recipes have been mentioned 2 or 3 times on An American Housewife as I've made many of them since the early 1990's.  


December 1st:  Molasses Cookies
December 2nd:  Chocolate Caramel Thumbprints
December 3rd:  Peppermint Pinwheels
December 4th:  Candy Striped Cookie Sticks
December 5th:  Peppermint Teacakes
December 6th:  Peanut Butter Patties
December 7th:  Peanut Butter Fudge
December 8th:  Sugar Cookies:  Snowflakes with Edible Glitter
December 9th:  Swedish Rosettes
December 10th:  Cream Wafer Cookies
December 11th:  Cherry Poppy Seed Winks
December 12th:  Peppermint Pretzels
December 13th:  Candy Pretzels
December 14th:  Homemade Truffles
December 15th:  Cream Horns
December 16th:  The Best Brownies
December 17th:  Red Velvet Cake Balls
December 18th:  Glazed Sugar Cookies
December 19th:  Gateau Bon Bons
December 20th:  No Bake Chocolate Bars
December 21st:  Peppermint Meltaways
December 22nd:  Melted Snowman Cookies
December 23rd: No Bake Fruitcake Bars
December 24th:  Mini Peanut Blossom Muffin Cookies

Print Friendly and PDF

10/7/13

Crustless Coconut Cream Pie - Tastes like Coconut Gelato


I posted this recipe back in 2012 but I made it this week and wanted to post again.  I didn't use any caramel sauce on it in part because I am cutting out all sugar this month and didn't have any sugar free made (and didn't really want to make any) but more importantly was that I don't think this pie needs it!  I love it just as it is.

Now, even though you don't need a crust for this, I happened to have the almond flour sitting out on the counter from another recipe so I simply sprinkled about 1/8 of a cup of pure almond flour on the bottom of my greased pan so that is why you see a tiny little 'crust' in my photo above.

I made my version sugar free, but the original recipe was not sugar free so I'm leaving it as I had posted in 2012 but I made it sugar free simply by using a natural substitute of your choice (Swerve, Just Like Sugar, Xylitol, etc.) 

Crustless Coconut Pie

3 tablespoons unflavored gelatin
nonstick cooking spray
2 cups half-and-half
1 cup sugar or sugar substitute
1 teaspoon pure almond extract
3 cups freshly grated coconut (for sugar free be sure to use unsweetened)
3 cups heavy cream, whipped
1 cup fresh shaved coconut (unsweetened option)
Optional:  Caramel Sauce - bought or homemade


Sprinkle gelatin over 1/2 cup water, and let stand until softened, about 5 minutes. Spray a 10-inch round nonstick springform pan with nonstick cooking spray; set aside.

Bring half-and-half to a boil in a large saucepan over medium-high heat. Add gelatin mixture and sugar and cook, stirring, until gelatin and sugar have dissolved. Remove from heat and let cool slightly.

Stir in almond extract and grated coconut; stir in whipped cream. Transfer pudding to prepared springform pan and transfer to refrigerator until chilled and set, 2 to 3 hours.

Unmold pudding onto a serving platter and sprinkle with shaved coconut. Serve with caramel sauce.


Print Friendly and PDF

3/26/13

Cut Out Cookies for Easter


As a Mom, I've made sure my kids have grown up with many different memories and traditions, some as simple as holiday cookies.  When the children were all younger I had no idea if the energy and love I poured into the crafts, games, learning experiences, trips, cookies and things made any real difference but once the kids were older, I knew it did.  They told me.  And continue to tell me, and continue to 'make sure' Santa comes to (and I quote) "poor, starving, college students"  or that the Easter bunny will remember them, or I'm going to make their favorite goodies or cookies for the holidays.   

I don't really love baking and cutting out sugar cookies, but I did it.  Every holiday and usually at least once a month even when there no holidays, you would find cute, cut out cookies.  Frogs, ice cream cones, football helmets, dinosaurs...  even fish.  Something fun.  And they loved them!

So this week is my "Easter"  cookie week.  I hope it is in your house too.  If you are short on time, just make the dough on one day and refrigerate it.  Bake the cookies another day and pop them in the freezer for decorating on a third day.  By breaking it into little time frames, it's easy to fit them into busy schedules.

Sugar Cookies (or Cut Out Cookies)

1.5 c butter, soft
2 c white sugar
1 c powdered sugar
4 eggs
2 t vanilla
5 c flour
2 t baking powder
1 t salt

Cream the butter and sugar until smooth. Beat in eggs and vanilla. Stir in the flour, baking powder and salt. Cover and chill dough for an hour or up to as long as overnight. Preheat oven to 400. Roll dough on lightly floured surface. Cut. Place on ungreased cookie sheets. Bake 6-7 minutes for a semi chewy cookie and 8-9 for a more crisp. Cool completely. Can be frozen after cooling until you want to decorate at a later time.


Sugar Cookies

1 1/2 c granulated sugar
1 1/2 c butter, soft
2 eggs
2 tablespoons vanilla extract
4 c flour
1 t baking soda
1 t cream of tartar
1 t salt

Combine  sugar and butter, beat until creamy with your electric mixer.  Add eggs  and vanilla.  Beat well.  Add dry ingredients and mix until blended.   Chill dough until it's easy to work with;  30-60 minutes.

On  lightly floured surface roll the dough to 1/4 inch thickness.  Cut out  cookies.  Bake at 350 until the edges just start to turn golden brown,  about 10 minutes.  Cool on wire racks.  Frost.


Print Friendly and PDF

3/1/13

My Favorite Low Carb, Sugar Free, Grain Free Cookbooks

Back in 2002 I started to research the effects of sugar and refined, white flour on our bodies and our health.  By the spring of 2003 I was ready emotionally, mentally and psychologically to give myself a "detox" of all sugar and flour and see what (if anything) happens.  The effect of that first 2 weeks of detox was eye opening and amazing.  So much so, that my husband saw the positive changes after the first week and although he previously hadn't paid any attention to the research I was doing - he asked me if I could explain to him what he could and couldn't have so that he could start the 2 week detox as well.  We've never looked back.  Since that spring in 2003, we do the Atkins 2 week induction detox followed by 2 months of sugar free, low carb; at least 3 times a year.  More often than not however, we seem to eat this way even subconsciously when we are not low carbing.


We've always had to live on a very frugal budget and buying cookbooks is a long and painful decision for me.  I take forever to make my decision, then I spend even more time looking for the best prices, sales and if I'm looking online (more often now than not) I look for free shipping and other perks before I finally (FINALLY) spend the money.  Frankly and honestly;  we just don't have it.  So we watch every nickel carefully.   For that reason, I don't own many low carb cook books.  However, in the interest of this post and for bookmarking purposes for myself as well, I decided to put my favorite list here with links to purchase them through Amazon.

Cookbooks I either own and use, or are on my personal 'next to purchase' list;

The Art of Healthy Eating - Sweets

Splendid Low-Carbing: The Complete Series (Volumes 1 to 5)

500 Low-Carb Recipes: from Snacks to Dessert

Low Carb-ing Among Friends  V3 (14-Jan-13)

Low-Carb ing, Among Friends Gluten-Free, V2 (27-July-12)

Low-Carb ing, Among Friends, V1 (11-Nov-11)


Here are the image links to the books listed above;


Print Friendly and PDF