Pages

5/13/22

Homemade Canned Salsa and How to Quick Dry Fresh Basil


If you planted basil this spring, it's probably already 'ready' because it's one of the easiest herbs to grow and grows so well and so fast!  I have done a few posts on it already and don't need to reinvent the wheel again but the photo above is a link to one of those posts if you are interested.

Another recipe posted many times on my site since I started it in 2006 is our family favorite canned salsa.  We have 3 salsa recipes we tend to like and make often; this recipe (below) is the one I use for canning and have for over 20 years now.


Homemade Salsa


10 Cups of peeled, seeded and chopped tomatoes
5 c chopped onions
3 sweet banana peppers, diced
4 jalapenos, seeded and diced
2 t minced garlic
1 green pepper, chopped
1/2 red pepper, chopped
1 1/4 c vinegar
2 T chili powder
2 1/2 t salt
1 1/2 t cayenne pepper
1 T sugar

To peel/skin your tomatoes easily just put them in boiling water. Skins will split in 10 seconds - 2 minutes. Remove as soon as the skin splits and lay on a clean towel to cool until you can handle them comfortably - or you can dip them into a bowl of ice water if you wish. Some tomatoes won't split but they are still ready;  if it has been in the water for over a minute, lift it out and look at it and feel it. If it looks tight and ready to burst, yet it feels like a water balloon, then remove it to cool. It's ready.  The second your fingers or a knife touch the skin it will probably split on contact.  Tomatoes can be seeded and the juice canned separately or you can use the whole tomato in your salsa and skip that process.  Up to you.

Mix all the ingredients for your salsa and simmer 1-3 hours.

While simmering, be sure to either run your jars and lids and seals through an extra hot dishwasher cycle or boil them in another pot of water so they are hot and sterilized when you are ready to use them.  Ladle salsa into the jars with about 1/2 inch head space at the top.   Wipe the edges completely clean with a clean cloth and place the lid on it and then the ring.  You don't have to tighten them hard - just a quick twist to hold the seal/lid on during the process.  Simmer them in a water bath for 25 minutes for pints, 35 for quarts.   (Originally this old time recipe did not call for a water bath.  The heat from the salsa and the jar will seal the lid.  However, I always water bath can them.)

Remove from the water, set on a towel on the counter and let them cool at room temperature.  You will hear popping noises.  That is the lids sealing.  When completely cooled, store in your pantry or cupboard. 


Print Friendly and PDF

5/9/22

Vintage Recipes: Boston Brown Bread and Recipes for using Canned Beef

I have an old, vintage recipe book put out by Arm & Hammer Soda, which includes this Boston Brown Bread that uses a mixture of Indian meal (corn meal), graham flour, rye flour and wheat flour. 


And... canned beef recipes

This pamphlet was originally put out to help homemakers in 1934 by the Bureau of Home Economics - US Dept. of Agriculture.  The Federal Surplus Relief Corporation had been created the year before to distribute excess food commodities to people who needed it rather than continue the waste of livestock and food which the government was doing to try to boost the prices on the market.  The public outrage (and rightly so!) about the surplus being destroyed when so many people needed it, led to the government distributing it to the poor.  

The canned beef was 'new' to so many households, they needed ideas on what to do with it.  This pamphlet from 1934 gave the homemaker recipes to use the canned beef in.

Beef and Turnip Pie, Beef Scallop, Tamale Pie, Hot Beef and Onion Sandwich, Panned Cabbage and Corned Beef... so many vintage recipes to try!


Print Friendly and PDF

Vintage Recipes: Tomato Butter (an early version of ketchup) and Vinegars! Cider vinegar, potato vinegar and corn vinegar!

Some of my favorite cookbooks are old... really old.  I even have one published in 1910.  
 
Most of my vintage cookbooks were handed down to me from my Grandmother, including her handwritten recipe notebooks from high school when she would listen to the radio 'cooking' chat shows and copy down recipes they featured.  (Back in the 1920's - 1940's homemaking 'cooking and chat' radio shows were popular for Midwest housewives and young women to listen to, copy recipes and household hints from and connect with other women 'chit-chatting' about whatever the radio hostess felt like talking about that day - the farm, children, husbands, neighbors, church, crafts, animals, etc.)  

These days it's also fun and easy to find old cookbooks online, digitally kept and free as they are no longer under copyrights (although, sadly many of these free old books are offered as printed copies for exorbitant amounts of money by unscrupulous people on sites like Amazon who simply download the text versions from online educational library's and Gutenberg Project, and run them through a printer and sell it.)  


While reading one of my old 'War Foods' (1917)  cookbooks, I came across "TOMATO BUTTER" - which is simply a very early recipe for homemade ketchup. 
Tomato Butter Scald and plunge into cold water eight pounds of ripe tomatoes; peel, and add four pounds of sugar and one pint of vinegar; boil till they begin to thicken, then add one teaspoonful of cloves, one tablespoonful of mace» two tablespoonfuls of cinnamon, one teaspoonful of allspice. Cook till very thick, being careful not to burn. Spoon measurements should be level.

I currently make my own apple scrap vinegar and usually have a new batch going at all times, so I was interested when I came to the part about homemade vinegars and saw options for... potato vinegar and corn vinegar!?   (Note:  this image comes from a G**gle version which doesn't actually scan the pages (which is my favorite) but the scans are computerized so the text is often wrought with errors as the computer doesn't recognize individual letters but makes a 'guess' and prints out what it thinks it's seeing.  
 
It's very easy to figure out the words, but I just wanted to note why potato looks like paUdo for example.  A human would read the "tat" while the computer sees "U". 


Cider Vinegar

Put cider in a barrel or keg.  The bung-hole must be left open and protected from insects by tacking a piece of cheesecloth over it.  Keep in a moderately warm place.  It will be ready for use in from four to six months.  If a very strong vinegar is desired, add 3 tablespoons brown sugar to each gallon.

Potato Vinegar

To two gallons of water that potatoes have been boiled in, add one pound brown sugar and one cake of yeast dissolved in a little warm water.  Keep in a warm place for 3 or 4 weeks.  There should be a chance for it to ferment.  If it is in a jug, the cork must be left out and a piece of cheesecloth tied over the top of the jug.  It is said cucumbers cut fresh from the vine will keep in this vinegar without salt.

Corn Vinegar

Add to one gallon of water one pint of brown sugar, and one pint of corn cut from the cob.  Put it in a jar and cover with a cloth; set in the sun for 3 weeks and the vinegar will be ready for use.


Source:  War food; practical and economical methods of keeping vegetables, fruits and meats - published in 1917.


Print Friendly and PDF

5/6/22

A Double Subject Recipe Post for a great Keto Garlic Roll - but also Using Food Storage - Dehydrated Eggs and Buttermilk Powder


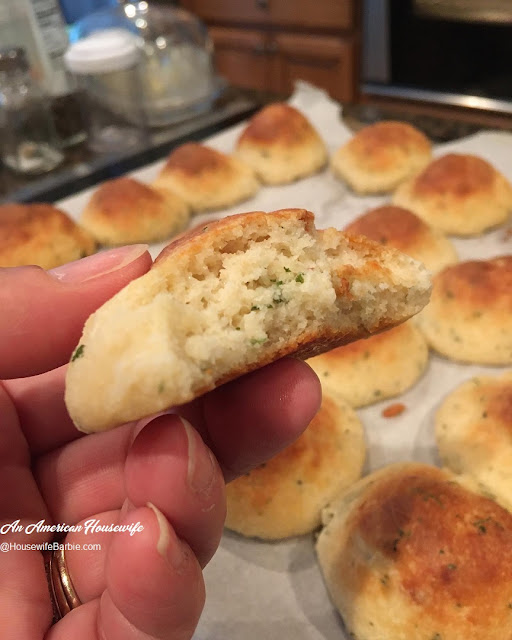
This was going to be a post to save a good recipe for a simple keto - low carb garlic roll but it ends up being a 'double subject' post as I also decided to do a trial with emergency storage food dehydrated eggs we have on hand, as well as buttermilk powder to see what the results would be.  Primarily it's a good garlic keto roll, but the secondary recipe note is that I can safely say it can be made with powdered eggs and powdered buttermilk if you don't have fresh eggs or buttermilk on hand!

For those of you who do not choose to use food storage items, obviously the recipe is originally made for fresh items.

Keto Garlic Rolls

3 c shredded mozzarella cheese
4 oz. cream cheese
2 eggs
2 1/4 c almond flour
1/4 c coconut flour
1/4 c buttermilk
2 T fresh minced garlic
1 1/2 T dried parsley flakes
1 t baking soda
1/2 t baking powder
1/2 t salt

In a microwavable bowl, place the mozzarella cheese and cream cheese.  Microwave it 1-2 minutes until it's soft and melty. Place the melted cheeses in a a food processor bowl with an S-blade, and add the rest of the ingredients.

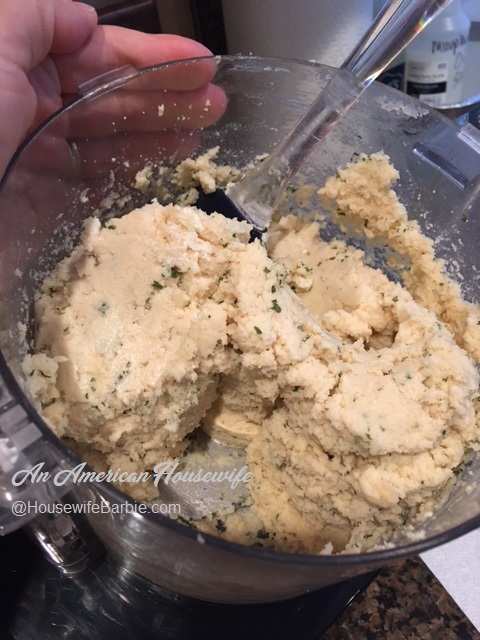
Pulse until it's combined and all comes together into a ball of dough.  Scoop even amounts out and roll into balls.  Place on a parchment lined baking sheet.  I used a 2" scoop for the rolls in the photos.  

Bake at 400 degrees until golden brown (about 15-18 minutes but depends on the size rolls you made).  Let them cool on the baking sheet for 4-5 minutes before moving to a wire rack or serving.  If you move them before that they will tend to fall apart easily.  Give them a few minutes to set up.

The food storage items I used were powdered eggs and buttermilk powder. In the future I might also do a trial using freeze dried mozzarella but it's so expensive to purchase that I hate to open a can just for recipe trials I'm unsure of.  If I use it for pizza or lasagna and have a can already opened I'll go ahead and do some testing and come back to report!


 The dough in the food processor....


My powdered (dehydrated style) eggs.  Note these eggs have been in storage for about 10 or 11 years.  I just opened the sealed pouch and since I'll be using them regularly to use them up in the next month or two, they are now in a sealed canning jar for regular use in the pantry.


Made into rolls


The powdered eggs and powdered buttermilk seemed to keep them from rising like fresh eggs would so they are a little more dense and not as fluffy, but still very, very good and did rise somewhat.


I served these with keto lasagna the first night, and homemade beef stew the second.  The few remaining were spread with a garlic cheese spread and placed under the broiler for a few minutes before being eaten for lunch (by me).


Print Friendly and PDF