Showing posts with label Side Dish. Show all posts

2/2/25

Carrot Loaf (a vintage recipe from the 1930's and 1940's)

What a bizarre recipe!  I don't often update this site anymore (maybe in the future if I get more time... right now it's impossible) but I saw this one in an old magazine and just thought it was the most interesting recipe!  Peanuts and tomatoes and carrots?  Oh my.  If you make it you can tell me how it was.  :)

Carrot Loaf

1 c ground carrots
1 c tomatoes
1 c ground peanuts
1 T butter
1 c bread crumbs
4 eggs

Grind carrots, peanuts and bread through your food chopper.  Add tomatoes and butter.  Mix well.
Beat eggs until foamy, then add.
Bake in a greased loaf pan at 350 for 1 hour.


Print Friendly and PDF

6/15/24

Grilled Shrimp and Butter Rice


So simple and not flashy but oh so good.  

Tonight I went to the freezer and spied a bag of large shrimp.  Yes, shrimp sounds fine.  Thawed under water and rinsed, I decided to season with some olive oil, fresh cracked black pepper, ground coriander and garlic salt.  

While I let that sit and marinate for a bit, I started some rice in a saucepan on the stove.  1 cup rice to 2 cups water - (I used about 1 3/4 c rice and scooped in a quick 3 3/4 ish of water);  bring to a boil, reduce and simmer 15-20 minutes.  Because we are usually low-carb, and keto, having rice is a nice treat - a change of pace.  We are trying to 'use up' everything in the pantry and freezers, so we have been eating foods that we normally don't have.

While it simmered I grilled the shrimp, which only takes a few minutes for each side.  (I threaded them on metal skewers.)

When the shrimp was done, I removed them from the skewers, and added about 1/2 c butter to the rice, along with a heavy dose of garlic salt. 

This simple meal was so good!  Simple, filling and oh-so yum.


Print Friendly and PDF

2/27/24

Food Storage: Macaroni Salad


Macaroni Salad

8 oz. macaroni, cooked and drained
2 T dried celery pieces (or 2 ribs fresh)
1 T dried minced onion
1/4 c diced/chopped dill pickles
1/4 c diced/chopped sweet pickles
2 c mayonnaise (or substitute part Miracle Whip)
salt and pepper
mustard to taste (about a teaspoon)
1 t sugar
*if you use only mayo and no Miracle Whip, add some paprika, and a dash of garlic powder and onion powder, maybe even a little celery seed.  (Mayo doesn't have spices or sugar added, but Miracle Whip does).   Chill for at least 2 hours minimum for the flavors to meld.  Up to 4-8 is even better.


Print Friendly and PDF

2/12/24

Carrot or Vegetable Casserole (an old, vintage church cookbook style, grandma recipe)


A older, 'vintage' Grandma recipe that I've been making off and on in various ways for years now (since my own kids were itty bitty) that can be varied with whatever you want or whatever you have on hand.

I posted this recipe in 2008 using all carrots from the garden: https://www.housewifebarbie.com/2008/10/carrot-casserole.html

Carrot Casserole

2 pounds carrots, cubed, chunks or sliced
1 c water
1 medium sweet onion
2 T butter, melted
1 1/2 c shredded cheddar cheese
1 c Ritz Crackers, or similar buttery flavor cracker, crushed
salt and pepper to taste
4 slices bacon, cooked and crumbed
2 eggs, slightly beaten
1/2 c more buttery crumbs for a topping (optional)


Combine the carrots and water in a saucepan and cook about 15 minutes until just tender. Drain and mash just a little bit to give it a mixed texture. Saute' onion in butter until translucent but not brown. Combine all ingredients in a greased casserole dish. Sprinkle with 1/2 c crumbs if preferred, bake uncovered at 350 for about 40 minutes until hot completely through and golden.


Later I posted the recipe again using many vegetables I had on hand, like zucchini and yellow squash.

Vegetable Casserole (Use;  Yellow Squash, Zucchini, Onions, Carrots)

2 - 3 cups squash;  either yellow or zucchini or a mixture of both, sliced and cooked just tender
1 medium sweet onion like Vidalia, chopped and added to the squash cooking the last 3 minutes
2 carrots, sliced or grated (if sliced, add to the cooking squash or use a can of sliced carrots if you need to substitute)
1 egg, slightly beaten
3 T butter
1/2 c mayonnaise
1 T sugar or substitute
1 c cheddar cheese, grated
1 - 1 1/2 cups crackers, crumbled such as TownHouse or Ritz
Dash Cayenne pepper
salt and pepper

Put the well drained zucchini or yellow squash and onions into a mixing bowl.  Add the carrots, egg, butter, mayonnaise, sugar, half the cheese, half the crackers crumbs and the cayenne and salt and pepper.  Mix gently.  Put into a buttered casserole dish.  Top with the remaining cheese and cracker crumbs.  Bake at 350 for about 25-35 minutes until warmed through and golden.


Last night for dinner we had this casserole and again, improvising what I was wanting to use up, and what we had to work with.

The carrots are the the final ones in the bag of carrots given to me in November (?).   They are locally grown, and may have originally been part of a food bank, or maybe just gifted to someone.  They don't eat or use carrots and they gave them to someone else.  They also didn't use or cook with them so they gave them to someone who gave them to my daughter.  A whole bag of fresh garden carrots, but she doesn't love carrots and never cooks with them (nor wanted to clean and cut these for fresh with ranch) so she gave them to me.  I've been using a few here and there ever since but they needed to be used up as a couple were starting to get a bit soft. 

So, carrot casserole it was!  I didn't quite have enough, so I grabbed a jar of home canned carrots as well.
I had some leftover green onion tops from a few weeks ago that needed to be used up from the fridge.
The egg was powdered whole egg.
The butter, home canned.
The crackers were dry canned from the pantry (food sealed with a dry canning attachment sealer)
Mayo and spices I have. 
Cheese is from a block of cheddar I had in the deep freezer.  It's my last one, so I'll have to switch to freeze dried in the future when this one is used up.


dry sealed crackers - I used Keebler Butter Flavor

home canned butter - canned back when butter was affordable!

powdered egg

canned baby carrots when I had a bunch to 'use up'

The original plan for this recipe/dish - using up the fresh carrots and some leftover green onion tops


Mixed the egg powder in with the mayo and spices - and water to reconstitute the egg per directions (I think 2 1/2 T)


Lots and lots of cheddar on top as I grated too much but just decided to use it all.  We love cheese so it's all good.


Print Friendly and PDF

8/3/22

Homemade Butter - got extra whipping cream? Make butter using just a mason jar


Homemade butter!  I make this once in a while but with the cost of whipping cream being what it is, I'm not really saving money to make it myself so I just buy it.  However, sometimes I have extra whipping cream leftover from other recipes and making homemade butter is one of the ways I use it up.  It will take about 10 minutes or so and use nothing more than your leftover whipping cream (heavy cream) and a glass jar with a lid.

 
Homemade Butter
(It's actually just home-shaken butter....)

Heavy Whipping Cream - any amount but it's best if you have at least 3/4 of a cup

Place the cream in a glass jar with a tight fitting lid.
Start to shake it.
Continue to shake it.
Keep shaking it.
It will turn thick, then will blend together to form whipped cream.
Keep shaking it.
Just when you are thinking you are bored and 'done' and there are other things you could be doing right now....
You'll hear it separate!  You'll hear the sloshing sound of liquid and a little thump of solid butter!
Open the container and you now have buttermilk and butter.
Remove the solid butter. Use the buttermilk for any other use (ranch dressing or bread!) or just drink it if you like buttermilk.
Add about 1/2 cup ice cold water to a bowl of butter and knead the butter a bit, working out the excess liquid - a cloudy, watery liquid.
If you want to add salt at this time go ahead and add a little dash to taste (amount depends on how much butter you made.)  Pour off the excess liquid and use your homemade butter!

That's it!  You made butter.

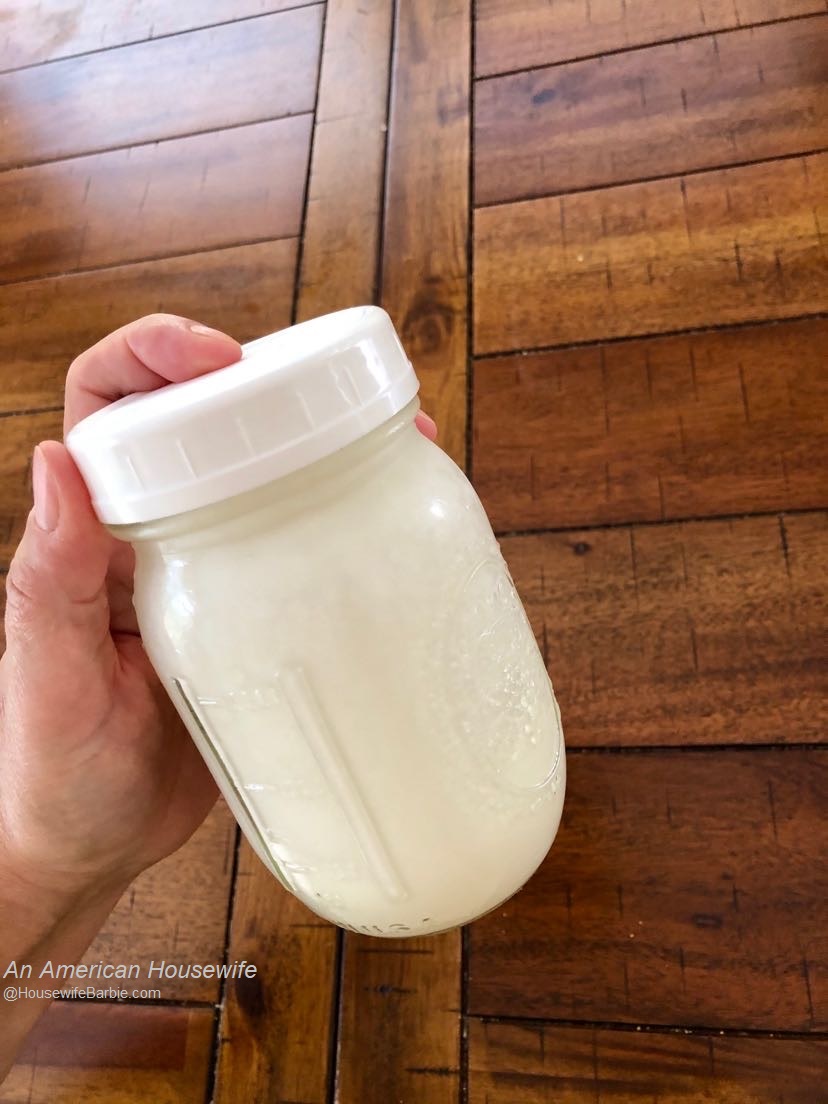
whipping cream in a jar


That awesome sloshing sound you've been waiting for that means your butter has separated from the liquid and you have made butter!


Open the jar and see your butter!


Poured out into a bowl.  Drain it and add your ice water to knead it and work it a bit to get out excess buttermilk liquid.
  Butter!


Print Friendly and PDF

3/27/22

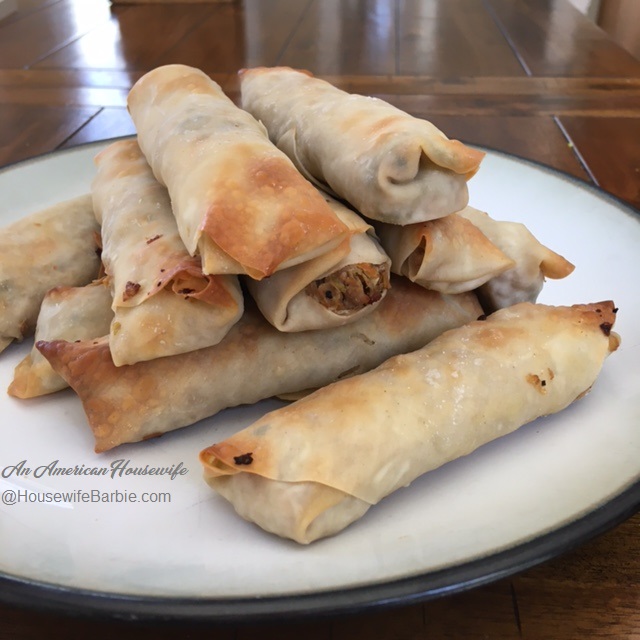
Crispy Baked Egg Rolls - (yes, baked, not fried) and freezing the leftovers for future meals!


I love egg rolls but I don't give into that craving very often because of the useless carbs.  However, I've been craving them off and on for about a year, and last weekend I had a couple cabbages in the fridge to use up.  I grabbed a packet of egg roll wrappers at the store and decided to give into the craving.  

Note - yes you can 'make' various versions of low carb or keto egg rolls.  But I don't actually like them and no, they are not like the real thing when you are absolutely craving the real-crispy-yummy-deal.  

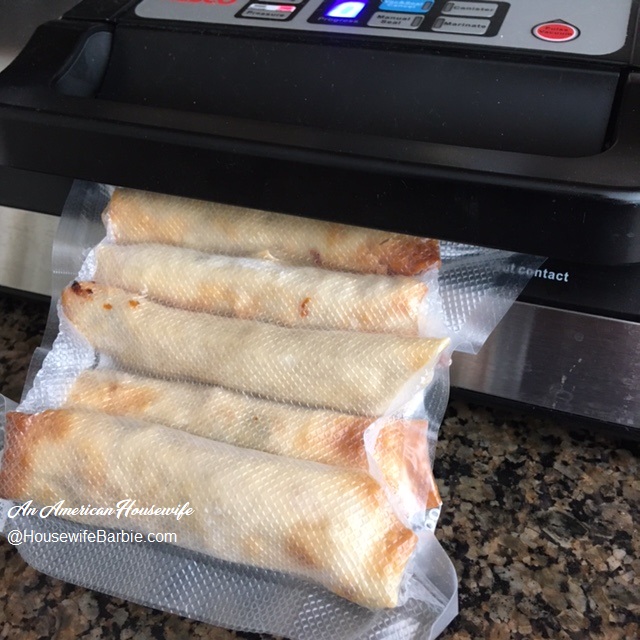
I made a batch, ate the leftover filling separate for 'lunch' (low carb!  No egg roll!) and then had 3 egg rolls later that night for dinner.  After we all had our fill, the leftovers were placed in a container and put into the deep freezer to freeze over night so I could food seal them and freeze them the next day!

YES YOU CAN FREEZE EGG ROLLS.  That seems a silly question to me, but apparently a lot of people don't know, or think you can't.  Basically, just ask yourself if you can buy a food frozen at the store?  Yes?  Then you can freeze it. 


I like shrimp egg rolls and pork egg rolls.  Not so much chicken.  And beef?  Well, that's basically like making any number of Midwestern beef and cabbage meals (like Runza with an egg roll wrapper instead of a pastry crust, or a bajillion of the Iowa/Nebraska/Minnesota casseroles that are basically the egg roll cabbage filling but with ground beef).  If you are from Minnesota you might want to substitute 'casserole' for 'hot dish' when you mentally read that last sentence.

I wanted pork, and I have ground pork in the freezer (remember, I grind our meat myself so I have whatever kind of ground meat or poultry I want).  So pork it was!

Since I was going to have carbs in this meal anyway from the egg roll wrappers, I also decided to use up a can of bean sprouts I had in the pantry.  Egg roll fillings are great that way.  You can play with your food a little bit and add/delete what you want outside of the typical cabbage, green onions, soy sauce and ginger. I didn't have any green onions left (I go through them quickly!) so I used dried chives in its place. 

When you get the mixture made, taste it.  See if you prefer it to be seasoned a little more - or a little less (by adding more cabbage or pork).  Do you want to add more onion? Garlic? Ginger?  Soy Sauce?  Do it.  It's your recipe, your food, your meal.  Play with it to make it taste how you want it to.

BASIC EGG ROLLS - Crispy and Oven Baked

1 1/2 lb. ground pork
4+ c shredded cabbage
1 can bean sprouts, drained and pressed well to get moisture out
a few carrots, shredded
a stalk or two of celery if you wish (I don't but some do)
a small can of water chestnuts, diced up
4 green onions, or scallions, sliced
4 cloves garlic, minced
1 T ginger
salt and pepper
1/2 c soy sauce or liquid aminos
4 T rice vinegar (if you only have white vinegar, only use about 3 T)
2 T brown sugar or brown sugar substitute like Swerve
Oil - about a cup total for everything (you'll probably use canola)
2 pkgs large egg roll wrappers (the ones about 6-7 inch
You can use oil, water or a beaten egg to seal them.  I just use the liquid from the filling and oil that are on my hands/fingers when I'm rolling them.

In a bowl, mix the soy sauce, rice vinegar and brown sugar.  Set aside.  Cook the ground pork in a pan with oil on the stove until it's done and no longer pink.  Add about 1/2 the liquid soy sauce/vinegar mixture.  Cook another minute or two until the liquid starts to evaporate a bit.  Remove to a plate and use the same pan to pour in about 1-2 tablespoons oil to cover, then add the vegetables, ginger and garlic.  

When the cabbage is softening a bit, add the green onions or scallions and the rest of the liquid soy sauce mixture.  Cook and stir until the liquid is evaporating (about 5 minutes on a medium high heat).  Put the mixture into a large bowl with the browned pork and mix.

Lay out a well oiled baking pan (I use avocado oil for everything but most people use canola). 
Lay your egg roll wrapper in front of you in a diamond, with the point at your stomach; place about 1/3 cup filling on the wrapper just below the half way line and an inch above the bottom point.
Use your finger to get the top point and about an inch down each side wet with either liquid that is already on your hands from grabbing the filling, or water, oil or some beaten egg. 
Start with the point nearest your stomach and roll up the filling, stop at the half way to fold each side point inward to contain the filling, then finish rolling upwards.
The moistened top point now seals the roll.
Place on your well oiled baking pan.  Do the rest of them.

If you have filling leftover, you can eat it as it is and call it lunch.  :)

Brush the egg rolls very well, covering them with the oil.   Bake in a preheated 400 degree oven for about 12-15 minutes or until golden brown on the ends and crisp. 

Remove, and although you don't have to, if you aren't going to serve them for at least 10 minutes or more, I like to remove them to a wire cookie rack so the bottoms crisp up and don't get soggy sitting on the oiled pan.  I also do this to let them cool if I'm freezing them.

TO FREEZE:  Let them cool down and place them into the freezer overnight or at least for 4-6 hours to freeze solid.  Then remove them and package them in freezer ziplocks or food seal them - as many to a package as you would need or want for future meals.  To prepare them later, you just bake them again until they are heated through (about 15 minutes). 


The filling... 


Rolling... and placing on a well oiled pan


That first little guy was opening up a bit but the oil I brushed on before baking got him back down


Using lots of avocado oil (purely my choice oil - you can use canola) to get them crispy


Ready to be dipped in a little Braggs liquid aminos...(or any soy sauce. I use both Braggs liquid aminos and LaChoy soy sauce - whatever I have on hand).  Many prefer a sweet and sour sauce.


Print Friendly and PDF

3/4/22

Ideas to Use Up Potato Peels After Cleaning Potatoes for Other Dishes or Using Up Peelings From Canning Potatoes

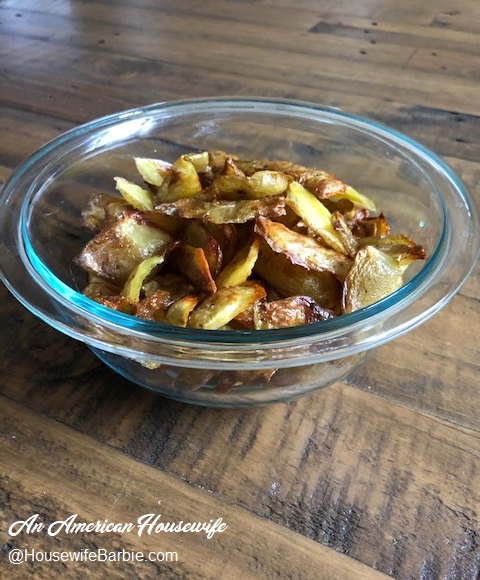
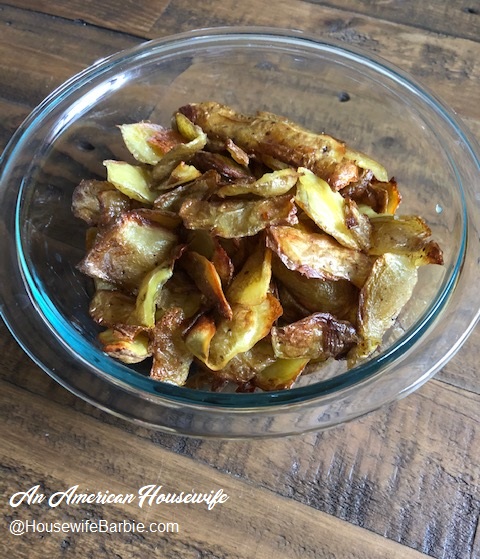
Bowl of crispty baked potato peels - using up potato peelings
Potato peel crisps
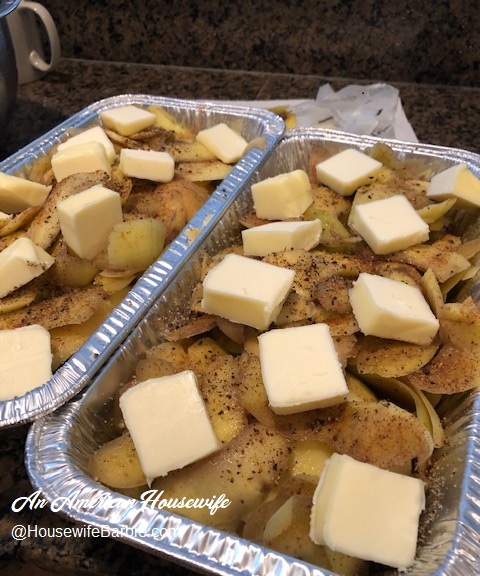
Campfire Potatoes using potato peels
Camping Potatoes - using the peelings


Although we don't get to eat potatoes regularly anymore because of the high carb content, we love them.  Anything you can make with them - any way, shape or form - I probably love it.  Potatoes and onions are two of my all-time favorite foods.  

Over the years of cooking them and using them in dishes, I've come up with a few ways to not only use leftovers from meals of mashed potatoes, baked potatoes, etc;  but use up the peelings as well. 

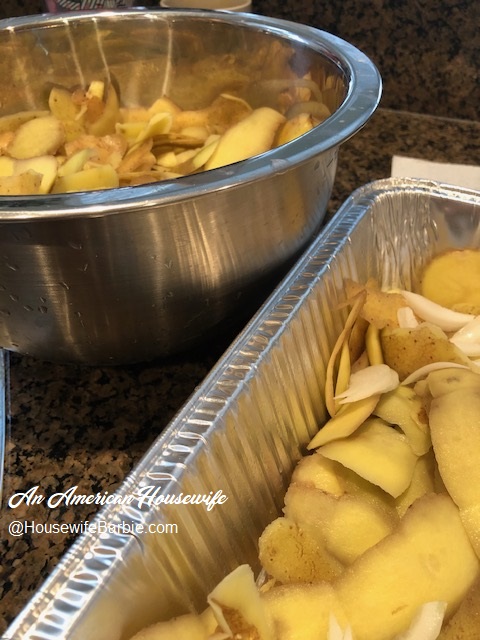
When I can potatoes I use a knife - not a potato peeler, as I personally like the feel of a paring knife better and can clean them faster.  I knew I planned to use the peels to make two side-dishes so I was also happy to slice freely with a bit more potato on each slice as I planned to use them in other dishes.

I soaked the peels in water to keep them from browning, and then drained them just before using.
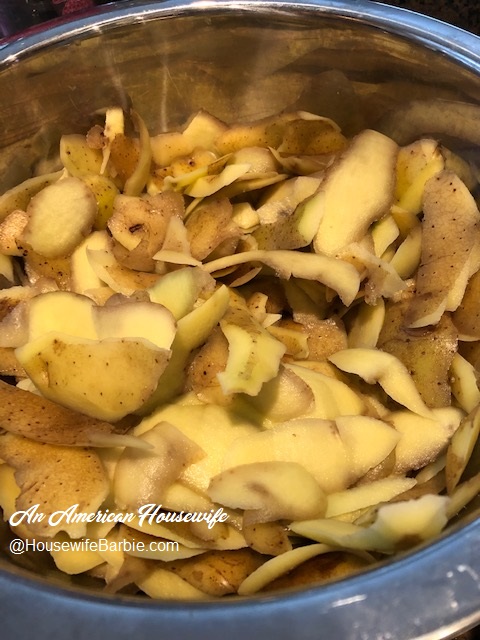
Potato Peels


I've been cooking for more years than I'd like to admit (count the years in decades).  One of the first ways I ever used up potato peelings - and did so for the first 20 years of our marriage - was to make pancake syrup from them.  

I actually make pancake syrup from potatoes in two different ways;  you can either boil the potatoes whole with the skins on and use the potatoes after, however you wish; and the second is to peel and clean the potatoes first and use the peeling's starchy water after.  Either way works.  This recipe is very, very old.   


Pancake Syrup Made from Potatoes or Peelings

Approximately 6 potatoes - the starchier the better (like russet) or the peelings from 6-8 potatoes
1 c sugar
1 c brown sugar

Scrub the potatoes well and place in a pan with 2 cups of water.  I've also used just the peelings from a bunch of potatoes (anywhere from 6-8).  Boil them, reducing the liquid until about 1 cup of the water remains.  Remove the potatoes and use them for another dish.  To the water remaining in the pan add the sugar.  Bring to a boil, stirring to dissolve.  When dissolved, continue boiling about 1-2 more minutes.  Remove from heat and let cool.  Pour into a mason jar or other container, like recycling a syrup bottle.  You can use it right away, but the flavor is best if you can keep it in the cupboard or pantry for a few days before using.  Tastes like maple syrup!


The second way to use up potato peels - Baking them into a crispy treat to snack on. (The top photo)


Potato Peel Crisps

Potato Peelings
Onion powder if you wish
Oil
Salt (and if you wish, pepper)

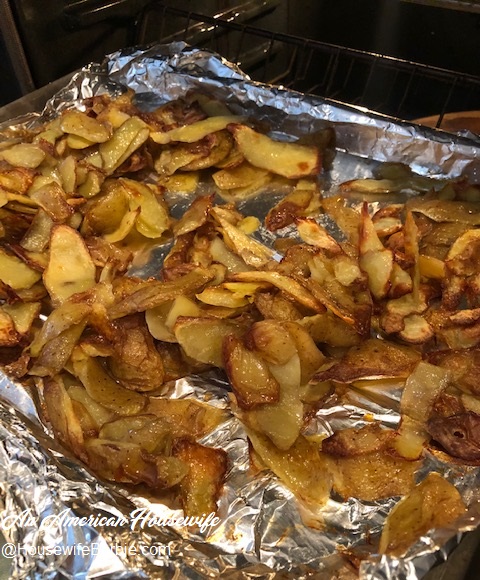
Toss your peelings with oil (I use avocado oil or olive oil).   Spread them in a foil lined baking pan or baking sheet. Sprinkle with a little onion powder if you choose, then sprinkle with salt and pepper if you like it as well.  I like them with just oil, a little onion powder and salt.   Bake at 400 degrees approximately 20 minutes or more depending on the level of crisp you like.  Flip them and stir them a bit every 8 minutes or so to cook them evenly.  Around 15-20 minutes they are 'done' but if you want them really crispy, keep baking them longer, checking every 4 minutes or so.  Serve as is or with a sour cream dip. 


The last idea on this post for using up the potato peelings is to make the old, well known 'campfire potatoes' but make them using peels from other potato dishes or home canning.  (The second photo above).   

Normally you make individual campfire potato packs wrapped in aluminum foil and cook them over the fire when you are camping or at home in the oven just because they taste so good.  You use the whole potato, sliced up, topped with a bunch of other ingredients that everyone pick and chooses based on their personal tastes - topped with a bunch of butter, wrapped up tightly in the foil and eaten out of the foil as everyone sits around the campfire.  

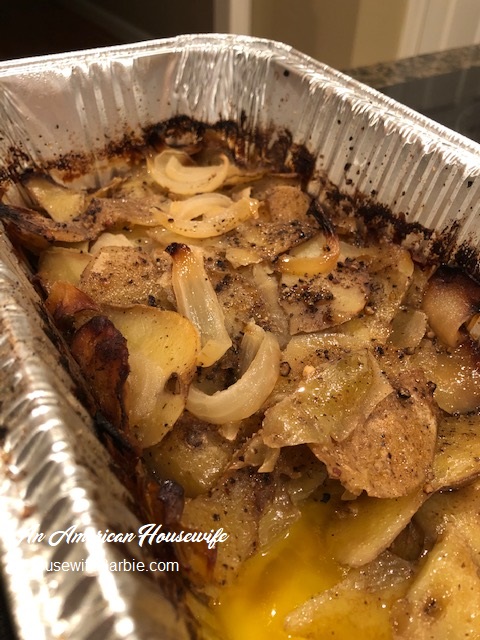
This is like that - but the photos you'll see I opted to use a disposable aluminum pan for these batches.  I have leftover aluminum pans on hand from holiday cookie baking AND this allows me to cover the pans with foil and pop them into the deep freezer to grab out for future meals or when/if we have guests over.


Campfire Potatoes 

Peelings from your other potato dishes or home canned potatoes
Onions
Butter
Salt and Pepper
Onion Powder
Garlic, green peppers, other bell peppers, zucchini, green onions, chives, cheese, bacon bits, etc.

*if baking in an aluminum pan in the oven, add about 1/4 c cream.  If baking in little packets, do not add liquid.  

If you are using disposable aluminum pans, grease or spray the pans, otherwise use a double layer of aluminum foil or use heavy duty aluminum foil pieces large enough to wrap a pile of potato and other additions in and wrapping up to seal tightly with space for a little expansion.

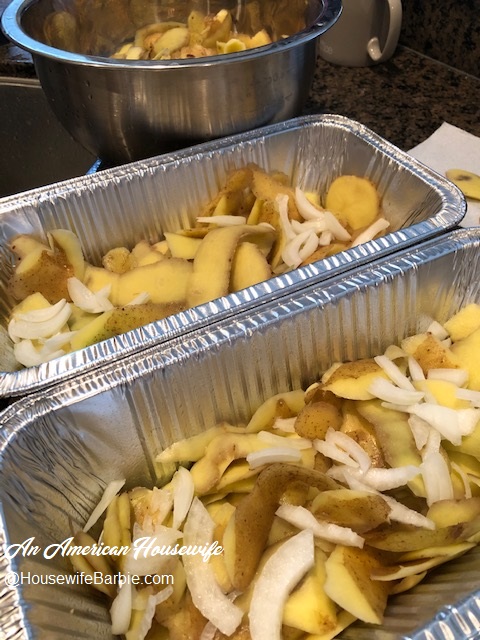
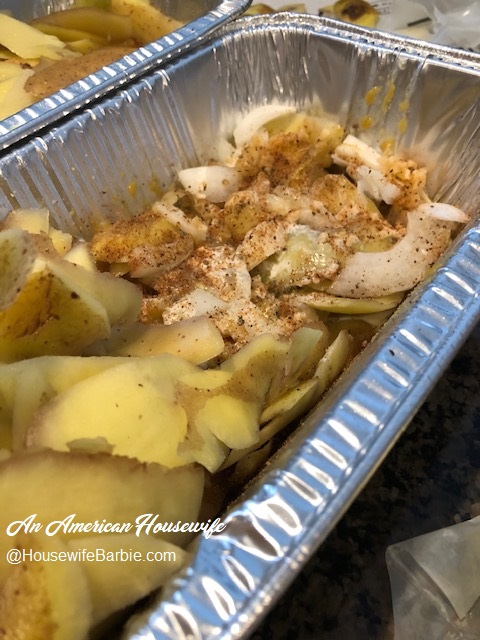
Layer leftover potato peels and bits and pieces along with onions and a bit of onion powder;  if you like and want to add things like bell peppers or other ingredients - yes, please!   In a pan in the oven, add about 1/4 cup cream poured over all.  Do not add cream to little foil packets though.  Top with a bunch of butter pieces or pats.  Cover the pan with foil or seal up your little foil packets - but not too tightly, the potatoes and veggies will expand a bit during cooking.

Cook either over your coals or in the oven at 400 degrees for about 30-35 minutes until thick and dark golden brown.  Uncover the foil pan half way through cooking.   If you use potato slices you'd have to cook about 10-15 minutes longer but peelings are thin and cook faster.


 _____________________________________

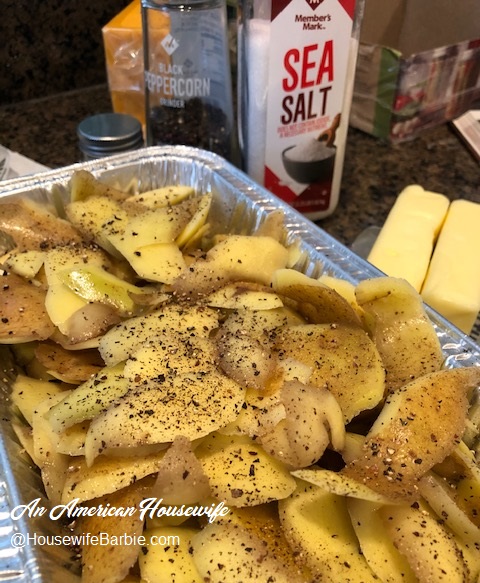
Photo:  layering leftover potato peelings from canning potatoes in a disposable pan with onions and seasonings.  I baked them, then served one and froze the rest for future meals - as they just have to be reheated in the oven. 


Layered to the top and then lots of yummy salt and fresh cracked black pepper

 
I went a little heavy on the butter this time - oops!  I was busy and just quickly cut up butter and threw it on.  I wasn't really thinking about it.


These were some of the peelings tossed with oil and sprinkled with salt and a bit of onion powder


Crispy potato peelings... yum!



Print Friendly and PDF

11/1/21

Vintage Recipe: Broccoli Casserole (the 'church cookbook' kind your grandmother or great-grandma might have made)


"Anything special you want for dinner?" I asked.
Surprisingly the answer was, "Yeah... uh, for a side dish, make that broccoli casserole thing.  I'm really craving that!"

Blink. Blink. Blink.  (That's me)

Yes, my husband requested not only a vegetable... but a casserole.  He loves this casserole (one of perhaps only two or three since he is not a casserole kind of guy)  and it's the easiest, quickest thing to throw together.   It's an 'oldie' and probably has fifty different versions depending on the person making it, but this is the one he loves, I love, the kids loved... and it's something we've made for too many years to count.  

The amounts are approximate - a little more, a little less, meh.  Also, I have made this a number of times with fresh broccoli - just make sure you cook it tender as this casserole is not as good if the broccoli is still too crisp.  Plus, I don't like 'wasting' fresh broccoli on a casserole when it's so good in various ways eaten fresh and crisp; or in dishes where it's the star of the dish and stands out.  This is a good old fashioned casserole and frozen works perfectly.

I know I've posted it on An American Housewife previously, but to make it quick and easy to find I'm posting again. 

Broccoli Casserole

20 oz. frozen broccoli, cooked and drained
Optional:  replace some of the broccoli or add to it a bit of frozen, cooked carrots/yellow squash
2 eggs
1 c mayonnaise
1 can cream of mushroom soup (regular or fat free)
1 c shredded cheddar cheese (option: I've used some Velveeta in it and the family loved it)
3/4 c crushed Ritz Crackers
1/4 c butter
Salt and Pepper

Combine the mayonnaise, soup, cheese and eggs.  Add the broccoli.  Pour into a greased casserole dish or 9X13 ish pan.  Top with the crushed crackers and either dot the top with butter or melt and pour over.  Salt and Pepper to taste.  Bake at 350 for about 35 minutes.


We never used to have Ritz Crackers on hand and had to buy them for this dish but with a baby/toddler around we now have Ritz on hand most all the time so this is really easy to whip up for dinner!


This time I used 20 oz. broccoli but also some frozen carrot/yellow squash, cooked and drained.


Print Friendly and PDF

7/25/21

Zucchini Side Dish - (Using up yellow squash and zucchini -use as a side dish or a main entree)


Reposting this one as I go through photos in my file folders.... This dish isn't one that really has a 'recipe' so much as a throw it all together type thing.

When you eat low carb for years there are certain items you automatically always seem to have on hand, and for us, it's yellow squash and zucchini.  The problem is that sometimes I buy them and then we go all week without having anything that uses them and I forget about them until I realize I have to use them up or they are going to go bad.  

I've spiralized them and froze them at this point, or spiralized them and served them along side whatever meal we had that evening as a 'noodle' side dish or I quickly use them in random recipes (many already posted on this site).  
 
***One of my favorite quick ways to use them up is to slice them into rounds about 1/2 inch thick, drizzle them with olive oil, sprinkle with salt and pepper and grill them!  YUM!*** 
 
Here is another quick 'use em' up' dish....
 
Sauteed Zucchini and Yellow Squash
 
Zucchini and/or Yellow Squash
Mushrooms
Olive Oil
Salt and Pepper
Feta Cheese 
options:  a bit of diced red/yellow or orange pepper, a little bit of onion, green onion or even diced celery

Add some olive oil to your pan and then add the vegetables.  Saute' until they are tender.  Season with salt and pepper.  Sprinkle with feta cheese before serving.


Print Friendly and PDF

Re-posting - One of the best and easiest keto riced cauliflower sides


I've posted a version of this previously - about 2 or 3 (?) years ago.  But I love it and make it often as it goes so well with different meals depending on a couple tiny additions or substitutions.  It's based on a recipe I found in the book: 500 Paleo Recipes


Chicken Flavored Riced Cauliflower with Slivered Almonds

1/2 head fresh cauliflower, shredded with an S-blade to 'rice' it or store bought in frozen foods
1/4 c slivered or sliced raw almonds
2 t coconut, olive or almond oil to saute' the almonds
1 bunch scallions/green onions, sliced
1/4 c fresh, chopped parsley or 2 T dried
1 1/2 T Tone's Chicken Base

Steam the cauliflower in the microwave for about 4 minutes.  You want it to remain crisp enough to double for 'rice'.  In a skillet, place the oil, heat to medium high and add the almonds.  As the almonds start to brown, be sure to stir them or they will burn quickly when you aren't watching.  Add the cauliflower when the almonds turn golden; add the scallions and parsley along with the chicken base flavoring.  Stir-fry until the chicken base is all mixed in.  Serve along with your dinner!

_______________________________

Basically it's the flavor and crunch/soft texture of Rice-A-Roni - and I'm all about a crunch in my foods. You can play with this one a little bit - I'll note some of the ways I do - depending on what I have on hand, in the pantry or in the freezer.

Use any of these or a mixture of them:

  • Store bought frozen, plain riced cauliflower
  • Cauliflower Medley
  • Fresh cauliflower you cook/steam and rice yourself

Best choice is sliced almonds but improvise if you wish:

  • Sliced almonds
  • Whole, raw almonds, chopped
  • Slivered almonds

Additions (based on your carb count goals)

  • Chopped green onions or scallions
  • A few baby peas
  • A little shredded carrot
  • A scrambled egg (like fried rice)
  • Soy Sauce/Liquid Aminos/Coconut Aminos
  • Dried chives
  • Dried parsley
  • A little fresh, minced garlic
  • Bits of chopped broccoli
  • Bits of diced red pepper


MY PERSONAL NOTES:  I almost always double the almonds - they are my favorite part.  Be sure you are sauteing them first though - it's a must for the right flavor of this dish.  You can substitute the chicken base for cubed bouillon but you would probably have to smash it to a powder before adding or try to dissolve it in a bit of liquid - which would make your dish liquidy.  Chicken bouillon granules would work; as does the paste base (which I always always have on hand).

I make it as above for a side with almost anything in hurry.  Made as above it's great with any chicken entree'.  When I use it with any of my Chinese inspired meals I add a scrambled egg, use the 'medley' version or add just a few peas/carrots and some Liquid Aminos.  I've also left out the chicken base and used 2 frozen bags or one head of cauliflower and used a packet of Sun Bird Fried Rice mixture.  YUM!


Print Friendly and PDF

5/28/21

Homemade Keto Mozzarella Sticks and Breaded, Fried Shrimp

When I was looking through previous posts on my site, I saw this one listed and thought for sure it was posted last year (2020) - perhaps even in the Fall.  When I looked at the date, I couldn't believe it.  I posted this in July of 2019!  That is almost TWO YEARS AGO.

I suppose it's just another 2020 thing... the year that messed up all sense of time.  But either way, I'm posting again because they are THAT good and it deserves to be reposted.


I've posted the recipe for mozzarella sticks before but the reason I'm posting again is two-fold.  The first, because I've mentioned in the past that it's awesome to make a double batch so you can put on in the freezer for later and second, that you could use the breading for other items like chicken or shrimp.  I buy the peeled with tail on style personally.   Just make them the same way you make the mozzarella sticks.  Serve with your favorite sugar free condiments or as low sugar (like 1 gram) as you can find or make yourself.


Low Carb Mozzarella Sticks


2 eggs, beaten
1 c almond flour
scant 1 c powdered Parmesan cheese
optional:  1/2 c wheat resistant starch 75
optional:  1/2 c ground pork rinds
(If you don't use the wheat resistant starch 75 or pork rinds just use more Parmesan or almond flour)
Approximately 20 sticks string cheese
2-3 T Italian Seasoning
1 t garlic salt

Cut the string cheese in half.
Lightly beat the eggs and pour into a small shallow dish.
Mix the dry ingredients in a large Ziploc baggy.
Roll the cheese stick halves in the egg and dip in the dry mix. Press lightly to help it adhere.
Place the breaded cheese sticks on a baking sheet and freeze at least 2 hours or up to 3 months.
When you want to make them, heat about 2 inches of oil in a pan and fry the sticks for 1-2 minutes. Do not crowd the pan.  Remove them with a slotted spoon and drain on paper towels.  You can salt them if you wish for more salt.  Serve hot with low or no sugar marinara sauce or ketchup. 


The shrimp I breaded last month and put into the deep freeze for 'another day'.  Here they are right out of the freezer and waiting to jump into the pan of hot grease.


Made a double batch of mozzarella sticks last month and popped them into the freezer.  Here they are still frozen.


 Mmmm my dinner is waiting for me.... but I remembered to take a picture this time.


Snapped a photo quickly on my cellphone so I could hurry and EAT them while they were hot.  Oh so good.


Print Friendly and PDF