Showing posts with label Appetizers. Show all posts

5/9/24

Just another Mexican Casserole (or nacho dip) featuring ground beef, refried beans and sausage

The plan tonight was to use up some of the homemade sausage in the freezer, the last glass jar of homemade salsa, a half round of my favorite queso that I had food sealed and in the fridge as well as some cheddar from the deep freezer that tastes great, but cheddar does get 'crumbly' after frozen.  I added to that some refried beans, black olives and was able to empty the last of the homemade taco sauce. 

I originally got this recipe when I was 14 years old and was babysitting for a woman who made it and had me bake it for her 3 kids while I was babysitting.  I loved it so much I had her write down the recipe for my Mom.  She then made it regularly as we all loved it - and I continued making it for my own family once I grew up and married and had kids.

It's a casserole and/or a dip for tortilla chips.  You can also put it in a flour tortilla.  Since I'm trying to use UP groceries and not BUY ANY... I don't have tortilla chips so we are having it as a casserole - which is my favorite way to eat it anyway!


 Mexican Casserole or Dip

1 lb. ground beef browned with 1 small onion, chopped
1 can refried beans
1 c ground and browned sausage
4 c shredded cheddar cheese
1 small can green chilies, chopped
1 - 16 oz. container sour cream
1 jar salsa or taco sauce
*optional - black olives, green olives, sliced
*optional - 1 1/2 c guacamole or avocado dip


Spread the refried beans on the bottom of a sprayed casserole dish for a meal or if you are using this recipe as a dip, spread it thinly on the bottom of a larger pan of your choice - (pizza pan, 9X13, anything you wish!) Brown the ground beef and/or sausage with the onion. Place half into a greased casserole dish or if you are using for a dip, use all of it over the refried beans in the larger pan. Sprinkle with half the cheese. Add the chilies and/or jalapenos, the sour cream, the salsa/sauce and the rest of the cheese in layers. Top with olives if you love them!

Bake at 350 for 20 minutes for a thinner pan and bake 45 minutes if you have a thick casserole dish. When the cheese is melted and it's hot all the way through, remove and serve as a dip or let set for 5-8 minutes to 'set up' when serving as a casserole. It may be more runny when hot straight from the oven and it sets up (like lasagna does) when left to stand and cool a bit. We can never wait and don't care - we dig right in!


Here are photos of what I think might be the first (1st) time I posted the recipe on An American Housewife - these were from March of 2011. 
You can see what it looks like when it's not all mixed up and dished, ready to eat.


Print Friendly and PDF

4/8/24

Cheeseballs


 The sauce is made with sour cream and mayo and Mrs. Dash Southwestern spice mix.


Last night I was craving something hot and comforting and honestly I wanted dumplings or homemade pasta but when I went into the kitchen to make 'something' I decided at the last second to make homemade cheese balls.   

Here is the basic recipe - same one I first posted for  Cheeseballs - back in 2009.

Food storage options include things like butter you have stored in the deep freezer or have home canned; the green onions I used were freeze dried from storage.  You can used premixed milk, freeze dried or frozen cheeses of your choice - mix and match any kind of cheese you wish.  Jalapenos can be left out, and you can also use straight from a can or bottle or even freeze dried. I used shortening to fry them in - which is hopefully in everyone's storage pantry.

 Homemade Cheese Balls

Play with the ingredients in this recipe. Use all different cheeses, leave out the jalapeno, add crumbled bacon, add extra jalapeno, some chipotle, add chopped shrimp, crab or lobster to make a seafood ball... the possibilities are endless.

1/2 stick (1/4 cup) real butter
2 green onions, chopped
1/4 c flour
1 c milk
1 c mozzarella, shredded
1/2 c cheddar, shredded
2 small jalapenos, chopped fine
1/4 c flour, extra for tossing with the cheese
oil for frying

Form balls and fry in hot oil or melted shortening.  Drain on paper towels.  Serve hot as is or mix up whatever sauce you wish to go with them.


Print Friendly and PDF

3/8/24

Quesadillas


Last night was a very simple dinner as it was just me home at dinner time.  Quesadillas.

I like onions on mine, but we obviously have no fresh onions right now so freeze dried it is!  I chose green onions, although you could use minced dried onions as well.
Lastly - the cheese. 
Not only do we keep blocks of cheese in the deep freezer, but when they are opened, I always use my vacuum food sealer to seal them tight for storage in the refrigerator.  This means our cheese lasts and doesn't get moldy or go bad!   So I had a food sealed 1/4 block of cheddar and a bit of Queso Fresco in the refrigerator which I used and then promptly resealed the rest of the cheddar again - which if we don't care to use it, will still be perfect a month or two from now (although we love cheese so it will probably be used this weekend as I cook with it all the time).


Print Friendly and PDF

1/9/23

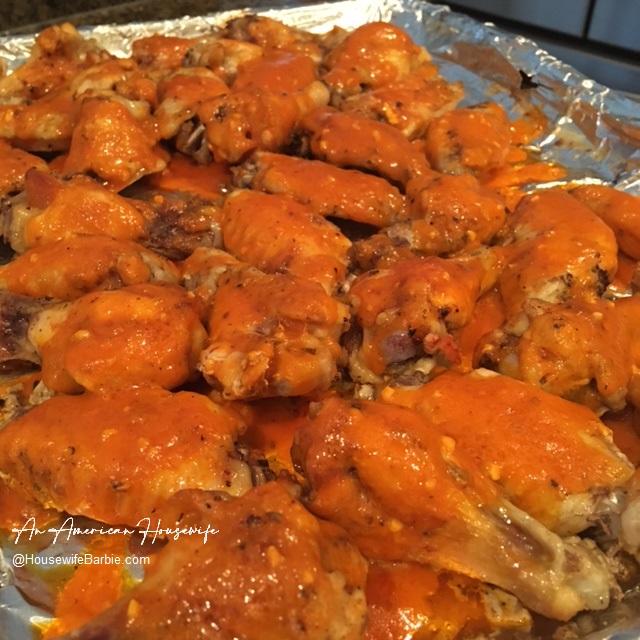
Buffalo Hot Wings with Homemade Buffalo Wing Sauce


This is a 'quick and sloppy' post - in which I literally am uploading a couple photos from my old cell phone - not even brightening them to make up for the ugly yellow lighting in the kitchen.  I really just want to make sure I get the wings recipe posted - although I'm sure I've posted it a couple times previously over the years; when your site has been active since about 2006, there are a lot of recipes for the search engines to wade through - and many of my pages are not google indexed for weird reasons that I have no idea about or how to fix... so it is what it is.

When I post recipes it's usually for my own personal collective use, but often they are with a particular child of mine in mind.  I want them to be able to find the recipe(s) when they need or want them.  This one is for my son.

Buffalo Hot Wings

Chicken wings and drumettes - as many as you wish
1 c hot sauce like Frank's or Crystals
1/3 c oil (olive, canola, vegetable)
1 t cayenne powder
1-2 t minced fresh garlic
1-2 t sugar or sweetener
1/2 t worchestershire sauce
fresh black pepper - about 1/8 - 1/4 t
1 egg yolk
2 t water
2-3 T cornstarch or 1/2 t xanthan powder

Cook the wings as you like (oven, grill, etc.)  While your wings are cooking according to package directions or your preference, make the sauce.  In a saucepan, mix the hot sauce, oil, cayenne pepper (optional - can leave out for less hot wings), garlic, sugar and worchestershire and pepper.  Whisk or stir briskly and heat until it comes to a slow boil.  As that is heating blend the egg yolk with water and corn starch.  Whisk in to the hot mixture and stir as it thickens.

Take the chicken wings/drummies and baste, spoon or pour some of the sauce over all, as heavy as you wish.  Return to the oven and bake or broil a few minutes until the sauce is nicely adhered and a bit drier.  Remove from the oven and serve - goes well with celery and ranch dressing and/or salads.  Serve the extra sauce in a dish along side for dipping the wings in.


Print Friendly and PDF

1/7/23

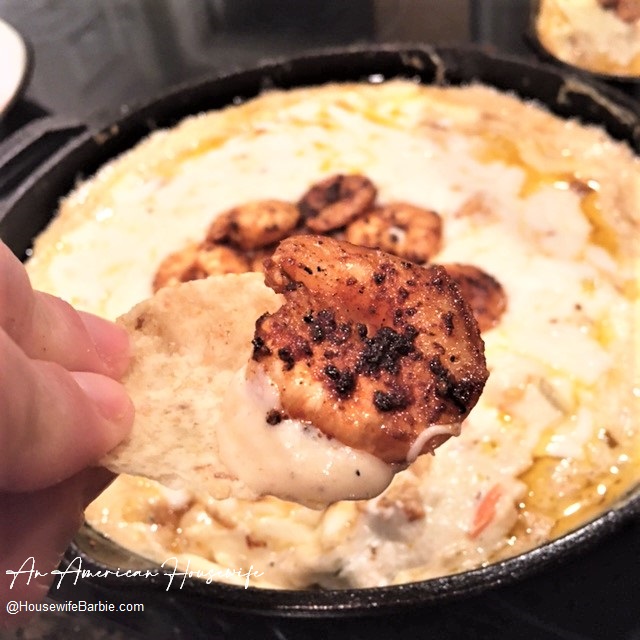
Spicy Shrimp Queso Dip


This week is 'Use Up All the Food" Week in our household.  This means using up all the foods we bought for our celebration(s) last weekend before we get back to our normal eating of typically low carb and sugarfree.  Last night was opening and using a bag of tortilla chips, as well as a package of 'queso' Velveeta cheese.  The dish trying to use both of those is obvious but I also wanted to start using up a bag of frozen shrimp that we've had in the deep freeze forever so.... shrimp queso it was!

This is being posted for my youngest daughter who wants me to make this for her, but I am making sure to post it so she can make it herself!  Ha.  

I didn't measure anything, so everything is estimated or just use as much or little as you like - like jalapenos; lots if you love them, little if you don't. 

And cheeses - use whatever you have on hand in your refrigerator.  Monterey Jack or Colby Jack would be yummy but I didn't have those - I ended up using White Queso, Smoked Provolone, Cream Cheese and then some mozzarella, which I only used to sprinkle on top because there was literally a cup of it sitting on the counter and I didn't want to put it back in the package in the refrigerator.  I actually liked it better without as it was on top and formed a cheese crust on top while the rest was all melted and blended.  Yours?  Play with your food - do what you like.

Spicy Shrimp Queso

A mixture of spices to blacken your shrimp:  black pepper, salt, smoked paprika, garlic powder, a little garlic salt
Onion, diced
Tomato, diced
jalapenos, diced
fresh garlic
Velveeta, Cream Cheese, Mont. Jack cheese, Colby Jack Cheese, Mozzarella, Provolone, cheddar... whatever!
Shrimp

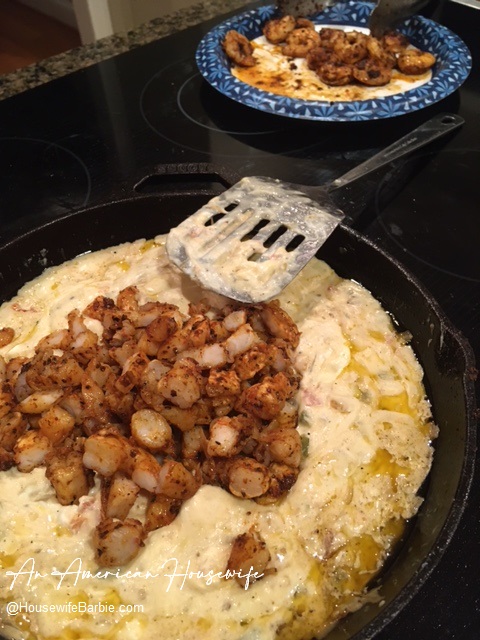
Toss the shrimp in the spices while you heat a cast iron pan and add just a bit of oil until very hot.  Add the shrimp in a single layer and cook quickly to blacken and crisp.  Remove to a plate.  Turn down heat and add a little more oil to the pan; toss in about 1/2 cup or so of onion and fresh tomatoes.  Cook briefly and add garlic and jalapenos.  Cook for a minute or two and then add all the cheeses.  Stir off and on til melted.  While cheese is melting, chop the shrimp, leaving a few whole.  Add the chopped shrimp to the cheese in the pan.  Top with shrimp.  Bake at 400 for about 8 minutes.  Serve with tortilla chips.


Mixture of spices


Blackened in a cast iron skillet 


Some tomatoes, onion, jalapeno and garlic


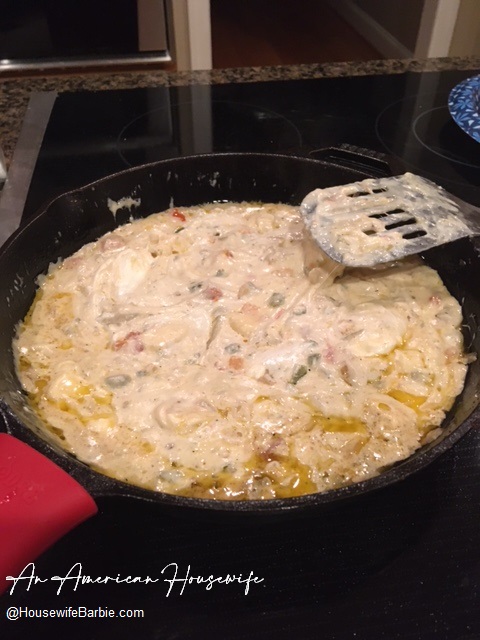
Adding lots of cheeses


Melted smooth


Chopped shrimp into the cheese


Topped with a few of the whole shrimp 


Into the oven to warm through for about 5-8 minutes til bubbly.


Print Friendly and PDF

12/27/22

Spinach, Feta and Kalmata Olive Keto Pizza: A review of King Arthur Low Carb Wheat Pizza Crust


I've posted various recipes for keto and low-carb pizza over the past 15 years or so, and although I really liked a couple of them, I had purchased the Keto Wheat Pizza Crust Mix by King Arthur, and had it in the pantry, so I thought I'd give it a try. 

It was very, very good. 

The recipe...  I've made this for so many years, I never actually use a recipe and just make it throwing together ingredients as I know I like.  It's been posted numerous times on An American Housewife, but here is one of them way back in September of 2011!   

NOTES:  I don't always pre-bake the crust first (although it's crispier and firmer if you do), and I top everything at once, including the spinach.  I don't like sun-dried tomatoes so I never use them; but it's delicious if you just add a couple tablespoons of pizza sauce smeared or dropped over the mayo/feta/garlic mixture.  Amounts can be changed if you want less or more garlic, feta, etc.  Play with it.  Make it your own.

Greek Pizza or Spinach, Feta and Kalamata Olive Pizza

1/2 c mayonnaise
4 garlic cloves, minced
1 c crumbled feta cheese
1 - 12 inch pre-baked pizza crust
1/2 c oil packed sun dried tomatoes
olive oil (or oil from the sun dried tomatoes)
1/4 pitted Kalamata olives,, chopped or sliced
1 t dried oregano
2 cups baby spinach leaves, washed and dry
1/2 small red onion, sliced into rings

Heat oven to 450.  Mix the mayonnaise with garlic and 1/2 cup feta.  Spread this over your pizza crust.  Top with tomatoes, olives and oregano.  Bake until heated through.  Toss the spinach and onion with about 1 tablespoon olive oil or if you have it - oil from the sun dried tomatoes.  Tops the pizza with the spinach mixture and the rest of the 1/2 cup feta.  Return to the oven for about 3 minutes.   Slice and serve!


Print Friendly and PDF

12/15/22

Mozzarella Dough (FatHead Dough) Cheesy Garlic Bread (keto garlic bread)

One night (last week?) I made a pizza for dinner and opted to use the second part of the dough to make cheesy garlic bread sticks.  Hardly needs a recipe, but more of a 'reminder' to myself to make these again soon as I browse through my site when I'm pondering "what do I make for dinner tonight?"

These are keto, low carb and sugarfree.  ANY of your favorite 'mozzarella dough' or sometimes known as 'fathead dough' recipes will work.  So many little variations of the recipe but if you have a favorite, just use that one.


Cheesy Keto Garlic Bread

1 recipe mozzarella dough (use half for a pizza and half for garlic bread sticks!)
a handful of shredded cheddar
a handful of shredded mozzarella
2 T fresh minced garlic (or as much or little as you like)
1 t garlic salt
1/2 t dried oregano or Italian seasoning
2-3 T real butter (or as much/little as you like)

Preheat your oven to 400.  Roll or spread your dough out on parchment to a rectangle or square shape.
Prebake it (on the parchment) on a pizza baking sheet or a pizza stone (I use a stone) for about 6-8 minutes until it's firming up and turning golden on the edges.  Remove and flip it over, still keeping it on parchment. 

Spread butter over it, top with fresh garlic and sprinkle with garlic salt and Italian seasoning or oregano.  Sprinkle cheddar and mozzarella over the top and pop it back into the oven, still on parchment, to finish baking about 5 more minutes or until the cheese melted, the edges are golden and it's done to your desired crispness and coloring.

Use a pizza cutter to slice into bread sticks or squares to serve. 

__________________________________________

If you don't know what a mozzarella dough or fathead dough is - or you don't have a recipe for one, here is one of my mozzarella/fathead doughs from almost 4 years ago, in the spring of 2019.  You can find it at the post I did on keto hot dog buns:  https://www.housewifebarbie.com/2019/02/low-carb-hot-dog-buns-and-hamburger.html


Low Carb Hot Dog Buns and Hamburger Buns 
(A Fathead Dough Style Recipe)


1 1/2 c mozzarella cheese
2 oz. cream cheese
1 egg
1 1/4 c almond flour
*optional - 2 T oat fiber 500 or unflavored, no carb whey protein powder
1 T baking powder
*optional - 1/2 t xanthan gum


Microwave the mozzarella and cream cheese until melted.  Place in the bowl of a food processor with 1 egg and the dry ingredients.  I like to add the oat fiber and xanthan gum but if you don't have it, that's fine.  Many people don't use it theirs although I feel like the texture and height is better when I use them.

Process just until the dough comes together, then stop.  Wrap the dough in plastic and pop it into the freezer while you preheat your oven to 400.

Line your baking pan/sheet with parchment.  Spray or oil your hands and divide your dough into about 5-6 pieces.  Form into balls for buns or 'logs' for hotdog buns.  Bake at 400 for approximately 12 minutes until raised and golden brown.  Cool before splitting and using.


Print Friendly and PDF

12/11/22

Buffalo Hot Wing Style Chicken Bites (Buffalo Boneless Chicken? Buffalo Chicken Meatballs?)


About a week ago I decided to make chicken 'meatballs' for dinner.  I wanted to use up some of the Whisp cracker crumbs I had, as well as having a huge craving for 'hot wings'.  This is what I came up with.  A HUGE hit - even with family members who are not low-carb, keto or sugarfree.  It was even requested I make a triple batch and 'gift' it to them so they could store it in their freezer for future meals.

Lots of options with this one... ground chicken or sausage.  Amount of cheddar.  Optional seasonings to add.  Optional coatings to toss prior to baking... or not.  Sauce... or not. 
 

Buffalo Hot Wing Style Chicken Bites

1 pound ground chicken or chicken sausage
1 heaping c shredded cheddar cheese
1 c almond flour
1 T baking powder
1 t Italian seasoning - optional
Parmesan cheese or Whisp cheese cracker coating - totally optional
Buffalo Wing Hot Sauce - store bought or homemade


Buffalo Wing Sauce

1 c Franks hot sauce
1/3 c oil
1 1/2 t cayenne pepper
1 1/2 t minced garlic
1 t sugar
1/2 t worchestershire sauce
1/4 t black pepper
1 egg yolk
2 t water
2 t cornstarch

In a saucepan, blend the hot sauce, oil, cayenne, garlic, sugar, sauce and pepper.  Heat over medium high until it comes to a boil. Turn off the heat.  Beat the egg yolk with the water and cornstarch.  Whisk in the egg mixture.  Set aside to use later.

Preheat oven to 375 degrees.  Line a baking sheet with foil.  Mix the chicken with the cheese, almond flour, baking powder and the Italian seasoning if you want to use it.  Season with a bit of salt and pepper.  Mix until blended and form small balls, place on the foil.

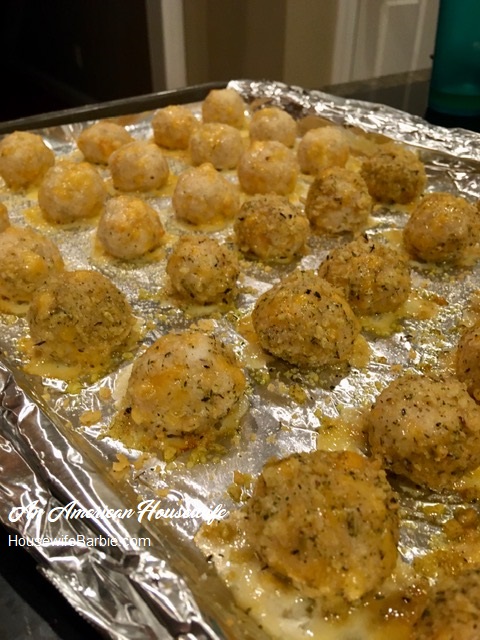
If you want to, you can toss or roll the balls in either parmesan cheese or in crushed Whisp cracker crumbs.  (Photos on this post show both - half of each).  Bake 15-20 minutes, remove from oven, pour and/or brush the buffalo hot sauce over all and return to the oven for 5 more minutes.  Goes great with blue cheese dressing.


Mixing the chicken with the almond flour and cheese


Formed balls


I rolled half in crushed Whisp crumbs I wanted to use up and try; the other half tossed in plain parmesan cheese.


Baked in the oven, taken out to add the buffalo wing style hot sauce


Cover the balls in sauce and return to the oven for about 5-8 minutes


Hot from the oven and ready to serve


My husbands dinner plate with some of the sauce scraped from the pan and topped over the balls as well.


Print Friendly and PDF

6/12/22

Dill Pickle Dip for Vegetables or Chips (both options are amazing!)


While I was brainstorming ideas of what to make for a family reunion we were hosting, I came across a 'fad' recipe all over social media.  It was a dill pickle dip (which is actually a rather old recipe dip) but had been re-discovered and is currently (apparently) popular again.  I don't spend much time on social media at all - like - almost none at all - and even I managed to see a post with this one mentioned so I assume it must be popular right now.   

I made a single batch of it last week because I thought it sounded really, really good.  And it was.  We  ate it with cucumber slices at that time; and then I made a triple batch for the reunion this weekend.  It was served at two different meal times with both cold, sliced cucumbers and celery sticks as well as regular potato chips, and wow!  It was really well received both ways.  

I am going to be totally honest here and admit that I ate about 2 cups of it myself with potato chips as my 'lunch' because it was so good, it was all I wanted to eat... and couldn't stop.  YUM.


Dill Pickle Dip
for dipping chips or vegetables

1 - 8 oz. pkg. cream cheese, softened in the microwave
1/2 c sour cream
2 T dill pickle juice from the jar
1 t garlic powder
1 T fresh dill
1 c chopped dill pickles

Mix the cream cheese and sour cream with an electric mixer, stir in the rest of the ingredients and chill at least 2 hours until needed.  Really good if you can chill for at least 4-6 hours or more.


Print Friendly and PDF

5/13/22

Homemade Canned Salsa and How to Quick Dry Fresh Basil


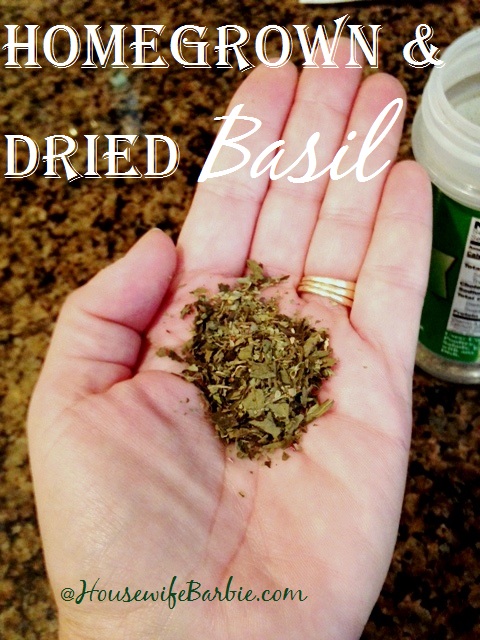
If you planted basil this spring, it's probably already 'ready' because it's one of the easiest herbs to grow and grows so well and so fast!  I have done a few posts on it already and don't need to reinvent the wheel again but the photo above is a link to one of those posts if you are interested.

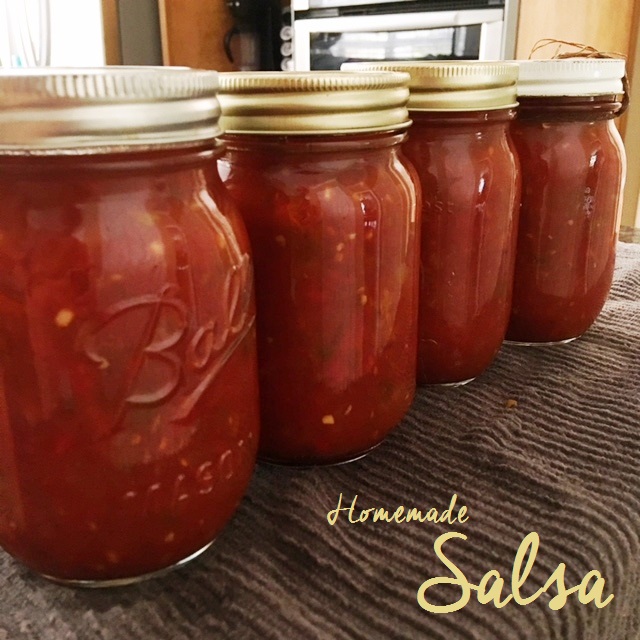
Another recipe posted many times on my site since I started it in 2006 is our family favorite canned salsa.  We have 3 salsa recipes we tend to like and make often; this recipe (below) is the one I use for canning and have for over 20 years now.


Homemade Salsa


10 Cups of peeled, seeded and chopped tomatoes
5 c chopped onions
3 sweet banana peppers, diced
4 jalapenos, seeded and diced
2 t minced garlic
1 green pepper, chopped
1/2 red pepper, chopped
1 1/4 c vinegar
2 T chili powder
2 1/2 t salt
1 1/2 t cayenne pepper
1 T sugar

To peel/skin your tomatoes easily just put them in boiling water. Skins will split in 10 seconds - 2 minutes. Remove as soon as the skin splits and lay on a clean towel to cool until you can handle them comfortably - or you can dip them into a bowl of ice water if you wish. Some tomatoes won't split but they are still ready;  if it has been in the water for over a minute, lift it out and look at it and feel it. If it looks tight and ready to burst, yet it feels like a water balloon, then remove it to cool. It's ready.  The second your fingers or a knife touch the skin it will probably split on contact.  Tomatoes can be seeded and the juice canned separately or you can use the whole tomato in your salsa and skip that process.  Up to you.

Mix all the ingredients for your salsa and simmer 1-3 hours.

While simmering, be sure to either run your jars and lids and seals through an extra hot dishwasher cycle or boil them in another pot of water so they are hot and sterilized when you are ready to use them.  Ladle salsa into the jars with about 1/2 inch head space at the top.   Wipe the edges completely clean with a clean cloth and place the lid on it and then the ring.  You don't have to tighten them hard - just a quick twist to hold the seal/lid on during the process.  Simmer them in a water bath for 25 minutes for pints, 35 for quarts.   (Originally this old time recipe did not call for a water bath.  The heat from the salsa and the jar will seal the lid.  However, I always water bath can them.)

Remove from the water, set on a towel on the counter and let them cool at room temperature.  You will hear popping noises.  That is the lids sealing.  When completely cooled, store in your pantry or cupboard. 


Print Friendly and PDF

3/27/22

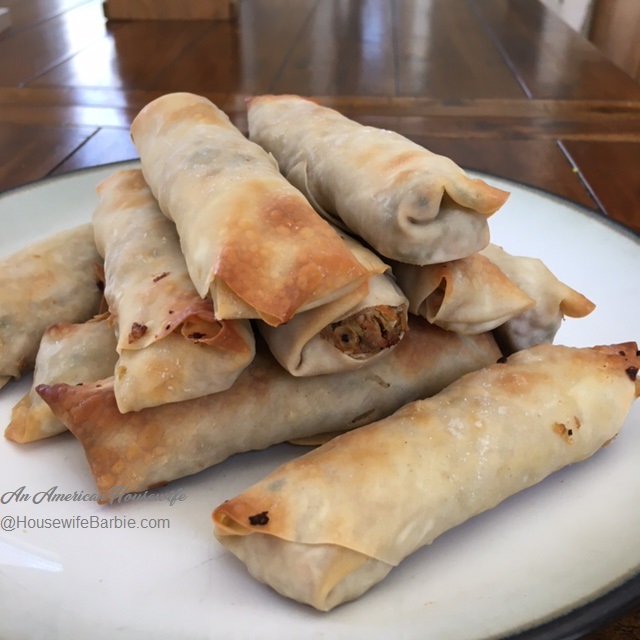
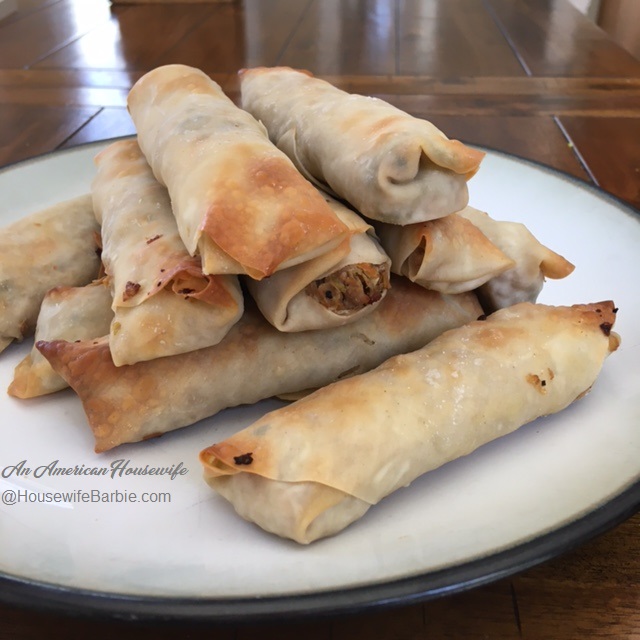
Crispy Baked Egg Rolls - (yes, baked, not fried) and freezing the leftovers for future meals!


I love egg rolls but I don't give into that craving very often because of the useless carbs.  However, I've been craving them off and on for about a year, and last weekend I had a couple cabbages in the fridge to use up.  I grabbed a packet of egg roll wrappers at the store and decided to give into the craving.  

Note - yes you can 'make' various versions of low carb or keto egg rolls.  But I don't actually like them and no, they are not like the real thing when you are absolutely craving the real-crispy-yummy-deal.  

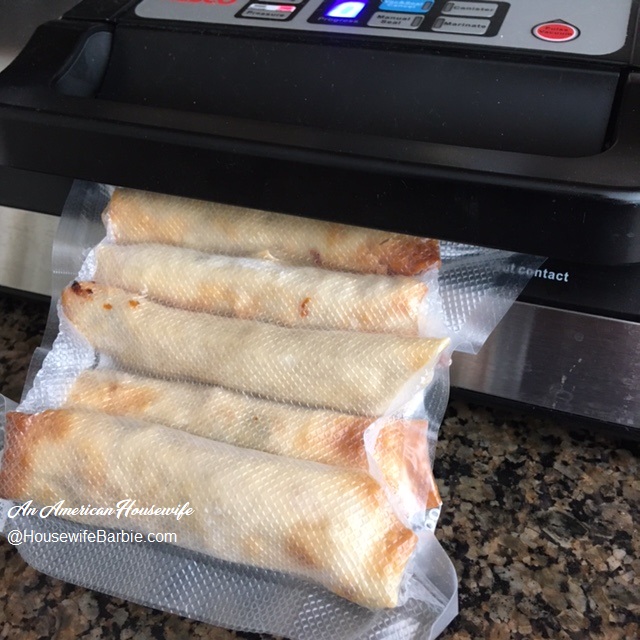
I made a batch, ate the leftover filling separate for 'lunch' (low carb!  No egg roll!) and then had 3 egg rolls later that night for dinner.  After we all had our fill, the leftovers were placed in a container and put into the deep freezer to freeze over night so I could food seal them and freeze them the next day!

YES YOU CAN FREEZE EGG ROLLS.  That seems a silly question to me, but apparently a lot of people don't know, or think you can't.  Basically, just ask yourself if you can buy a food frozen at the store?  Yes?  Then you can freeze it. 


I like shrimp egg rolls and pork egg rolls.  Not so much chicken.  And beef?  Well, that's basically like making any number of Midwestern beef and cabbage meals (like Runza with an egg roll wrapper instead of a pastry crust, or a bajillion of the Iowa/Nebraska/Minnesota casseroles that are basically the egg roll cabbage filling but with ground beef).  If you are from Minnesota you might want to substitute 'casserole' for 'hot dish' when you mentally read that last sentence.

I wanted pork, and I have ground pork in the freezer (remember, I grind our meat myself so I have whatever kind of ground meat or poultry I want).  So pork it was!

Since I was going to have carbs in this meal anyway from the egg roll wrappers, I also decided to use up a can of bean sprouts I had in the pantry.  Egg roll fillings are great that way.  You can play with your food a little bit and add/delete what you want outside of the typical cabbage, green onions, soy sauce and ginger. I didn't have any green onions left (I go through them quickly!) so I used dried chives in its place. 

When you get the mixture made, taste it.  See if you prefer it to be seasoned a little more - or a little less (by adding more cabbage or pork).  Do you want to add more onion? Garlic? Ginger?  Soy Sauce?  Do it.  It's your recipe, your food, your meal.  Play with it to make it taste how you want it to.

BASIC EGG ROLLS - Crispy and Oven Baked

1 1/2 lb. ground pork
4+ c shredded cabbage
1 can bean sprouts, drained and pressed well to get moisture out
a few carrots, shredded
a stalk or two of celery if you wish (I don't but some do)
a small can of water chestnuts, diced up
4 green onions, or scallions, sliced
4 cloves garlic, minced
1 T ginger
salt and pepper
1/2 c soy sauce or liquid aminos
4 T rice vinegar (if you only have white vinegar, only use about 3 T)
2 T brown sugar or brown sugar substitute like Swerve
Oil - about a cup total for everything (you'll probably use canola)
2 pkgs large egg roll wrappers (the ones about 6-7 inch
You can use oil, water or a beaten egg to seal them.  I just use the liquid from the filling and oil that are on my hands/fingers when I'm rolling them.

In a bowl, mix the soy sauce, rice vinegar and brown sugar.  Set aside.  Cook the ground pork in a pan with oil on the stove until it's done and no longer pink.  Add about 1/2 the liquid soy sauce/vinegar mixture.  Cook another minute or two until the liquid starts to evaporate a bit.  Remove to a plate and use the same pan to pour in about 1-2 tablespoons oil to cover, then add the vegetables, ginger and garlic.  

When the cabbage is softening a bit, add the green onions or scallions and the rest of the liquid soy sauce mixture.  Cook and stir until the liquid is evaporating (about 5 minutes on a medium high heat).  Put the mixture into a large bowl with the browned pork and mix.

Lay out a well oiled baking pan (I use avocado oil for everything but most people use canola). 
Lay your egg roll wrapper in front of you in a diamond, with the point at your stomach; place about 1/3 cup filling on the wrapper just below the half way line and an inch above the bottom point.
Use your finger to get the top point and about an inch down each side wet with either liquid that is already on your hands from grabbing the filling, or water, oil or some beaten egg. 
Start with the point nearest your stomach and roll up the filling, stop at the half way to fold each side point inward to contain the filling, then finish rolling upwards.
The moistened top point now seals the roll.
Place on your well oiled baking pan.  Do the rest of them.

If you have filling leftover, you can eat it as it is and call it lunch.  :)

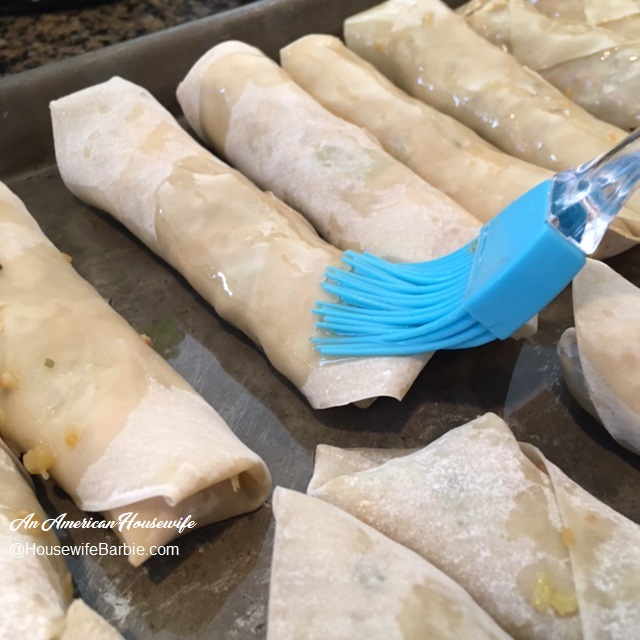
Brush the egg rolls very well, covering them with the oil.   Bake in a preheated 400 degree oven for about 12-15 minutes or until golden brown on the ends and crisp. 

Remove, and although you don't have to, if you aren't going to serve them for at least 10 minutes or more, I like to remove them to a wire cookie rack so the bottoms crisp up and don't get soggy sitting on the oiled pan.  I also do this to let them cool if I'm freezing them.

TO FREEZE:  Let them cool down and place them into the freezer overnight or at least for 4-6 hours to freeze solid.  Then remove them and package them in freezer ziplocks or food seal them - as many to a package as you would need or want for future meals.  To prepare them later, you just bake them again until they are heated through (about 15 minutes). 


The filling... 


Rolling... and placing on a well oiled pan


That first little guy was opening up a bit but the oil I brushed on before baking got him back down


Using lots of avocado oil (purely my choice oil - you can use canola) to get them crispy
  

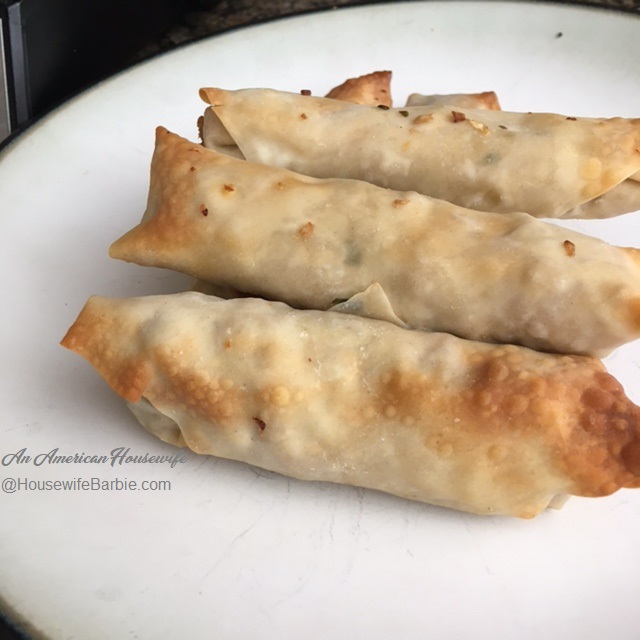
Ready to be dipped in a little Braggs liquid aminos...(or any soy sauce. I use both Braggs liquid aminos and LaChoy soy sauce - whatever I have on hand).  Many prefer a sweet and sour sauce.


Print Friendly and PDF

5/28/21

Homemade Keto Mozzarella Sticks and Breaded, Fried Shrimp

When I was looking through previous posts on my site, I saw this one listed and thought for sure it was posted last year (2020) - perhaps even in the Fall.  When I looked at the date, I couldn't believe it.  I posted this in July of 2019!  That is almost TWO YEARS AGO.

I suppose it's just another 2020 thing... the year that messed up all sense of time.  But either way, I'm posting again because they are THAT good and it deserves to be reposted.


I've posted the recipe for mozzarella sticks before but the reason I'm posting again is two-fold.  The first, because I've mentioned in the past that it's awesome to make a double batch so you can put on in the freezer for later and second, that you could use the breading for other items like chicken or shrimp.  I buy the peeled with tail on style personally.   Just make them the same way you make the mozzarella sticks.  Serve with your favorite sugar free condiments or as low sugar (like 1 gram) as you can find or make yourself.


Low Carb Mozzarella Sticks


2 eggs, beaten
1 c almond flour
scant 1 c powdered Parmesan cheese
optional:  1/2 c wheat resistant starch 75
optional:  1/2 c ground pork rinds
(If you don't use the wheat resistant starch 75 or pork rinds just use more Parmesan or almond flour)
Approximately 20 sticks string cheese
2-3 T Italian Seasoning
1 t garlic salt

Cut the string cheese in half.
Lightly beat the eggs and pour into a small shallow dish.
Mix the dry ingredients in a large Ziploc baggy.
Roll the cheese stick halves in the egg and dip in the dry mix. Press lightly to help it adhere.
Place the breaded cheese sticks on a baking sheet and freeze at least 2 hours or up to 3 months.
When you want to make them, heat about 2 inches of oil in a pan and fry the sticks for 1-2 minutes. Do not crowd the pan.  Remove them with a slotted spoon and drain on paper towels.  You can salt them if you wish for more salt.  Serve hot with low or no sugar marinara sauce or ketchup. 


The shrimp I breaded last month and put into the deep freeze for 'another day'.  Here they are right out of the freezer and waiting to jump into the pan of hot grease.


Made a double batch of mozzarella sticks last month and popped them into the freezer.  Here they are still frozen.


 Mmmm my dinner is waiting for me.... but I remembered to take a picture this time.


Snapped a photo quickly on my cellphone so I could hurry and EAT them while they were hot.  Oh so good.


Print Friendly and PDF

4/19/21

From my Instagram: Cheddar Crisp Crackers - Keto, low carb and one ingredient


I posted this 'recipe' a couple years ago and haven't posted new photos or versions since then, although they've been made quite often!  Here is this weeks versions as I finally grabbed my cellphone while I was making them so I could post new photos.

I also tried to use a sharp cheddar this time that came in 'snack sticks' that are long square shaped logs.  I thought they would be quick and easy and make nice shapes but the Sargento brand I used was not drying out sufficiently.  I cut the little bites into tiny squares but they took a long time to dry out and even then, weren't as nice as the flat slices.  They did puff up and pop a bit but were not as dry and crisp as the flat squares and stayed more chewy.  I had to 'repop' them 2 or 3 times to get them as dry and crunchy as the square crackers.  I don't plan to make those again.


Homemade Cheese Crisp Crackers

Sliced 'hard' cheese of your choice - but 'real' cheese only.  Not 'American' or other soft cheese.

Salt
Spices, herbs - optional


I prefer to buy the sliced cheddar and sliced Swiss from  Sam's Club (in the black tub packaging) as it's the perfect thickness but it's also good quality so it makes a good quality crisp cracker with less prep work on my part. If I use a block cheese, I slice it in my food processor using the slicing blade.  

Lay out as many slices as you wish on a sheet of parchment paper or paper towels.  Use a knife to cut the slices into 1" squares, or use whatever little shape mini cutters you wish.  

Lay out all your little cheese shapes on the parchment paper on the counter for about 2-4 days so they start to get dried out.  I laid them out on my dehydrator trays!  I loved this as it was a compact place to keep them, I could rearrange the trays for optimal air circulation and I could easily flip them over and pat them dry with a paper towel. 

As they sit out, the excess oil can be patted with a paper towel.  After about a day or two (depending on where you live and your humidity level) they will be rather empty or hallow sounding when you tap them on the counter, and will start to be dried out.  (Currently very humid where I live and I left them for 4 days.) When they can be tapped on the counter top and sound 'empty' but are firm enough to tap, pop them onto a parchment sheet on a baking pan, add any sprinkles of salt or flavoring if you wish, and put them into a hot, 400-425 degree oven.  Bake them for about 3-5 minutes.  The oils left in them will cause them to 'pop' and crisp and sometimes even jump around the pan.  (I found 4-5 minutes at 400 or 3 minutes at 425 was about right for my oven.)

Pull them out, let them cool... they should be nice and crisp!  Eat them as you wish. 


 2021 photos:   Cheddar slices, cut into squares


Air dried a few days and ready to pop into the oven.


Video of them sizzle and popping.  It takes about 4-5 minutes at 400 degrees or 3-4 minutes at 425 degrees.


Let them cool completely and they crisp up like a cracker

These are the squares I mentioned in my post above.  They take longer to dry out, and didn't bake up as nice and crisp as the flat squares.  I would have to leave them 2-3 more days to dry out more I think but I'll probably just stick to making square crackers!


Print Friendly and PDF