Pages

6/21/22

Home canned butter: another update taste test at almost 2 years (canned October 2020 and updated again today, June 21, 2022)


In October 2020 I canned butter.  I did a follow-up taste and post in May 2021 and at that time I was thrilled with it.  Absolutely thrilled.  I did another taste test in February of 2022 - at the 18 month mark, it was again... absolutely wonderful.  Just perfect, sweet cream butter.  

Here we are in June 2022... this October will be 2 years.  I haven't used much of the canned butter because it was part of my 2-3 year storage for 'hard' or 'harder' times.  I knew it was coming... and it looks like it's coming up pretty fast.

So... was my home canned butter still holding up?

Oh yes!

Tonight I opened one to use at dinner and it was just as perfect as the day it was canned. 


Once opened, I use a plastic lid on the canning jar.


Some notes from my original posts:

In October 2020 I finally canned butter in a pressure canner. 

I didn't know if it was going to work out or not, but I wanted to try and thanks to good sale at our local membership warehouse, my freezer food storage had some 'extra' butter I could do a trial run with and not be too upset if it didn't turn out.

I have a Presto brand, 23 quart pressure canner. This is an 'after thought' but I need to mention it because it's important... if you haven't bought a pressure canner yet and you have a GLASS TOP ELECTRIC STOVE then you need to be careful of the brand and style you buy!  Many are not recommended for glass top stoves because they will crack them.  I have a glass top stove, which I've always used for water bath canning but I had to be careful when I purchased my pressure canner.   

This also probably goes without saying if you've been doing your research on canning butter - but you never trust water bath canning for items like butter.  And even then - always use brand new, good quality lids so know you have a new seal.My butter was canned in October 2020.   I wanted to wait to do the first taste test and seal test at about 6 months.

I had to work hard to get that seal off.  That was the first good sign.
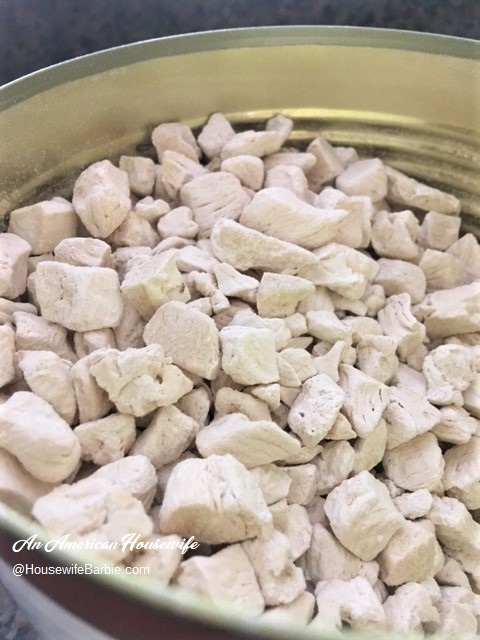
When I opened it, it smelled like... butter.   There wasn't much of a scent at all - which is good.
 
It was just... butter.  That sounds almost too simple but there you go.  It was just... spreadable, creamy, real butter.

It had good, even color.  It had a light, fresh, 'buttery' smell.  

Why did I want to can butter? 

For my readers who are thinking "Why would you can butter!?  Just buy it at the store or put some in the refrigerator or freezer!", this is why I personally wanted to. 

I do keep butter in our freezer for longer term storage.   

Butter is a food item I never want to run out of!  I use a lot of butter in our day to day meals and baking!  

I will always keep butter in the freezer as part of my well stocked kitchen/pantry, but I know first hand about storms and power outages. 

I want the ability to have butter for meals for my family in the event of an emergency of any sort or to take with when we go camping, on vacation, etc. 

Today (this June 2022 posting) I just checked and that same, exact butter at the same, exact membership warehouse is $13.28.  $6 more per pound than it was just a few months ago.  All the more reason to can and store.

Basically, I want to have the option of having and storing butter
without depending on electricity.

  _______________________


Print Friendly and PDF

6/18/22

An American Housewife: Keto Coconut Custard Cream Pie - (including the pie crust - with a secret ingredient making it simple)


I had a few reasons to make this pie this weekend.  The first being to use up rainbow colored coconut sprinkles in my pantry that were taking up space for months and months now (since I don't cook with coconut flakes often).  The second was to do a trial run using the pancake mix as a pie crust. 

I have a Birch Benders Keto pancake mix in the freezer that basically just lives there rent free (also taking up valuable space) because frankly, I don't really care for pancakes made from it.  I won't waste food though so when I try a keto or sugarfree/low carb food I'm not thrilled with, I find other ways to use it up.  

I was going to make the typical almond flour crust for this but saw the pancake mix and decided to try it.  It worked great!  It was seriously perfect as a pie crust and didn't puff up at all during baking, and wasn't in the least bit pancake like.  I don't care for it as a pancake mix, but I'm happy with using it as a pie crust mix now.


Keto Coconut Pie

Pie Crust:
1 cup Birch Benders Keto Pancake Mix
1 egg
1/4 c softened butter

Filling:
4 eggs
2/3 c natural sweetener of choice (like erythritol/monkfruit mixtures)
1/2 t vanilla
1 t coconut extract
1/4 t salt
1 can Thai Coconut Milk (13.5 oz. can)
1 t xanthan or other keto thickener
3/4 c unsweetened coconut flakes


Mix the keto piecrust mix with the single egg and softened butter in a bowl.  Mix well until it is completely mixed and forms a ball of dough.  Spread and press into a pie plate.  Bake at 350 for approximately 12-15 minutes.  Remove and let cool while you make the filling.

Mix the eggs, sweetener, vanilla and coconut extracts and salt in a bowl, beating well.  

In a small saucepan on the stove, whisk about 1/3 cup of the coconut milk with the thickener.  Stir over medium heat until it starts to thicken.  Slowly drizzle this over the egg mixture in your bowl.  Pour it all back into your saucepan and heat, stirring constantly for another 2-3 minutes, then pour into your pie shell.

Top with the coconut flakes.  Bake at 350 for 35 minutes or until the custard center is 'set' and hardly jiggles when you wiggle the pie plate.  Remove and cool completely on a wire rack.  It will set up more as it cools.


I didn't care about how 'pretty' the pie crust was, so I just pressed it in and baked it quickly.


The filling, ready to pour into the crust


The custard filling


My coconut flakes are multi-colored as I used them for sugarfree 'sprinkles' on cookies previously.


A rainbow colored coconut pie


This is before it went into the oven.  It turned golden brown on parts after baking (see top photo).


Print Friendly and PDF

Homemade Keto Buns

Originally posted in October, 2021

    
Another batch, hot and fresh from the oven!  Second day in a row...

I've found I must use Fleischman rapid rise yeast for the right texture and rising.

The recipe is originally from King Arthur and is printed on the back of their keto flour. All the previous times I've used it for breast I've used an active dry yeast, but never the rapid rise because I never keep it on hand and almost never use it.  However, I couple months ago, during a "stock the pantry and freezer" grocery trip, I randomly picked up a strip at the store and put it into the freezer and forgot about it.  

Last night as I prepared to make the dough, I remembered I had seen some yellow envelopes of yeast stuck in the freezer and grabbed one out.  It was the rapid rise yeast and BINGO.  That was all the difference in this bread dough. 

Keto Buns

3 1/2 - 3 2/3 c King Arthur Keto Flour
1 1/2 c water - cool, not as warm as with regular yeast as you don't proof it
1 t white vinegar
1 1/2 t Rapid rise instant yeast
1 t salt
2 T soft butter

Combine all the ingredients into the bowl of your stand mixer.  Use a dough hook to knead the dough for 5 minutes.  Use a little more flour or a little more water drizzled to make sure the dough is mixed well. Cover the dough and let the dough rest for 15 minutes.

Shape the dough into buns and place in a greased pan.  Cover with sprayed or greased plastic wrap and place in a warm place to rise.  (I turn on my oven, place the plastic wrap over and then turn the oven off so it's barely warm; and then place the pan in the barely warm oven with the light on).  Let it rise until it's about 1" above the top of the pan for bread or doubled for buns.  This might take 1 1/2 - 2 hours. 

Bake in a hot oven (350 degrees) for about 30-35 minutes until golden brown.  Remove and let cool a few minutes then turn out onto a rack to cool completely before cutting.  If you cut when they are still hot or warm, the centers will be a different texture; dense and squished and too wet.

King Arthur bread loaf made with this recipe yields 18 slices at 3 carbs each.  I made this into 9 buns so they would 6 carbs each.


Hot keto buns fresh from the oven


Print Friendly and PDF

6/12/22

Dill Pickle Dip for Vegetables or Chips (both options are amazing!)


While I was brainstorming ideas of what to make for a family reunion we were hosting, I came across a 'fad' recipe all over social media.  It was a dill pickle dip (which is actually a rather old recipe dip) but had been re-discovered and is currently (apparently) popular again.  I don't spend much time on social media at all - like - almost none at all - and even I managed to see a post with this one mentioned so I assume it must be popular right now.   

I made a single batch of it last week because I thought it sounded really, really good.  And it was.  We  ate it with cucumber slices at that time; and then I made a triple batch for the reunion this weekend.  It was served at two different meal times with both cold, sliced cucumbers and celery sticks as well as regular potato chips, and wow!  It was really well received both ways.  

I am going to be totally honest here and admit that I ate about 2 cups of it myself with potato chips as my 'lunch' because it was so good, it was all I wanted to eat... and couldn't stop.  YUM.


Dill Pickle Dip
for dipping chips or vegetables

1 - 8 oz. pkg. cream cheese, softened in the microwave
1/2 c sour cream
2 T dill pickle juice from the jar
1 t garlic powder
1 T fresh dill
1 c chopped dill pickles

Mix the cream cheese and sour cream with an electric mixer, stir in the rest of the ingredients and chill at least 2 hours until needed.  Really good if you can chill for at least 4-6 hours or more.


Print Friendly and PDF

Animal Cracker (Circus Cookies) Truffles.... pink and white truffles with sprinkles


I'm a big fan of the actual Mother's brand Circus Animal Cookies (Frosted Animal Crackers) and could eat an entire bag myself, easily.  When I initially decided I wanted to make truffles instead of my typical chocolate chip cookies, I first figured I'd just make the regular almond truffles I know everyone loves, but then thought maybe instead, I should do the Oreo version as well to mix it up a bit.  But... meh

When it comes to quick and easy cookie truffles, a regular 'go to' is the Oreo version but it's just as simple to make them with 'Nilla Wafers, animal crackers or obviously - frosted animal crackers like the original (and best version, in my opinion) Circus Animals.

It's basically just pulverizing the cookie, adding enough frosting or cream cheese to hold it together, forming balls and dipping in candy coating.

And... that's what you do!


Frosted Animal Cracker Truffles

Frosted Animal Crackers (like Mother's Brand Circus Animals)
Cream Cheese or white or pink frosting
Pink candy coating
White candy coating
Muli-colored sprinkles

To each 9 oz. bag of animal cookies you'll want to use about 2 ounces of either frosting or cream cheese.  The amount you make is up to you.  I used 2 bags of Circus Animal Cookies and about 6-ish ounces cream cheese.   

Separate the pink and white cookies from each bag you are using.  Pulverize the white cookies in a food processor and add about 2-3 ounces white frosting or cream cheese and pulse just until it forms a ball.  Repeat with the pink.  If your dough is a bit too sticky to work with, chill in the refrigerator for 30 minutes until you can form balls. The sprinkles in the white tend to turn it a pale 'green' tint.

Using about 1/2 teaspoon, scoop out little bits and roll in tiny balls, both pink and white, placing on parchment paper lined trays.  Freeze for about 20 minutes, and then use a white ball to smash a little and form it around a pink ball and place back on parchment.  Repeat until you've used about half of them and then reverse the process and smoosh a pink one to form around a white center.  If you want skip this step and do single color bites, (faster) just form 3/4" balls out of the white and pink cookie dough as you wish.  

Freeze your balls for about 30 minutes.  Prepare your candy melts by following directions on the packages.  Use a bowl for white and a bowl for pink (separate).  Usually this means microwaving on defrost or 50% power for 1 minute at a time and stirring and mashing between minutes until smooth and melted.

Dip half the balls pink and half white.  Be sure to sprinkle with multi-colored candy sprinkles immediately while they are wet because as they are frozen, they set up very, very quickly.

At the very end you can use the remaining melts to splatter and drizzle across and over the truffles.

You can keep these in the refrigerator for a week easily.  Mine were also out on the counter for 2-3 days, no problem.  


Some are multi color centered (right) and when I ran out of white dough but still had more pink, I did the rest solid pink.  Each are dipped in the opposite color candy coating.


Print Friendly and PDF

6/5/22

Chicken and Avocado Salad or Wrap Filling


This is one of those 'throw together what sounds good' kind of dishes.  I wouldn't even say there is a recipe for it so much as an estimate and taste-test to your own preferences. 

I think what sets this apart right now is the fact that it's easily made with items from food storage and pantry storage if you wish; although obviously a fresh foods meal for the average person on an average any-day. 

This is what freeze dried chicken looks like right from the can before reconstituting with water.  It's 100% just plain chicken.  This diced chicken doesn't have any seasoning to it; but you can get seasoned white chicken and grilled chicken in freeze dried form as well.


Reconstituted, it's just like you boiled a chicken breast and then diced it up yourself.  Just easier.


________________________________

It was lunch time, I was hungry and decided to throw together a quick chicken wrap on a low carb tortilla for lunch.  No amounts used; just common sense, what you have on hand and what sounds good!


CHICKEN AND AVOCADO SALAD OR WRAP FILLING
 
Cooked, diced chicken  (leftovers, rotisserie or cook and dice a chicken breast quickly)
Avocado, cubed
Green Onions
Sour Cream and/or mixed with a bit of mayo
Cilantro
Jalapeno
Tomatoes, diced

*Salsa, mayo, black beans, cheddar cheese, cooked rice, green or black olives all great additives if they sound good to you too!

About a cup of cooked, diced chicken with half an avocado, 1 or 2 sliced green onions, a dollop of sour cream and/or mayo to hold it together.  Some fresh tomato dices tossed in, along with some jalapeno slices or green chilies and finish it off with a bit of salt and pepper and cilantro.

Eat chilled as a salad or spoon into a couple flour tortillas or wraps. 


Print Friendly and PDF