8/17/22

Crunchy, Spicy Jalapeno and Cheese smothered crispy pork chops (using jalapeno potato chips to bread pork chops)


This was a post meant to be posted over a month ago but I've never had the time.  It's similar to a recipe I've posted before and make often, but this time I took it up a notch because I had foods I wanted to 'use up' - as never waste food in our household.  I always find things to make with it or use it in.

In this case, I had leftover spicy jalapeno potato chips from the family reunion weekend we held at our home.  (This brand is much spicer/hotter than Kettle brand, Miss Vickies or any of the regular run-of-the-mill jalapeno flavored potato chips, which I thought would work great as a crispy breading for chicken or pork.) I also had a jar of leftover homemade salsa to use up from the same weekend, which is what I always use to marinate the pork or chicken when I make this dish - so a win either way!


Crunchy and Spicy Jalapeno and Cheese Smothered Pork Chops or Chicken Breasts

Pork Chops or Boneless Chicken Breasts
Salsa to marinate
Jalapeno Potato Chips
Sliced Cheddar Cheese 
oil
salt and pepper
cream cheese
diced or sliced jalapeno peppers
cooked, crumbled bacon
onion powder
garlic powder

AMOUNTS will vary based on how many pieces you are making and how spicy you like your food.  The amounts don't need to be precise.

Marinate your pork/chicken in about 2-3T salsa per piece for at least 3-4 hours and up to 24 hours. Flip it a couple times during the marinating so it's evenly marinated.  *If you are making this last minute and didn't have time to marinate, just coat your chicken/pork with it and leave it on under the breading/coating.

Lay the pork chops or chicken you wish to use in a thin layer of olive oil - both sides - and sprinkle with a bit of salt and pepper if you wish, then press both sides with crushed potato chips.  Lay them on well oiled (and foil lined if you like easy clean up) pan.

Bake in a hot oven (350 or 375 is fine) for about 25-35 minutes until done and golden brown.  The thickness of your pork or chicken determines how long it will take as thick cuts will take longer than a thin cut.  While this is baking, make the cheese topping.

The amounts of the cheeses, bacon and jalapeno are up to you and your tastes.  If you don't like spicy foods or have children eating that are not used to spice, cut back on the jalapenos or just use a small can of diced chili peppers (they are mild).  

We use about 6 ounces cream cheese,  and either a slice of cheddar on the pork/chicken OR mix in 1/3 cup cheddar, 1/4 cup diced jalapenos, 1/4 c cooked, crumbled bacon (I just grabbed some of the Hormel real bacon bits I keep in the freezer at all times).  Add about 1/4 t garlic powder and 1/4 t onion powder. 

Remove the pork chops, topped with a slice of cheddar, dollop of the cream cheese/jalapeno/bacon mixture and back into the oven to bake just until it's all melted and heated through.   We served them in these photos with zucchini.


 PHOTOS OF THE PROCESS followed by LINKS to the CUISINART mini stick blender and food chopper I use, a the bottom of the post.


Leftover chips from our family reunion weekend I wanted to use up

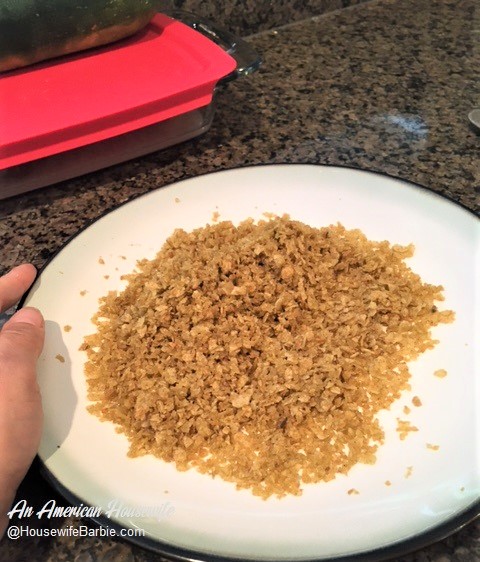
Chopped quickly in a small processor


I used my mini Cuisinart processor to crush the chips but you can use a full sized food processor or even a bag and a rolling pin to crush them if you wish. 


Ready to use as a crispy breading


Leftover fresh, homemade salsa smothered the pork chops before breading

I left the salsa on nice and thick since they had had a short marinade time

Ready for the oven on well oiled foil


Baked until done and now ready for the cheesy topping

Mixing cream cheese, jalapenos, bacon crumbles with a bit of garlic and onion powders

I had sliced cheese to use up this way but normally just mix shredded cheddar in.

Hot and melted from the oven - ready to serve with green beans, zucchini or any vegetable


Print Friendly and PDF

8/3/22

Homemade Butter - got extra whipping cream? Make butter using just a mason jar


Homemade butter!  I make this once in a while but with the cost of whipping cream being what it is, I'm not really saving money to make it myself so I just buy it.  However, sometimes I have extra whipping cream leftover from other recipes and making homemade butter is one of the ways I use it up.  It will take about 10 minutes or so and use nothing more than your leftover whipping cream (heavy cream) and a glass jar with a lid.

 
Homemade Butter
(It's actually just home-shaken butter....)

Heavy Whipping Cream - any amount but it's best if you have at least 3/4 of a cup

Place the cream in a glass jar with a tight fitting lid.
Start to shake it.
Continue to shake it.
Keep shaking it.
It will turn thick, then will blend together to form whipped cream.
Keep shaking it.
Just when you are thinking you are bored and 'done' and there are other things you could be doing right now....
You'll hear it separate!  You'll hear the sloshing sound of liquid and a little thump of solid butter!
Open the container and you now have buttermilk and butter.
Remove the solid butter. Use the buttermilk for any other use (ranch dressing or bread!) or just drink it if you like buttermilk.
Add about 1/2 cup ice cold water to a bowl of butter and knead the butter a bit, working out the excess liquid - a cloudy, watery liquid.
If you want to add salt at this time go ahead and add a little dash to taste (amount depends on how much butter you made.)  Pour off the excess liquid and use your homemade butter!

That's it!  You made butter.

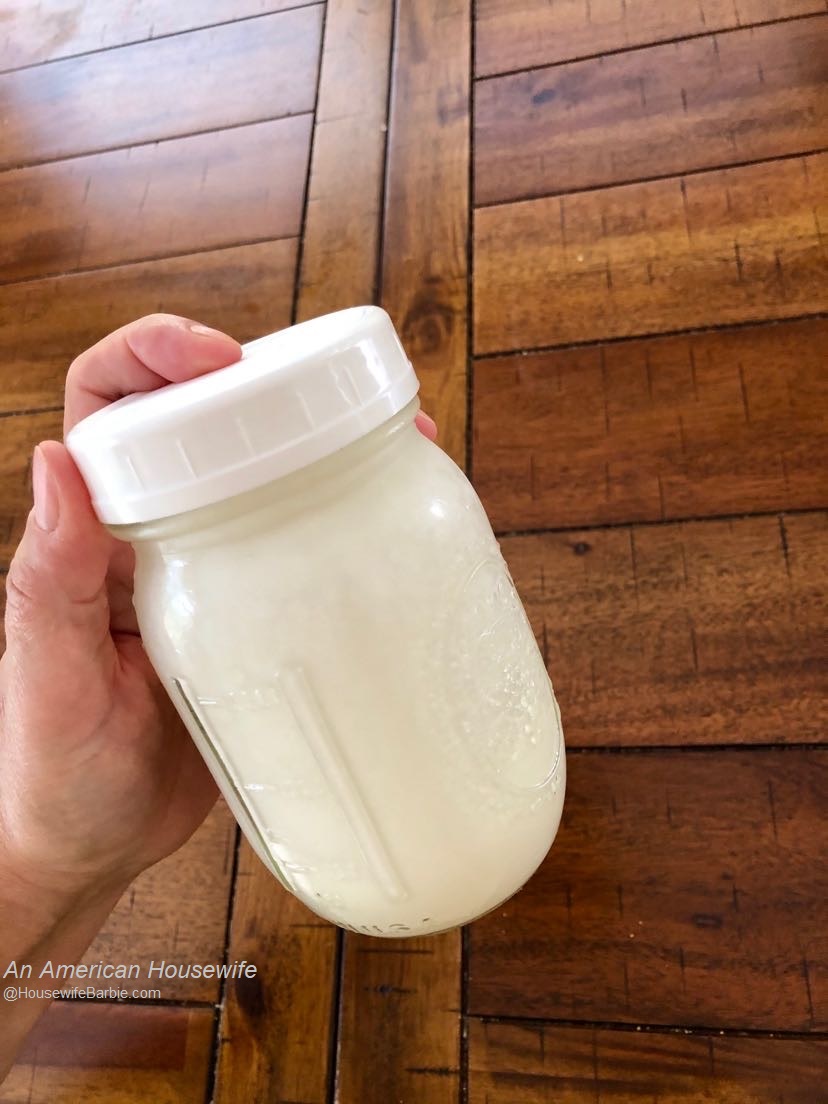
whipping cream in a jar


That awesome sloshing sound you've been waiting for that means your butter has separated from the liquid and you have made butter!


Open the jar and see your butter!


Poured out into a bowl.  Drain it and add your ice water to knead it and work it a bit to get out excess buttermilk liquid.
  Butter!


Print Friendly and PDF

7/30/22

By request - reposting a couple 'old' recipes: Slow Cooked Roast Beef in the Crock Pot, and a Homemade Creamy Chicken and Mushroom Soup

By request - I'm putting a link front and center for an "OLD" recipe - posted in 2016 that a reader wanted me to repost so she could find it easier.  :)

Slow Cooked Roast that Makes it's Own Gravy    - this is the one with the Lipton Soup Mix envelope (or as I do - making my own with beef bouillon, minced onions, celery seed....)


Print Friendly and PDF

7/14/22

My all time, classic, never fails bread dough recipe


I mentioned on Instagram, the homemade rolls I made last night and sent with a 'meal package' to a family member.  It's the recipe I've posted many, many times on HousewifeBarbie.com but am putting it here again since I just mentioned it again on my story.

It's a classic, basic recipe that you can play with a bit and it will turn out for you.  I replace some of the white flour with wheat, I add some chives, some garlic or Italian Seasoning.  Sometimes I use the basic recipe as a base for cinnamon rolls or pizza dough (although I like my actual pizza dough recipe better, I have used this one many times as it's just so easy to whip up).

You can make this in your bread machine, completely knead by hand or (as I often do) whip it up in my stand mixer with a bread dough hook.

Brushed with butter after they come out of the oven?  Soft, buttery and oh so good.
 

This particular cut and paste is from my posting in 2009.


Classic White Bread Dough 

  • 12 oz. water 
  • 1 1/2 t salt 
  • 2 T butter 
  • 4 c bread flour or all purpose flour 
  • 2-3 T dry milk (I pour it in but never measure) 
  • 2 T sugar 
  • 1 3/4 t dry yeast (although I don't always measure this either as mine comes from a large jar). One package is 2 1/4 t though so leave about a teaspoon and it's about right. 

Machine:  Place into your bread machine in order listed (water, salt butter, flour, milk, sugar, yeast) unless of course your machine has a different order needed to achieve results (some make you do the dry first). 

I put them in this order in my KitchenAid mixer pulse it to mix for the first minute or so and then left it on the lowest level to knead for about 10 minutes.  Leave it to raise, punch it down, make into bread, rolls, buns, whatever; let it rise again and bake.

For bread it makes 2 loaves - bake about 25-30 minutes at 350.   Buns are usually about 25-27 minutes.


Print Friendly and PDF

7/3/22

Cherry Dessert Trifle Recipe: Grandma's Vintage Cherry Dessert Recipe Meets White Cake and Becomes a Trifle


I love to look 'back' and see what I was doing on certain days in years past.  I did this when I was younger and kept diaries, I've done this with old calendars I've tucked into an office drawer or storage box and I do it with recipes as well.

It is a holiday weekend here in the States but I'm not out celebrating... I'm home.   I'm waiting on a refrigerator delivery.  If you follow me on Instagram, then you already know that story.  They didn't show up yesterday (well, they paused for 10 seconds in the street in front of the house and drove off, claiming no one was home so they didn't have to deliver).   After some phone calls they are supposed to deliver (again) today.  

Sitting here this morning, enjoying morning coffee, I briefly wondered what I was doing 10 years ago and what I was making.  I clicked back to 2012 and saw a yummy dessert I had made.  I blended my Grandma's Cherry Dessert recipe with an 'extra' white cake I had made and came up with this dessert. 

Cherry Dessert Trifle


______________________________________________


Original Post:  July, 2012

Just because I used a from-scratch white cake doesn't mean you have to.  Simple use a white cake of your choice.  You can also play with the filling.  Blueberry, cherry, strawberry...  whatever you wish.  I particularly like cherry pie filling with this and although I do sometimes make my own, I had a can of cherry pie filling in our camping supplies and it was the perfect 'quick' filling I needed.

Cherry Dessert Trifle

1 white cake of your choice
1 can cherry pie filling
1/2 cup (approximate) graham cracker crumbs
2 T melted butter
2 cups whipped cream (you could use spray whipped cream in a can)
1 c heavy whipping cream (or use 2 cups Cool Whip)
2 T sugar
1 package cream cheese

Cut the cake into cubes.  This is sometimes easier if it's frozen first.  But they don't have to be 'pretty' as no one will see them. Place 1 cup of the whipped cream in the bottom of a glass dish.  Top with the can of cherry pie filling and push down a bit into the crevices of the bowl between the cake squares.  Smooth evenly on top.  Mash the graham crumbs with the melted butter and place over the cherry layer.  Mix the whipping cream with the sugar and cream cheese.  Beat smooth.  Spread this over the graham layer.  Top with the last cup of whipped cream.  Add a cherry or strawberry or blueberry for garnish to compliment your filling.  Chill at least 2 hours if you can before serving but up to 6-8 hours.


I think this tastes best with cherry filling

I left off the melted butter this time but it was too powdery. Add the butter to the graham crumbs.

Mixing the cream, sugar and the cream cheese.  I love this layer.


Print Friendly and PDF