This post isn't actually here for anyone but me... but I keep the blog site open to the public so others can find recipes and hints too.
The reason for this post is to take some of my keto or low carb cake recipes from the past 10 years and put them 'front and center' here because I need to make a birthday cake this weekend and I'm not sure yet which kind I want to make. It just saves me a few extra minutes to put them here and decide at the time I start the cake.
All of these are from posts over the past 10 years.
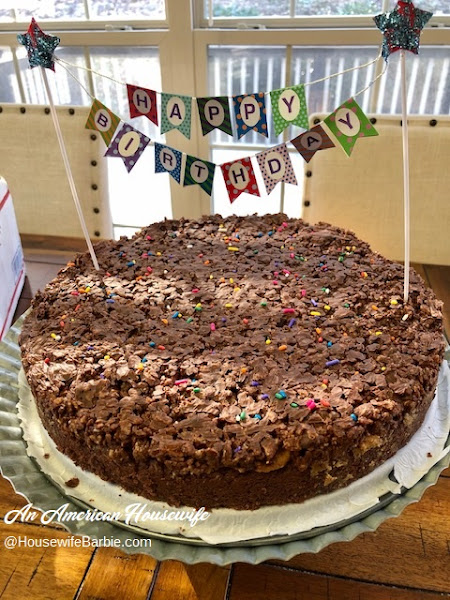
This photo is a cake I made in September of 2012 for my parents
anniversary as they were visiting us during that time, and I wanted to
celebrate, but our family was in the middle of a no sugar, low carb way
of eating. I first made it in April 2012 for my own birthday (was
also doing no sugar at the time) and again in September for them.
FIRST RECIPE: Sugar Free, Low Carb White Birthday Cake
3 c good quality, blanched, fine grained almond flour
1/3 c whey protein powder - vanilla or unflavored (I only use IsoPure - not any other brand)
2 t baking powder
1/2 t baking soda
1/2 t salt
1 1/3 sticks real butter
3/4 c mixture of granulated natural sweeteners of your choice (Lakanto, Xylitol, SoNourished, etc)
1/2 t liquid sweetener drops like Sucrarose, etc. (optional but it helps to use 2-3 sweeteners)
3 eggs
1 T cake batter flavoring
1 1/2 t vanilla
1/2 c unsweetened almond milk
Grease or line a 9" pan with parchment. Preheat the oven to 350.
Put the dry ingredients into a large bowl; almond flour, whey protein
powder, baking powder, baking soda, salt.
Mix
butter and sweeteners until fluffy, add eggs. Beat in cake batter flavoring and vanilla. Add the dry ingredients
alternating with the almond milk.
Bake in the oven for about 35 minutes. At this point your cake might
be done, but I find almond flour baked goods need a little longer and
the cake may start to be too brown on top. If your cake is still a bit
too wet in the center or jiggles, yet the top is getting browned,
cover with foil and bake about 5 minutes more; turn off the oven and
let it for about 5-10 minutes more, checking to see if the center of
your cake is set and done. My oven bakes this cake in a good quality 9" pan for 35 minutes at 350, cover with foil, turn off
the oven and leave for another 10-12 minutes and it's perfectly done. Cool completely or freeze before frosting.
SECOND RECIPE: White Cake - Low Carb and Sugar Free
1/2 c butter, soft
8 eggs
1 c white sugar-like sweetener of your choice
2 T Xylitol
14 drops liquid sweetener
(I used Superose Liquid Sweetener  which is no longer available, but you can use Stevia, EZ-sweet, etc.)
1/2 t salt
4 t vanilla extract
2 T Torani Sugar Free Vanilla flavor
1/2 c sour cream
1/3 c (not quite heaping) Carbquick
1/3 coconut flour
2/3 c Isopure Vanilla Whey Protein Powder (0 carb, 0 sugar)
1 t baking powder
Whisk or mix eggs and vanilla flavorings in a bowl until yellow and
frothy. In another bowl place the Carbquick, coconut flour, protein
powder and baking powder. In a large mixing bowl beat the butter and
the sweeteners; Splenda, Xylitol and liquid sweetener. Beat until
fluffy. Add the eggs by pouring them in as the mixer is running. Add
half the dry ingredients, half the sour cream, then the rest of the dry
and the rest of the sour cream.
Place in 2 round 8" or 9" pan sprayed or oiled and dusted with either a
light dusting of Carbquick or almond meal, etc. Bake at 350F for
approximately 25-35 minutes until the center is set. Let cool about 10
minutes so you can remove it easily from the pan. Invert it onto a
platter and let cool completely before frosting and serving.
Cinnamon Coffee Cake It's one that always
turns out and everyone loves it - even those who have no idea it's sugar
free, gluten free and low carb.
Frosting: Do a taste test on this one.... add more or less sweetener or vanilla if you wish
Approximately: 1 stick butter
2 c Swerve Confectioner's Style sweetener (Swerve Confection Style)
about 1 teaspoon liquid sweetener drops
1/4 - 1/2 c Lakanto
or other sweetener to bring out the best 'sugar like' flavor. (If you
use something like SoNourished Sweetener, I find I only need about 1
cup! So TASTE TEST because the sweeteners you use make a huge
difference in the amount needed to flavor your frosting).
1/4 t xanthan gum (optional, but it makes a nice thickener/texture)
1/2 - 3/4 c heavy whipping cream
1 T vanilla extract
1/2 - 1 t LorAnn liquid emulsion "princess" cake flavoring.
In an electric mixing bowl, beat the butter, then add the rest. Add
more cream to make it a bit thinner, or more sweetener to make it
thicker. Taste test to get the right amount of sweetness and flavorings
that you like.
Low Carb, Sugar Free, Chocolate Cake
2 1/4 c good quality almond flour
3/4 c cocoa powder
1/2 c sweetener (erythritol, etc.) + little more if you like it sweeter
1/3 c whey protein powder (I use Isopure - zero carb & zero sugar)
1 t instant coffee
2 t baking powder
1 t baking soda
1 t xanthan gum
1/2 t salt
3/4 c sour cream
1/2 c soft butter (1 stick)
5 eggs
15 drops liquid or other sweetener (mixing sweeteners gives it better flavor than a single sweetener)
2 t vanilla
2/3 c almond milk or half and half, etc.
Place all the dry ingredients from the almond flour to the salt, in a
large bowl and mix well with a wood spoon, whisk, etc. Set aside. In
your mixing bowl, beat the butter and sour cream. Beat in the eggs,
liquid sweetener and vanilla. Add half the dry almond flour mixture,
beat well. Add the almond milk, beat. Add the last of the almond
flour mixture. Bake in your preferred pan; a greased and parchment
lined 9X13, a greased bundt pan, 2 greased and parchment lined round 8
or 9 inch pans or make into cupcakes. Bake at 325 degrees. I baked
in two- 9 inch round pans about 32 minutes. Test and bake until the
center is done. Let cool about 10 minutes and remove from pans to cool
completely.
Low Carb Sugar Free Red Velvet Cake
1 c butter
1 1/2 c sweetener
2 eggs
2 1/2 c almond flour
1/3 c whey protein powder
1/4 c coconut flour
1 t xanthan gum
1 t baking soda
1 t baking powder
2 t cocoa
1 t salt
1 bottle - 1 oz. red food color
1 T vinegar
2 t vanilla
1 c almond milk with part cream and 1 1/2 t vinegar (or lemon juice) to sour
Mix the almond milk with the vanilla and 1 1/2 t vinegar in a small cup
and let set. You could buttermilk in place of the vinegar and almond
milk.
Cream the butter and sweeteners in a mixing bowl til fluffy. Add the
eggs. If your eggs are small use 3. In a separate bowl mix all the dry
ingredients. Add the dry ingredients alternately with the milk
mixture. Begin and end with the dry. When mixed well, pour into your
pans of choice. I use 2 round cake pans sprayed and lined with a piece
of parchment. Bake at 350 approximately 25-35 minutes depending on your
oven. When the center is set and the cake is done, remove and cool
10-15 minutes in the pan before removing from pan to cool completely.
Decorate as you wish - the traditional Red Velvet Cake Frosting DOES NOT
USE CREAM CHEESE. It's a flour and milk based frosting you then cool
and add the butter, sweetener and vanilla.
Sugar Free Butter Cream Vanilla Frosting
3/4 c granular Xylitol
1/4 c water
3 large egg whites (separate and use the yolks in another recipe)
2 1/2 sticks real butter
2 T vanilla extract or use half vanilla sf syrup and half extract
*If you taste test it and find your personal tastes would like it sweeter, use 5-10 drops liquid sweetener
In a saucepan, place the water and Xylitol. Heat over medium high until
it comes to 240 degrees. With normal sugar this would be soft ball
stage but because Xylitol and Splenda do not thicken, you cannot test
this by traditional soft ball stage.
As you are heating the sugar substitute and water, mix the egg whites in
a large mixing bowl. Beat the egg whites until soft peaks form. With
the mixer running, pour the hot Xylitol mixture down the side of the
bowl in a thin stream, mixing into the egg whites. Beat approximately
7-10 minutes on high until the egg whites resemble a thick and glossy
meringue.
Start to add the butter in chunks, about a tablespoon at a time. Keep
the mixer running and whip the mixture about 7- 10 minutes more. If the
mixture breaks up when you first add the butter and it looks like
cottage cheese, no worries. Just keep whipping until it's smooth
again. Once the frosting is smooth, add your vanilla and whip again for
a few minutes. If it's a really warm or humid day it might get too
warm to work with. Just refrigerate it for about 7 minutes, whip
again. The cooler temperatures will cause it to harden up again.
Drizzle the hot syrup down the side of the mixing bowl into the egg whites
I had to make 2 batches to fill and cover a 3 layer cake