11/7/22

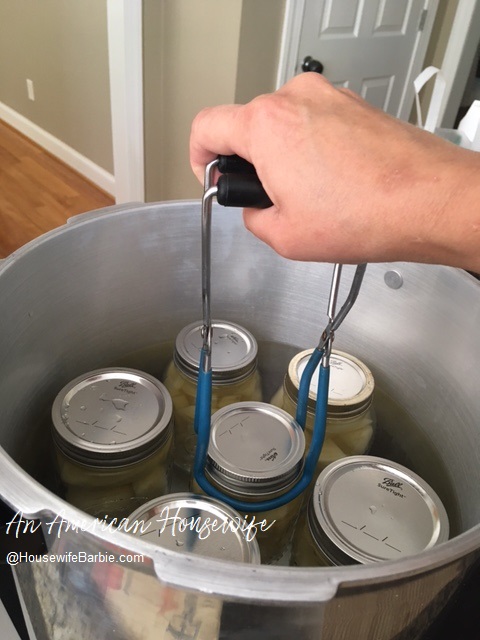
Open can testing of dry-canned potatoes with butter over a year later... and canning more potatoes in these times of food shortages and empty shelves at the grocery

First - just some regular canning of potatoes...  (water and salt)
 
A couple weeks ago I canned more potatoes.  Although I would love to have potatoes at every meal (they are one of my favorite foods and perhaps one of the most versatile foods you can use) we are low-carb and sugarfree most of the time, by choice, so starchy vegetables like potatoes aren't enjoyed as much as I would like.


UPDATE TO DRY-CANNED POTATOES:    A few years ago I opted to try dry-canning potatoes instead of the typical way of covering them with water.  Just for fun. I ended up doing some plain and others with butter.  I LOVED them.  (I also dry canned apples.)  I researched it first, and did a couple tests to be sure I felt comfortable with the process, but then I jumped in and did a few batches and ended up adding 'dry canning' them to my regular canning.
 
Now, I can potatoes in all sorts of ways because there are so many ways to use them.  Small, diced, chunks, larger chunks, french fry shape, thin wedges... and some traditional water covered, others dry.  Some with butter, some without.  I grab a certain shape or style depending on what I need them for.

I went ahead and saved one of my dry canned potatoes with butter that had been put up in September of 2021 to open at least a year later.  That was this Fall.  A couple weeks ago I grabbed one to use in dinner that night but made a point to take photos first and do a quick review for An American Housewife.   


The seal was incredibly tight and took a bit of work to get off (a good sign).
Inside the potatoes looked fine and smelled... like potatoes.

 
I dumped them out into a bowl and took a good look... and smell.
They were cold, and straight out of the glass canning jar so the butter was still a bit congealed...

 
Here is a close up.
They tasted good and had a great texture and didn't seem any different from the potatoes tested at the earlier marks of a few months.  We were over a year later and the butter canned dry potatoes were perfect.  They went into the crockpot with dinner that night so I don't have a picture of them after they were heated where the butter is melted and they just look like... well, potatoes.


If you have a pressure-canner (potatoes can't be canned safely by the water bath method) potatoes are one of the cheapest and easiest to put up... and in the event of hard times, they are a blessing!


Print Friendly and PDF

11/5/22

Roast Beef Sandwiches - Slider Style

A pan of sandwiches and green beans going into the warm oven to save for my husbands dinner later


Last month (or was it earlier?) I had a photo on my Instagram of roast beef sandwiches we had that night for dinner.  My husband eats later at night after he works out and showers, so this photo above was the sandwiches leftover from the meal, along with the green beans, which I placed in one pan and popped back into the still warm oven to keep for him.  

I thought I added the recipe to the site but when I went back to check, I didn't see it.  Not surprising, I have found I'm so busy lately I rarely have time to post anymore.  I grabbed my cellphone and took a few photos the next time I made them, hoping to get them posted.  I never did.  But tonight?  I'm racing with the clock to type this quickly, and get it up as ten other things are going on around me, dinner is ready and Mr. Husband is literally expected to drive into the driveway at any second!

But it needs to be here to make it super easy for me and my kids to find to make these.
 
Roast Beef Sandwiches

2 T olive oil
2-3 t minced garlic
1/4 t red pepper flakes
1/2 lb. sliced roast beef (mine comes from Sam's Club in the meat/deli area)
1/2 c beef broth
1 t Worcestershire sauce or, a little balsamic vinegar or red wine
2 t liquid aminos or soy sauce
2 t dried parsley
2 t dried basil
1/4 t salt and dash fresh cracked black pepper
1/2 t oregano
provolone or swiss cheese slices
buns

In a skillet, heat the oil.  Add the garlic and dried red pepper flakes.  Heat for 1 minute then add the roast beef slices, broth, Worcestershire, liquid aminos, parsley, basil, salt and pepper and oregano.  Heat through.  Lay bottom buns in a pan, top with the meat.  Drizzle the sauce over, top with cheese slices and the top bun.  Drizzle the top with a little more sauce.  Heat in an oven until the cheese melts.


These are not photos from the same night as the very top photo - these were another night we had them!


A little more on top... optional


I sometimes put a wire cookie cooling rack on the bottom of the pan and the sandwiches on top, which keeps the sauce completely off the bottom bun if you don't want any liquid on the bottom.  Other times I don't bother.  If I don't use too much sauce, it doesn't really affect the bottom bun.  If you use a LOT of sauce and the bottoms get a bit soggy, just flip them over and back into the oven to crisp up the bottoms.  Flip again and serve.


Print Friendly and PDF

10/23/22

Copycat Recipe for Long John's Silver Style Fish Fillet (been making this one almost exclusively since 2008 since it's my favorite)


If you follow me on Instagram you know I had a hard craving for Long John's Silver style fish and finally gave into it and made it this weekend. 

This is something I would happily make in a regular rotation because I love it so much but I don't for many reasons.  1)  We don't usually eat wheat flour (we are primarily low carb) 2) Frying foods in grease really smells up the house for a couple days and 3) Mr. Husband isn't a fan of fish except in fish tacos or shellfish like crab.

Substitutions:  I had taken tilapia out of the deep freezer to thaw, not quite sure what I'd be making with it.  But the thought of Long John's Silver fish was taking over my brain so I decided on the spur-of-the-moment to make it using the tilapia.  I also don't have sparkling water or club soda on hand right now, but I did have a 12 oz. can of lemon flavored hard seltzer left from our beach vacation in July so I whipped up a quick batter.  I didn't use self-rising flour this time, so I just used regular flour with the addition of some baking soda and baking powder.  I added paprika for a bit of color and used the batter for chunks of chicken for my husband.

I've been making this LJS copy-cat since 2008 in one way or another - always playing with the ingredients a little based on what I have on hand and what I feel like.  I've posted these in 2008 and 2018 which I'll include below as well.  


Batter for Fried Fish, Chicken, Shrimp and more!

1 c self rising flour
5 t prepared mustard
2 t sugar
2 t salt
1 egg
1 c water
1/2 t onion powder
2 lbs. fresh or frozen/thawed Cod filets or chicken strips, etc.

Mix everything but the fish/chicken. Heat a container of oil (3-4 cups) to about 350-400 degree's. Dip each filet into the batter and quickly place in the hot oil. Cook until golden brown, about 5 minutes. Drain on paper towels.


Seafood and Chicken Strip Batter
You can double this too if you want/need to


1 cup flour
1 1/2 t baking powder
2 t salt
1/2 t onion powder
4 t yellow mustard
1 egg
1 c sparkling water
Seafood or chicken, etc. you want to batter and fry

Mix the dry ingredients in a bowl.  Beat the egg in a separate bowl but only until just blended; don't over beat.  Pour the carbonated water into the egg, stir briefly and add to the dry ingredients.  Mix or whisk quickly just till blended; again, don't over beat.

Dip pieces of seafood of your choice or pieces of chicken into the batter and fry in hot oil until golden brown - be sure to turn a couple times so they cook evenly and don't crowd the pan.  Drain on paper towels.  Serve hot.


2022
 
Long John Silver's Style Fish

Approximately 2 lb. cod or other fish, or chicken chunks
2 c flour
1/4 c corn starch
2 t sugar
3 t salt
1/2 t baking soda
1/2 t baking powder
4 t mustard
1 t onion powder
1 t paprika
1/4 t fresh ground black pepper
2 eggs
12-16 oz. plain sparkling water, club soda, lemon flavored hard seltzer, etc.

Cut fish into wedges 7"X2" largest or whatever size you wish.  Blend the dry ingredients and add the liquid and eggs just before frying.  Heat oil to about 375 degrees (water sizzles when droplets are dropped).  Dip each fillet into the batter, coating generously and drop into the hot oil.  Fry each piece until golden brown (about 4-5 minutes).  Drain on paper towels or wire rack over paper towels.

*I packaged leftovers in food sealer bags, 2 to a bag, and sealed them to put in the deep freezer.  I was craving them again while typing this post so I literally left this browser open, took out a package and microwaved them to reheat and ate them sitting here at my desk while I finished the post!  The optimal way to reheat would be to crisp them in the oven by baking, or even in a skillet to crisp up again but believe me, I did not care.  They were delicious anyway and yes, I ate 2 more pieces just before typing this!


2018 I did a variety of seafood bites


 _____________________________________________


Print Friendly and PDF

10/3/22

Creamy Chicken with Spinach and Bacon - no cream cheese in this sauce


Typically I make this dish in various ways based on what I decide to throw in, but usually it includes cream cheese.  This time around I really did not want cream cheese in a sauce; I wasn't in the mood for it, as it's just so, so rich and I didn't want that rich of a sauce.   I left it out and we did not miss it a bit.  It was so, so very good.  Mr. Husband took all the leftovers to work with him the next day for lunch and told me three or four different times how much he really loved this dish.   I found that so funny because it's basically the same type dish I typically make; just sans cream cheese this time.
 
Creamy Chicken with Spinach and Bacon

Boneless, skinless chicken thighs (6-8)
olive oil
butter
6 t minced garlic
1 small onion
1/3 c crumbled, cooked bacon
1 1/2 c half and half or heavy cream
2 handfuls fresh spinach or a handful sized helping of frozen, chopped
1/2 - 3/4 c parmesan cheese
dried red chili pepper flakes
Italian seasoning
salt and pepper

In an instant pot cooker, heat to 'saute' setting, add the oil.  Salt and pepper the the chicken and sear it in the oil.  Add about 3/4 c water to the cooker, seal and cook about 8 minutes until done.  Release steam.  If you opt to cook them in a pan on the stove, heat the oil, season them and sear them in the pan.  Once they are seared, add about 1/2 cup water and continue to cook until done.  Remove them and the broth from the pan and set aside.

In the skillet place the butter, cook the onion for 2-3 minutes until starting to soften, then add the garlic and cook 1 minute more.  Pour in the broth from the instant pot or the pan you cooked the chicken in.  Let this simmer to reduce a bit while you crisp the bacon pieces.  I use 'real bacon pieces' from the store and microwave them to crisp them but you can also dice or cook bacon slices and crumble them.  Add the bacon to the broth/onion/garlic mixture.

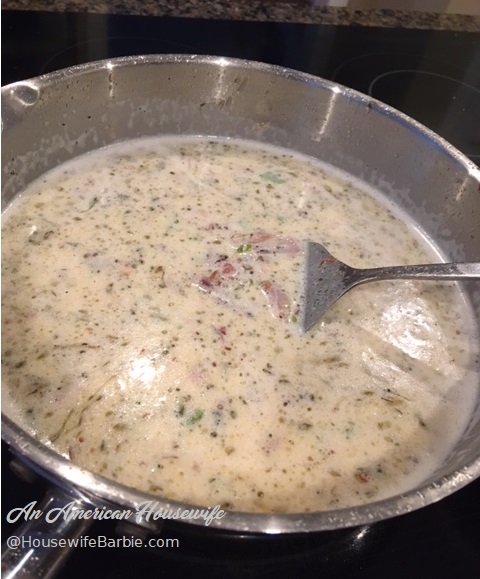
Add the half and half or cream and the seasonings to taste.  Add the spinach leaves, stirring gently to wilt them and mix in.  Add the parmesan cheese and red pepper flakes; let it simmer to reduce and thicken.

Spoon as much of the sauce over the chicken in your serving dish as you would like.  You can serve the extra sauce with the meal, as a topping for a side dish like mashed cauliflower or potatoes, or refrigerate it in an air tight container to use as a quick meal in a few days simply by cooking up some boneless chicken again and topping it.  


I made this dish because we had been out of town and had just returned home; I hadn't gone to the grocery store for fresh groceries yet and needed to use what we had on hand.  Thus, I used a red onion and some green onion instead of a yellow onion.


Adding the cream or half and half, and the rest of the ingredients


The spinach and parmesan

Stirring and letting simmer to thicken a bit


Print Friendly and PDF

9/25/22

Chicken Bacon Ranch Slider Sandwiches - (Low-Carb Keto option too)


Last night I wasn't sure what was going to be for dinner.  It was getting late and I needed to come up with a plan so I walked to the deep freezer and chose a package of chicken breasts.  I cooked them in the microwave in water with a tablespoon of chicken bouillon soup base and from there decided to make a 'slider' sandwich but a chicken, bacon ranch version.

We used keto buns but obviously any hamburger style bun will do. 
I didn't measure anything, and honestly, that's just the kind of recipe this is - you can play with all the amounts.  I'll try to do a guesstimate on some of the items to give you an idea but honestly, it's mostly just common sense mixed with a little whatever you like best.

Chicken Bacon Ranch Sliders

Cooked, diced chicken breasts - 2 or 3 depending on the size of yours
1 fresh tomato
1/2 c mayonnaise
1/2 c ranch dressing of choice
Cooked, crumbled bacon
Cheddar Cheese, shredded
Hamburger Buns (I used Keto Culture brand since we are usually doing low-carb in our house)
Butter

To the cubed chicken breasts add the 1/2 c mayonnaise, fresh tomato diced, about 1/3 c crumbled cooked bacon pieces and about 2/3 c shredded cheddar.  Mix. If it's too dry add a little more mayo.  If you like more bacon or cheese - go ahead.  Less bacon or cheese?  Do that if you wish. 

Use some butter to heavily butter a baking pan.  Place the bottom bun in the buttered pan.  Top with scoops of the chicken mixture.  Heavily drizzle ranch dressing over the sandwiches and top with the bun.  Brush the tops with some of the butter, melted or even an egg wash if you wish.  Pop it into a 350 degree oven and bake about 15-17 minutes until heated through.

Extra chicken filling mixture is a perfect casserole, just tuck in along side the sandwiches to bake or just make more sandwiches with it.    The size of the pan you use depends on how many sliders you are making.  You can see we made 5 and heated the leftover chicken mixture separately as a casserole.


I always have crumbled real bacon on hand in the freezer, which I like to put on a paper plate and heat in the microwave to crisp up. 


Mixing up the filling; use more or less bacon and cheese and tomato based on what you prefer.


Scooping the filling onto the buns.


Top each slider with a dose of your favorite ranch dressing then put the top bun on, brush with melted butter and bake until heated through - about 15-17 minutes.


Print Friendly and PDF